LED strip for the kitchen: which one to choose and how to install?
Well-organized light is the basis for a comfortable stay in a room. It is especially important to adhere to this condition in the kitchen, where good visibility is essential for cooking. One of the most productive lighting methods for the kitchen is considered to be an LED-based light source - an LED strip.
Advantages and disadvantages
This type of lighting is quite popular and it is no coincidence. LED fixtures are an excellent decoration element, they carry out a specific task and are endowed with a number of positive qualities.
- Long service life. Depending on the manufacturer and technical parameters, the device can operate from 25,000 to 50,000 hours. The body is made of aluminum and plastic, which makes it resistant to damage and shock resistance.
- Low power consumption... Using LED strip will not damage your wallet. LED-based lighting is the most economical and in less than 12 months it justifies all the money spent on it.
- The operation of such lighting is completely safe due to low currents. (with the exception of the 220 V LED strip, this has its own peculiarities).
- Wide range of colors. Manufacturers offer a wide variety of colors. You can choose the best option for interior decoration: cold and warm light, monochrome and multi-colored products.
- Intense luminous flux... This effect allows you to apply backlighting as an alternative to main lighting.
- Environmental Safety and the lack of special conditions for disposal.
- Comfortable lighting, which instantly turns on, gives a measured light without flicker. Ordinary light bulbs create blinking inconspicuous to the eye, which overstrains the eyes.
The main disadvantage of LED strips can be considered a rather high price and limited length (mainly 5 meters - this circumstance is associated with the technical provision of the same luminescence power of the LED strip elements).
Varieties
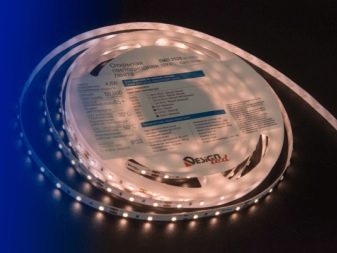
Today, manufacturers offer several types of LED strips. The range of uses for these durable, environmentally friendly, economical and reliable devices is quite extensive. They are practiced for decorating and illuminating shop windows, in the interior design of catering establishments, places of entertainment and recreation, in street advertising, for lighting niches and ceilings, aquariums, car interiors, spaces inside wardrobes, working areas of kitchens, and so on.
To make it easier to install LED strips, they are produced with a self-adhesive strip attached to the back, which makes it possible to effortlessly install these devices anywhere. LED strips are classified according to a number of basic features and characteristics that you should familiarize yourself with in order to find the ideal option for you.
By type of semiconductor devices
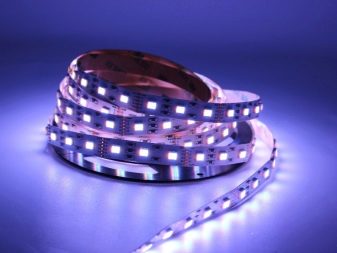
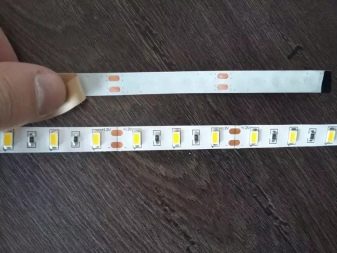
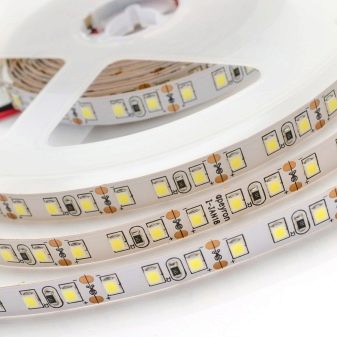
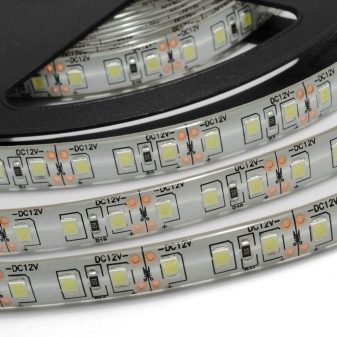
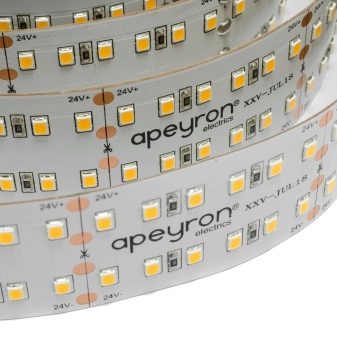
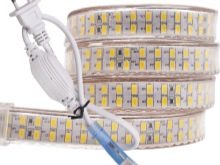
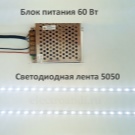
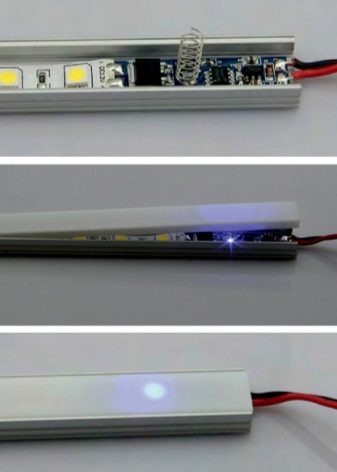
The price of these lighting devices significantly depends on this parameter. Common tapes with diodes SMD 3528 and 5050... SMD stands for Surface Mounted Device and stands for outdoor LED mounting method commonly used in engineering. The numbers after the letters indicate the size of the diode in whole and tenths of a millimeter (for example, "5050" should be understood as 5.0x5.0, and "3528" - 3.5x2.8 mm).
The 5x5 mm LED has 3 separate crystals, while the SMD 3528 - only one. This determines the power of the glow: LED strip 5050 brighter (approximately 2.5-3 times) the modification with the size of 3.5x2.8 mm. Therefore, the more powerful the device, the higher its price.

By color
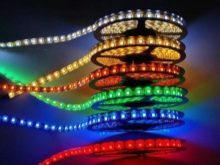
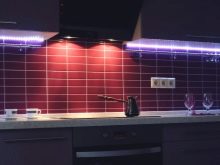
Everyone has probably come across the combination of the words RGB LED strip. This English abbreviation stands for Red, Green, Blue (red, blue, green) and presents a method of coding color for its reconstruction based on the principles of perception by the retina of the human eye. By mixing in various proportions and combinations of these 3 key colors, different tones can be obtained.
An RGB tape differs from an ordinary one in that it contains small red, green and blue crystals, which, if controlled by a controller, can give any color. White light arises when all 3 of the above colors merge, or it can be extracted from a blue diode covered with a phosphor, depending on the thickness of which it can become warm, cold or neutral (daytime). These shades are also formed by the temperature of the LEDs used.
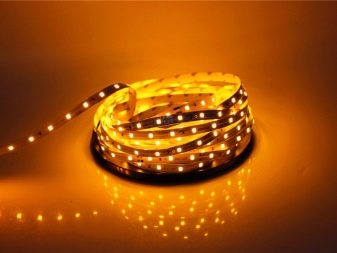
Yellow and white colors are in particular demand among buyers.
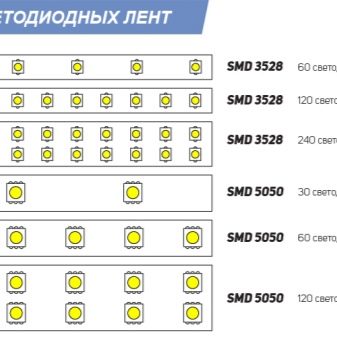
By density of LEDs per meter
The next indicator, which strongly affects the price of the device, is the number of diodes per 1 m. The higher this value, the more saturated and measured the illumination of the device. The greatest demand is for tapes with a saturation of 30, 60, 120 LEDs per 1 m.
Deciding which one you want to buy depends on your needs. For additional lighting, you can use devices with a frequency of 30-60, for the main one - 60-120 LEDs per meter.
According to the degree of moisture resistance
Since these devices are used not only in the interior of the premises, but also for decoration and lighting of buildings, shopping centers, in outdoor advertising, some of them have special protection against the effects of dampness. It can differ in class, be labeled in accordance with international standards. For example, The LED device with the IP 68 designation is the most waterproof, it can be used to illuminate pools, freeze in ice, place in water, at the same time observing fire safety standards.
LED strip with the designation IP 20 can be used in rooms that do not require additional moisture protection, in particular, for illuminating a two-level ceiling, shelves, PC monitor, cabinet, niche. A device of IP 65 class (medium degree of protection) is allowed to be used in the working area of the kitchen, car interior, bathroom, and also sometimes in street lighting.
Waterproof tapes, as a rule, are treated with a layer of silicone or wrapped in casings made of this material... Without any protection, the LED strip makes sense to operate where moisture will definitely not get on them.

By electric voltage and power
Another significant indicator in the specification of these devices is the transmitted power in watts. It depends directly on the size of the diodes and on their number per running meter of tape. For example, the consumption of SMD 3528 models, which contains 60 LEDs per meter, is 4.8W.
With knowledge of the power and length of a particular tape, you will accurately select a suitable source of electrical energy for it. The electrical voltage shown in volts is unified for LED strips. The market is dominated by designs developed for a voltage of 12, 24 V (the most common), as well as modifications for 36, 48 V.
Considering all of the above, it will not be a big problem for you to choose a specific LED strip.
Moreover, the market at the moment can offer an extensive range of LED-devices.

Selection recommendations
Once you have an idea of the main areas of use and characteristics, you can begin to select the desired product. Here are some tips on how to choose an LED strip for backlighting.
- Based on needs. For an apartment you need some characteristics, for a street they are completely different. Be sure to check the points regarding the connection to the mains and the degree of dust and moisture protection of the device.
- Choose a suitable color or a combination of them. Designers or special Internet resources for construction and design can help you with this. If you already have a project, proceed from its conditions. If you put a backlight in your apartment, take care that it does not tire you or get on your nerves.
- Take the required measurements. The implementation of calculations and planning will make it possible to calculate the amount of material and not spend extra funds.
- Follow the recommendations of the sellers or professional builders. Inexpensive specimens may not be of the best quality, which threatens them with overheating and failure.

Where can you place it?
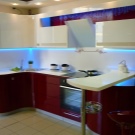
The LED strip for the kitchen, dispersed in the area of the working area, is an excellent solution for premises designed in both classic and modern styles.
For the former, you can choose options that emit a warm glow. For a modern interior, a tape with cold light will be a good option. Excellent performance coupled with aesthetics have made these devices in demand for the arrangement of kitchen lighting.
Through them you can:
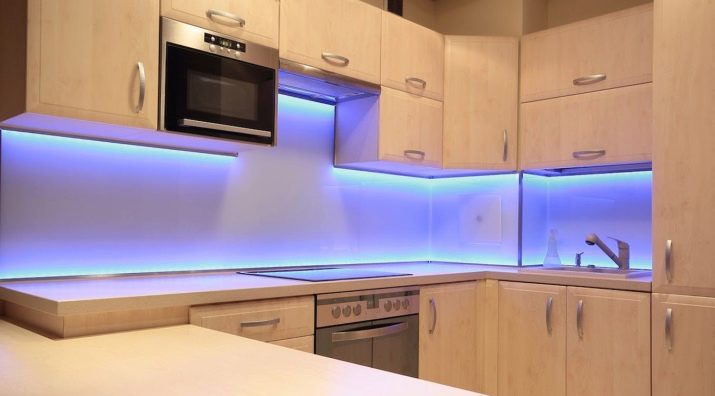
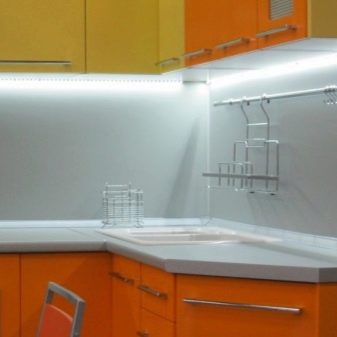
- highlight lockers and niches;
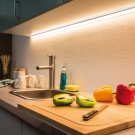
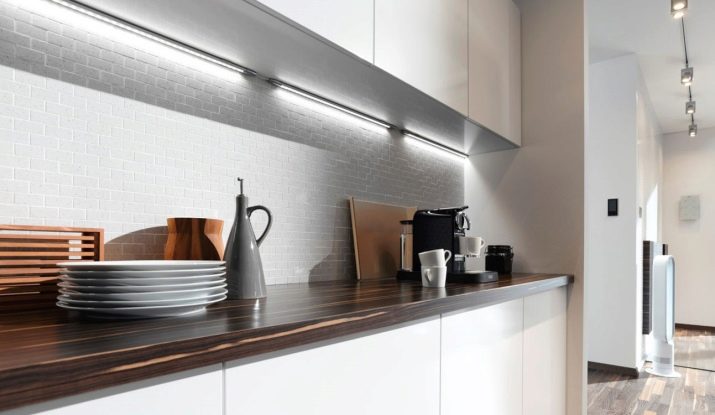
- highlight the sink, backsplash and work area;
- illuminate paintings and other decorative elements of design;
- it is interesting to highlight stretch or multi-level ceilings;
- illuminate cabinets and drawers inside;
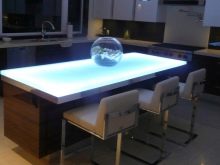
- create the impression of pieces of furniture hanging in the air by placing ribbon lighting under the kitchen set;
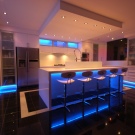
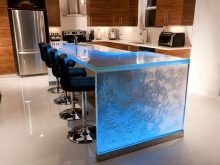
- reproduce the style and peculiar atmosphere of a real bar, advantageously playing with the place of the bar counter by means of the LED strip.
Ribbon illumination is harmoniously combined with other light sources, be it the main chandelier or built-in or surface-mounted spotlights.
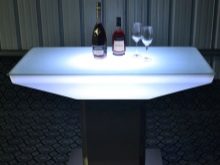
If you want to decorate the edge of the tabletop with a ribbon, then you will need a special aluminum profile that can reliably hide it from the eyes and bring grace and originality to the surrounding space.
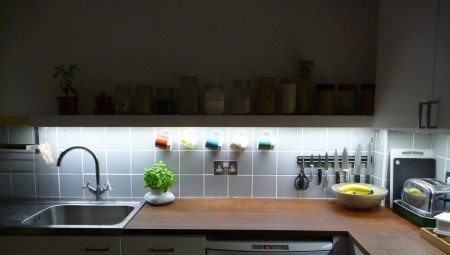
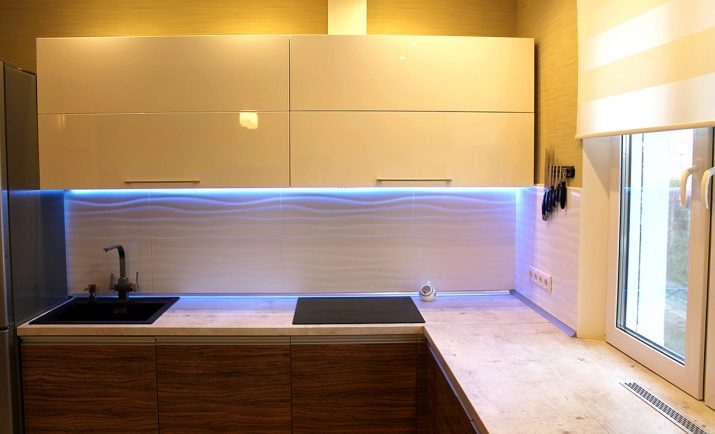
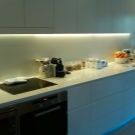
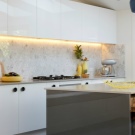
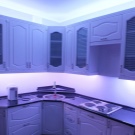
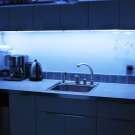
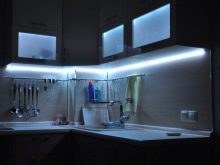
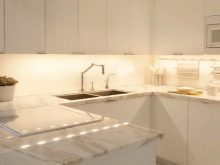
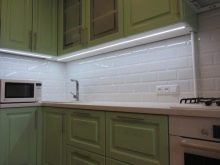
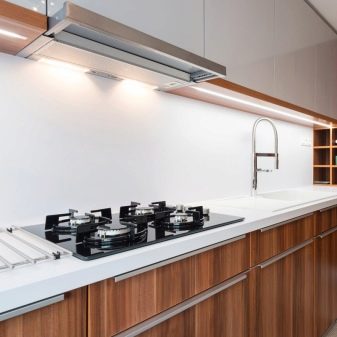
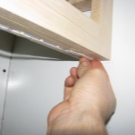
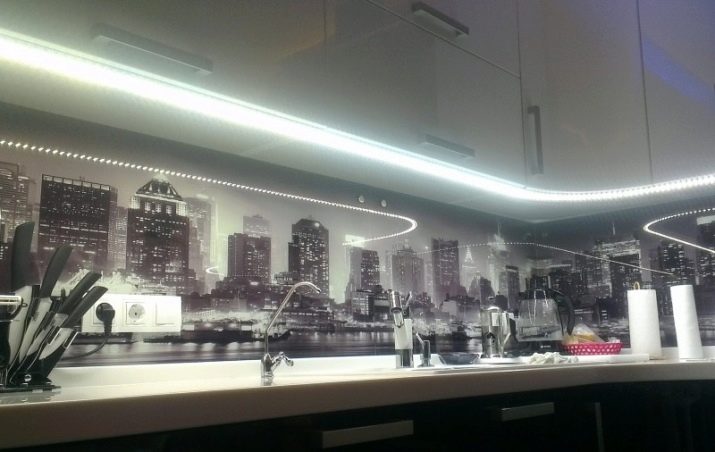
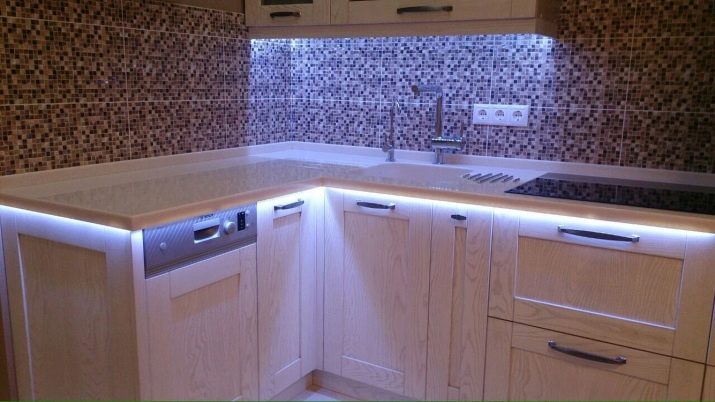
When the backsplash is illuminated, the tape is usually fixed under the kitchen cabinets, but can also be placed in other areas. Correctly placed LEDs provide shadow-free illumination, which is convenient when working.
For the dining area and food preparation area, it is better to choose a warm white color scheme, as it will not change the natural color of the food. An interesting decorative effect can be created by connecting several ribbons.
Subtleties of installation
Consider the installation issue LED strip for kitchen cabinets.
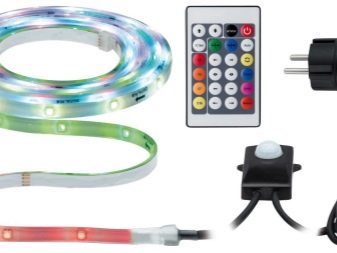
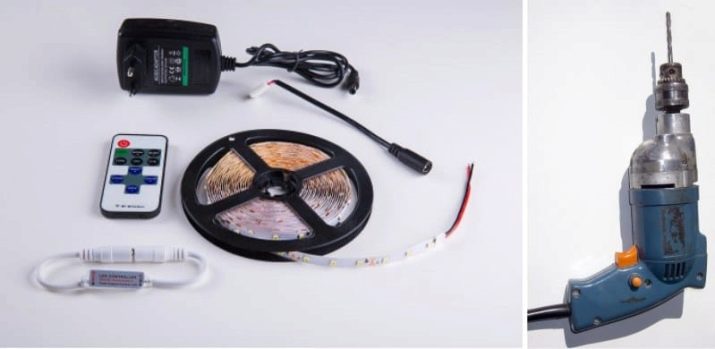
- Determine the place where you will hide the power supply unit (PSU), the length of the cable used depends on this. You can find a place near the socket, you can plug into the connection point of the kitchen hood. Everything depends on the "relief" of your kitchen.
- Measure the surface of the intended installation.
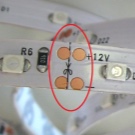
- Cut the required amount of LED strip. It is necessary to cut strictly according to the marks! Cutting off the tape elsewhere can ruin it.
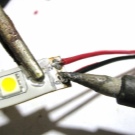
- 2 connectors are put to the contacts or 2 wires are soldered.
- After that, insulation is made (with a tube or tape).
- Wires are connected in parallel with respect to polarity - minus with minus, plus with plus. The resulting connections are connected to the power supply output.
- The base of the LED strip is self-adhesive, therefore, having previously cleaned and degreased the surface, it is simply glued.
- Do not turn on the backlight immediately after installation, let the glue cool and set.
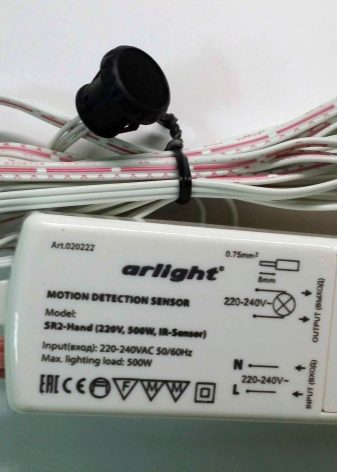
One of the most inconvenient steps in installing LED strip backlighting is the need to install a separate switch for it. As a rule, this question is relevant for highlighting the working area in the kitchen.
To solve this problem, there are now portable, infrared or touch (non-contact) switches, which have the width of the tape itself and perfectly fit the aluminum profile.
You calmly place them at the very beginning of the LED strip and cover with a diffuser, so they will not be noticeable at all.
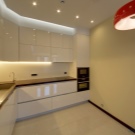
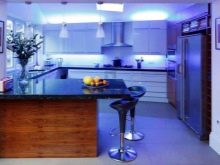
Successful examples in the interior
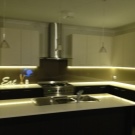
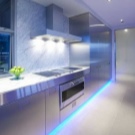
In this case, the highlighting of the work area is applied, overhead LED strips are placed along the edge of the bottom of wall cabinets, effectively reflected in a glass apron.
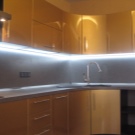
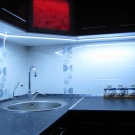
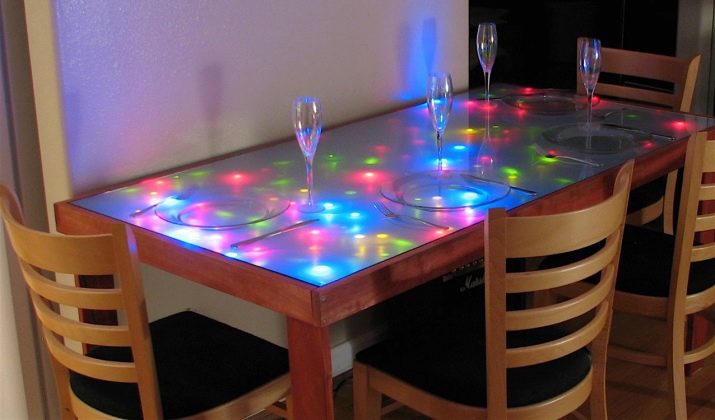
In this option, in a special way, lighting of the dining area.
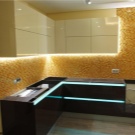
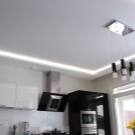
Along with the illumination of the working area, this design involves illumination of floor cabinets.
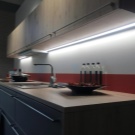
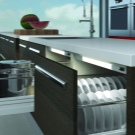
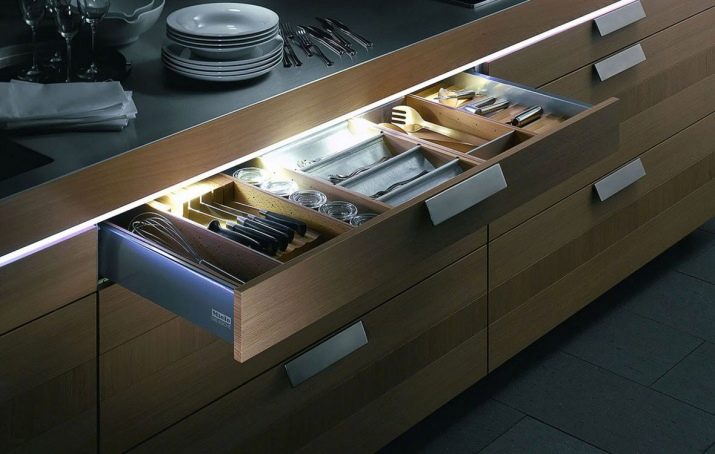
For the comfort of operation, it is provided lighting inside the drawer.
For how to make LED lighting in the kitchen with your own hands, see the next video.


