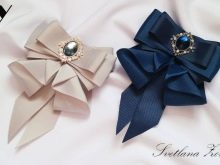
How to make a brooch from a rep ribbon?
You can make a brooch or tie from a rep ribbon with your own hands. To create an accessory, you only need consumables and free time. In the future, accessories can be sold or used independently as a decorative element of clothing for adults and children.
How to make a tie?
A tie is a modern and fashionable accessory. It can be combined with different types of clothing: shirts, blouses and dresses. In addition, it is perfect for school uniforms.
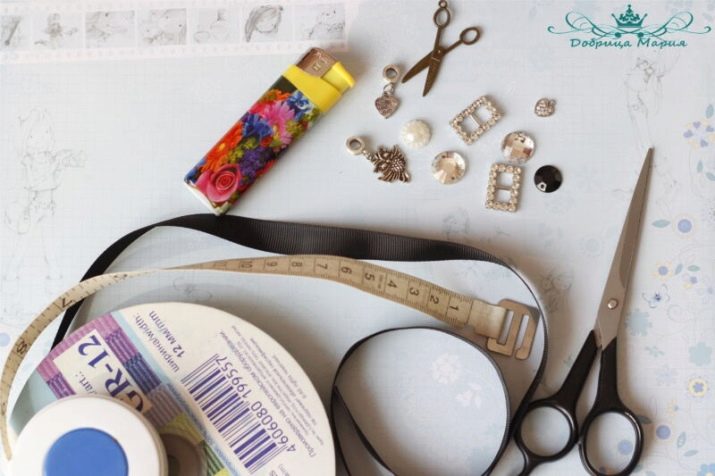
To create an accessory, you will need the following materials and tools:
- rep tape, the width of which is at least 1 cm (it is not recommended to take too large);
- ruler or measuring tape;
- scissors;
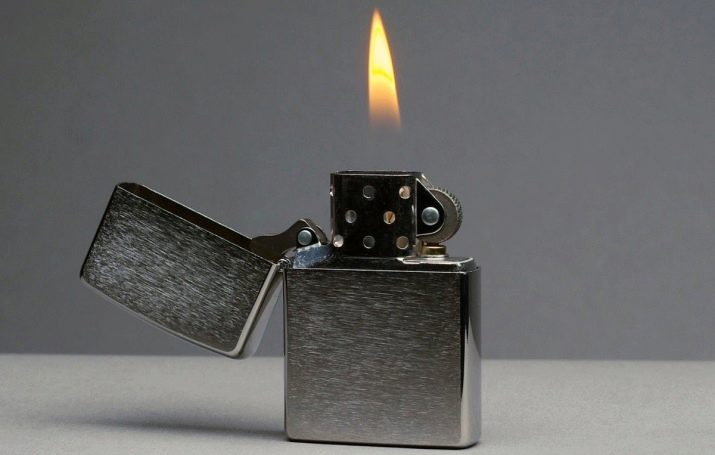
- lighter or matches;
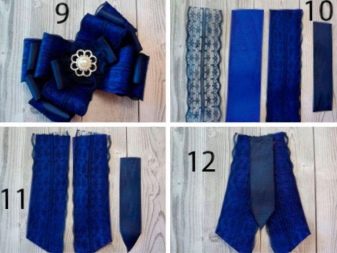
- glue;
- thread and needle;
- a small piece of felt.
To decorate the middle, you need to prepare a crystal or bead.
The step-by-step master class consists of several sequential stages.
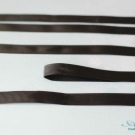
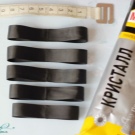
- It is necessary to make several segments from a rep tape: 3 pieces of 18 cm each, 1 piece of 16.5 cm and 1 piece of 14.5 cm.
- On each of the segments made, you need to mark the middle. To do this, you just need to fold it in half and make specific creases with a nail.
- Apply a small amount of glue to the middle on the back side, then fix the edges of the tapes. For this purpose, it is recommended to use the transparent "Moment". The result of the above stages of work is clearly shown in the photo.
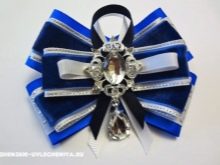
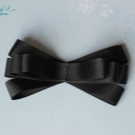
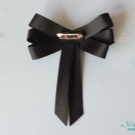
- Now you need to connect the long segments together. First, two of them so that you get the letter "X". Then you need to sew on the third section.
- Next, you need to sew on the middle blank, and add the smallest of all available on top.The result of these stages of work is shown in the photo.
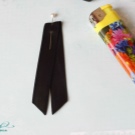
- Now you need to add the so-called ponytail. To do this, you need to cut off another small piece 18 cm long from the rep tape. It must be folded in half, pushing both parts apart. Cut the ends and process with a lighter.
- Next, a small piece of felt is glued to the resulting tie from the back side.
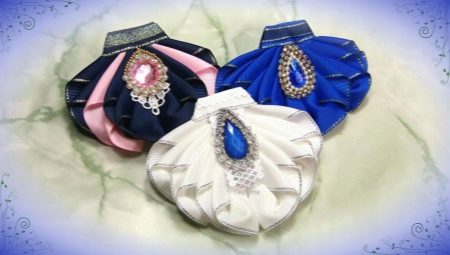
If the accessory is made for a girl, then a bead can be glued to the middle part. If for a boy, then, most likely, it is better to refuse this step, since the accessory will look a little ridiculous. The result of the work is shown in the photo.

Master class on creating a brooch using the kanzashi technique
You can make an excellent brooch using the kanzashi technique from colored rep ribbons. This will require the following materials:
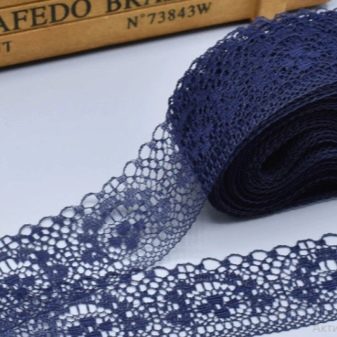
- lace ribbons 4 and 2.5 cm wide;
- rep tapes with the same parameters;
- a small piece of felt;
- bead for decorating the middle;
- thread and needle;
- scissors;
- lighter;
- glue gun.
The master class consists of the following stages.
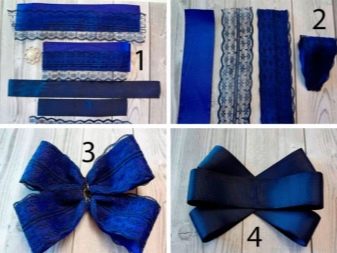
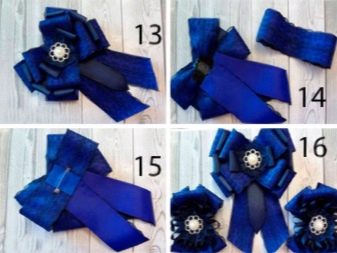
- You need to make 4 pieces of rep and lace ribbons, the width of which is 4 cm.The length of the blanks themselves should be 13 cm.
- With the help of glue and thread, they must be assembled into a neat bow as shown in the collage.
- Now you need to take a reps tape 2.5 cm wide for work again. Make three blanks 24 cm long from it. They also need to be turned into double loops with the help of glue.
- Then, rep and lace ribbons are again taken into work, the width of which is 4 cm. Two blanks with a length of 20 cm are made of them. They are assembled in the same way into a neat bow.
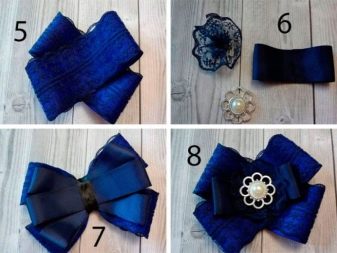
- You need to take another piece of lace tape measuring 2.5x16 cm. Collect it in a circle using a thread and a needle.
- A piece of rep tape 2.5 cm wide and 14 cm long is another blank. It is necessary to bend the edges on both sides and connect them in the central part.
- Glue the circle to the center of the line.
- Also, a decorative ornament is fixed in the central part. The above stages and the final version of the work are presented on the collage.
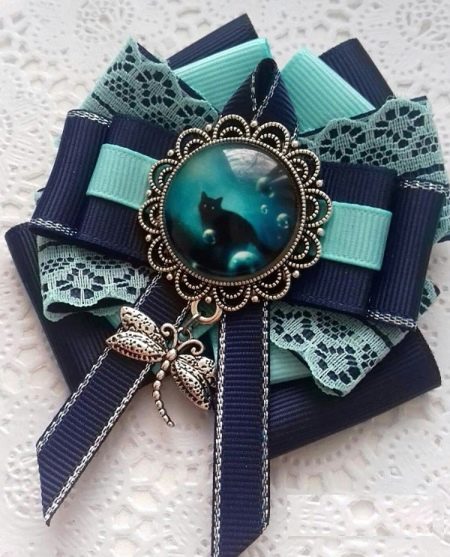
In the final part, the composition should be glued to the prepared piece of felt fabric.
This brooch can be used as a decoration on a dress or blouse, worn for holidays or just to school.
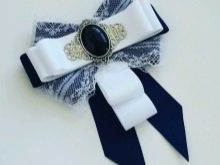
Diy brooch
Another interesting option is an elegant brooch made of rep ribbons. As materials and tools this time you should prepare:
- rep ribbons in a contrasting color, for example, blue and yellow;
- felt;
- glue gun;
- thread and a needle.
You will also need a decorative ornament to give the accessory an attractive appearance. The creation process is simple, but it should be consistent:
- you need to make several stripes: 2 yellow and 1 blue stripes of the same length, 1 yellow a little shorter and 2 even smaller ones (they should be of a contrasting color);
- then they must be folded in half and, using a glue gun, attach the edges to the middle so that loops are obtained;
- now, starting from large to small, they need to be collected in one composition, and a decorative ornament should be added on top;
- on the back side, the accessory is glued to the felt. An approximate result of the work is shown in the photo.
In order for the products to be neat and to serve for a long time, their cuts must be processed using fire. It seals the endings. But it is important not to overexpose the crafts under the flame of a lighter, since in this case the edges will burn too much, leaving black edges.
In order for rep ribbons to drape well and not bloom, they must be purchased in trusted stores where materials of appropriate quality are sold.