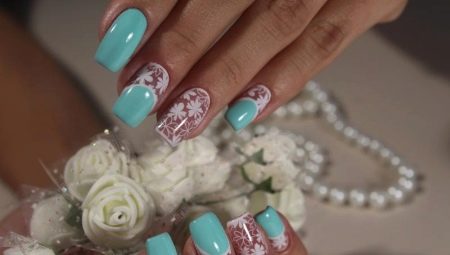
How to decorate your nails beautifully in white and blue tones?

Light and airy blue nail design is a versatile option, because it is able to emphasize an elegant feminine look. This manicure is great for both short and long nails. In addition, the design in soft blue tones goes well with different styles of clothing, be it jeans or a light dress.


Peculiarities
Blue is a symbol of purity, freshness and tranquility. It evokes extremely positive emotions, as it recalls the sea and the boundless beauty of the sky. A manicure with this color can have various variations of shades for every taste: heavenly, mint, azure-turquoise, gray-blue. An aquamarine design is a great choice as it looks natural, delicate and romantic.
The classic option is a blue and white manicure design. These shades are perfectly combined with each other and complement each other in the most favorable light, creating smooth transitions from one color to another. Blue-white nails look very attractive, their airy image resembles clouds.


Nail design in blue and white can be done using the gradient technique. Gradient manicure is popular for its interesting color palette. In such a decor, there is no border between the shades of varnish, because they seem to be blurred. Gradient manicure creates a light and sophisticated look. Most often, light shades are used to perform this type of design. Such manicure options can be a great addition to both your everyday look and luxurious outings.
Stylish manicure in blue and white tones can be complemented with other brighter shades of varnish. The most harmonious options for whites and blues are silver, black, gold, purple and blue. An excellent solution is a thematic manicure. On a white and blue background, you can make amazing winter patterns, snowflakes and even Christmas trees.
For spring-summer design, décor in the form of floral prints and sea beaches is perfect. In addition, you can beautifully decorate your nails with rhinestones and sparkles, which will make your manicure even more extraordinary and attractive.


Step-by-step instruction
to create a gradient style manicure it is necessary to perform several consecutive actions.
- The first step is to carefully align the nails with a buff.
- The next step is to apply a degreaser. This is necessary so that the base coat is evenly distributed over the nail plate.
- Next, you should cover the nails with a base and dry them in a lamp.
- Now you can start gel coating. With the help of the game of colors, you can visually lengthen the nail. To do this, light shades of varnish are applied near the root hole, and dark ones closer to the end of the nail. To create an ombre on foil or on any other flat surface, you need to distribute a small amount of varnish in two colors. To obtain beautiful and smooth transitions, the funds are mixed with each other.


- In the resulting mixture of varnishes, you need to gently dip a regular sponge, which should be quickly applied to the nail. Excess product near the nail can be removed with a cotton swab dipped in nail polish remover.
- Similar actions must be done with all the marigolds, then dry them in a UV lamp.
- When all nails are completely colored, they are covered with a top coat, which can significantly extend the life of the manicure. After fixing the top, the manicure is dried in an ultraviolet lamp for two minutes.
- The finishing action of creating a gradient nail art using gel polish is to remove the sticky layer. You need to moisten a napkin with liquid to eliminate the sticky layer and wipe your nails.


The sophisticated ombre design in light color is a popular option that will remain one of the leaders in nail art for a long time to come. To create stunning effects on your nails, just get creative and bring the best original gradient technology ideas to life.
How to create a blue and white ombre on your nails, see below.


