How to style almond-shaped nails?
Almond-shaped nails provide a lot of design space. They are chosen by many beauties around the world, which is associated with the convenience and femininity of this form. It is worth figuring out how to make such a manicure yourself at home, and consider the most relevant design options.
Features of almond shape nails
The almond shape is a cross between an oval and stylets. In order for this manicure to look concise, the free edge should be quite long. Moreover, although the tip is pointed, it is not as thin and elongated as in stylets.
A feature of this type is its versatility and durability. The free edge will not cling to objects, and also cause inconvenience when doing housework. You are also not limited in your choice of design as, for example, in the case of short oval nails.

Who is it for?
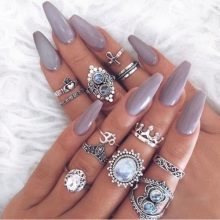
Beautiful long pointed nails will suit any type of figure and toes. The thing is that such a natural shape visually lengthens the fingers, which makes the image graceful and delicate. Especially it is worth taking a closer look at this form for ladies with plump hands. In their case, a square is contraindicated, but almonds will be very useful. At the same time, even the impressive length of the free edge will not look pretentious (as with stilettos).
As for the psychological portrait of the owner of the almond shape, psychologists say that this nail design is chosen by energetic and perky girls. If you want to make that impression, then by all means try to do such a manicure.
Technique of execution
When cutting this shape, the master pays great attention to the arched bend. It is easy to see if you look at the nail in a horizontal position from the side of the free edge. It is on how the bend is performed that the final result will depend. Although the shape is pointed, it should not be devoid of a natural C-shaped arch.
An almond-shaped nail can be obtained in several ways. (like others). If your nails grow poorly, exfoliate and break, then you can resort to building. But most girls choose a different method - this is the use of shellac with strengthening the nail plate. The fact is that additional protection of the nail from fractures helps to grow the desired length. The main advantage will be the natural thickness and shape of the marigold itself.
It is worth considering step by step how to achieve this shape at home.
- Remove old nail polish from your nails. If you have shellac, you will need a special apparatus or foil.
- Get a manicure. Here we will not describe in detail all its stages. You yourself know that it is necessary to remove the cuticle, burrs and grind the nail plate itself.
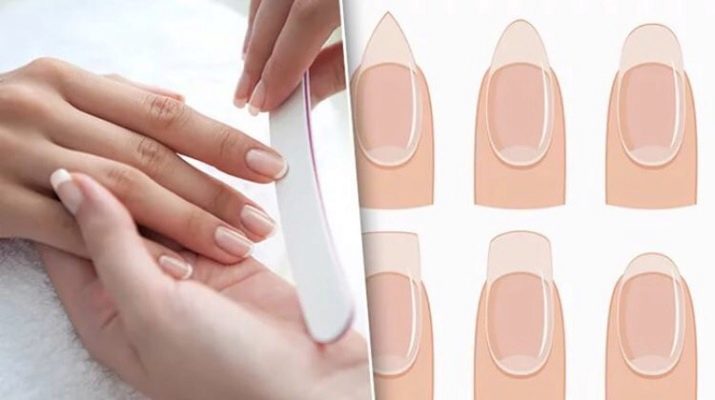
- The length should be quite large (in size equal to or greater than the length of the nail bed itself). Cut off the free edge at a right angle. This will give you a perfect square. It is better to do this with sharp nippers. In this case, the cut will turn out to be smooth.
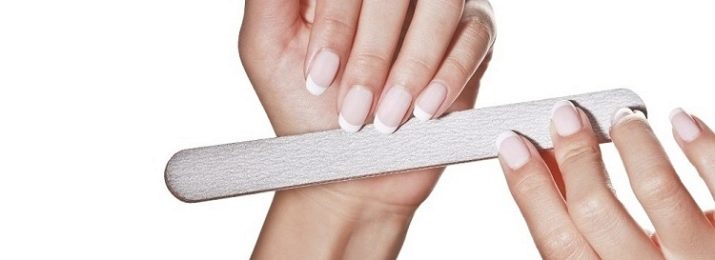
- Next, you need to arm yourself with a coarse nail file and cut out a trapezoidal shape, that is, your tip should not be too sharp. It is from this form that it is easiest to get almonds in the future. For this stage, you can take a rather coarse nail file, as this will speed up the process. Do not use scissors or wire cutters to create the trapezoid. One awkward movement will ruin the whole manicure.
- We take a more delicate nail file and round off our tip. On the one hand, it should be quite thin, but not go to the point. Slightly rounded and distinguishes almond shape from stylets.
- At the final stage of creating the shape, it will be necessary to sand the edges and the nail itself. Thoroughly sweep dust off your fingers and nails. After that, you can start applying the base coat.
Secrets of specialists
Masters of their craft know how to create an almond shape even from an oval. This will be necessary if you do not want to lose length. Of course, there are fewer preliminary steps here, so you don't have to do the square first, but it should be taken into account that making all the marigolds identical will be more difficult. So, take a coarse nail file and obliquely saw off the free edge, narrowing it towards the end. The difficulty lies in the fact that you have to work "by eye". Therefore, make sure that the slope and height are the same on all nails.
When working with extended nails, do not use nippers. When biting off, the rest of the free edge may be damaged or cracked, so you will have to cut it out with a coarse nail file, which will take more time, but you will not ruin the manicure.
Design ideas and fashion trends
All the variety of almond-shaped nail design options is simply impossible to describe. It all depends on your personal preference and imagination. Nobody limits you in creating completely unique and inimitable designs. Contemporary design ideas are worth considering.
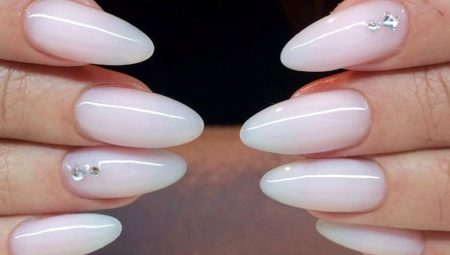
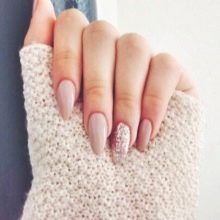
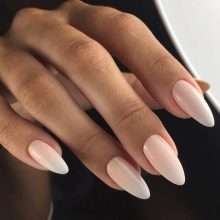
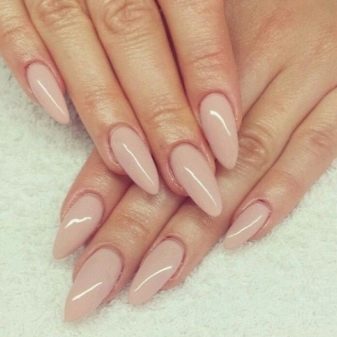
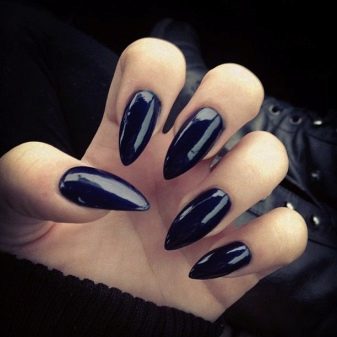
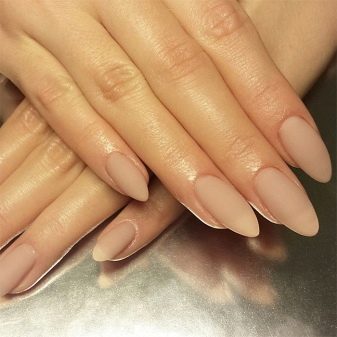
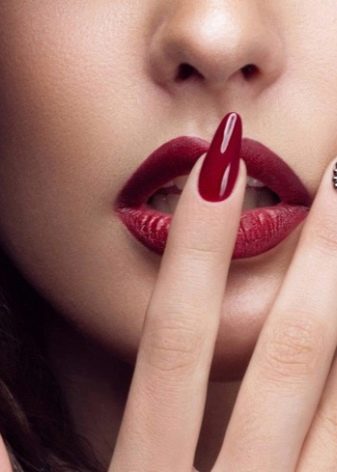
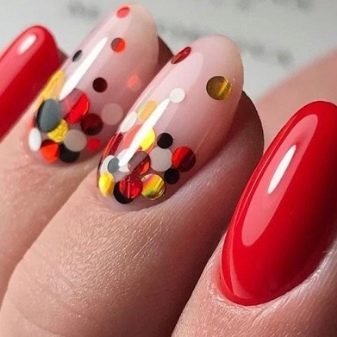
- Solid marigolds. This design option is always appropriate. A huge plus is the simplicity of its creation. Even a beginner can cope with a monochromatic manicure. If you practice and make an effort, then it will invariably turn out neat and beautiful. The choice of shade depends on the range in which your wardrobe is made. If there is no particular unity in it, then you should choose neutral nude shades or classic light tones.
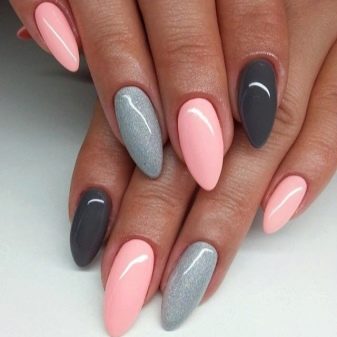
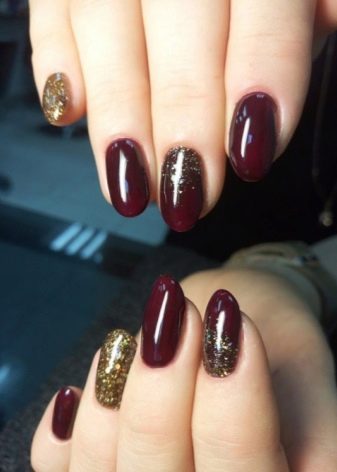
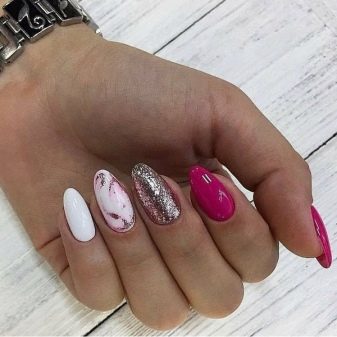
- Contrasting combinations. A manicure done in contrasting shades looks very bright, and you do not need to have special skills.It will be enough to cover different marigolds in the selected shades. By its nature, the execution technique is no different from a monochromatic coating. One has only to take into account that different varnishes may have a different texture. But this can also be beneficial if you are planning to cover some marigolds in a simple gloss, and others with small splashes or sparkles.

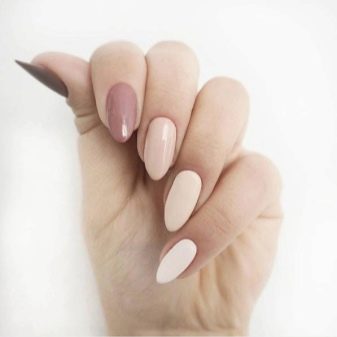
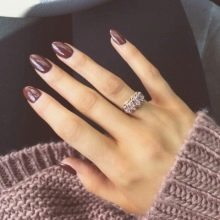
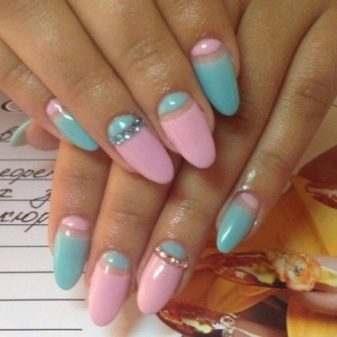
- Monochrome options. If bright combinations are not for you, but you still want to diversify the manicure, then you can consider the monochrome range. The shades will differ in their saturation and brightness, while remaining within the same gamut. For example, it can be blue and blue or beige and brown. How exactly to combine them is up to you. You can fit several tones on one finger or provide a different color for each nail.
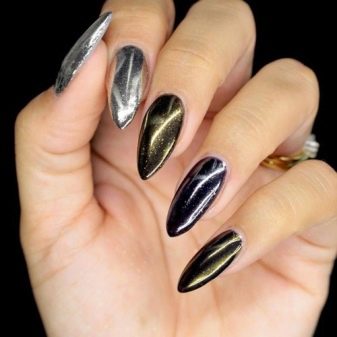
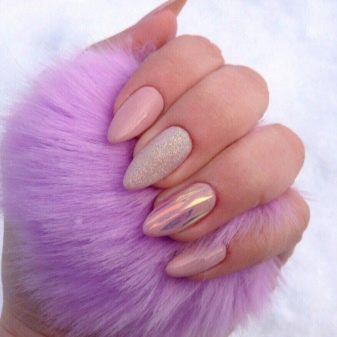
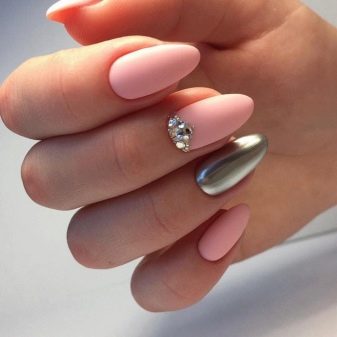
- Mirror. This option is at the peak of its popularity today. Many are afraid to embody it on their own nails because of the particular brightness or strict dress code at work. But a compromise can be found here too. Focus on only one of your fingers. So, you will give originality to the manicure, but keep its calm overall appearance. In this case, it is important to choose the right companion varnish, which will be on the rest of the nails.
It should ideally match both your outfit and the mirror nail you accentuated. The easiest way is to use rubbing, then the varnish on all nails can be the same.
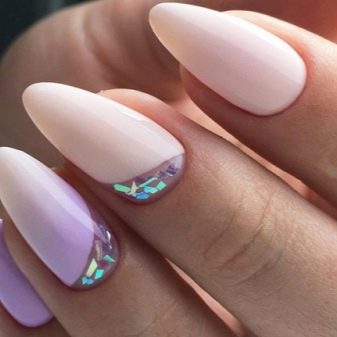
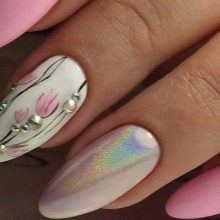
- Broken glass. This is an interesting and unusual effect that is created through the use of a special film. It is cut into arbitrary elements of irregular shape and has a mother-of-pearl surface. When they are placed on the nail close to each other, the illusion is created that there are real fragments on the nail. At the same time, the general appearance does not lose its restraint. Such a manicure can be done even for everyday wear. If there is a celebration ahead, then a soft shine on the nails will be very useful.
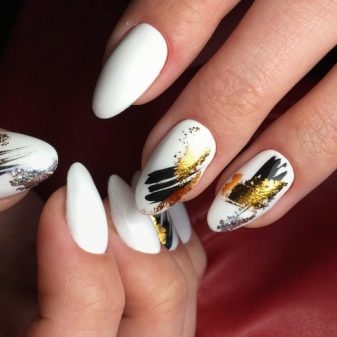
- Chaotic strokes. First you need to choose the main background color. It can be both light and dark tones. The difference will be in the end result. In the first case, the manicure will look more gentle and feminine, in the second it will not be devoid of brightness and originality. The master simply covers the nails in one tone, and then in a chaotic manner applies large strokes so that the stripes are visible. To achieve the greatest effect, you can use several shades at once for the strokes themselves.
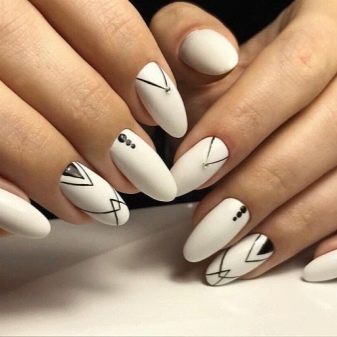
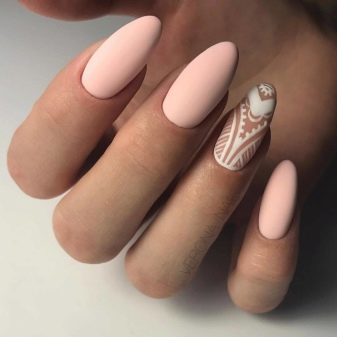
- Matt. The nobility and elegance of a matte manicure will always be at its best. For many years, women were forced to settle for only glossy textures. Today, any of the existing varnishes (or shellacs) can be transformed at the final stage by choosing a matte top as the last layer. The main disadvantage of a matte manicure is its soiling. And if on dark shades it will be almost imperceptible, then light solutions will very quickly get dirty. It will not be easy to wash this dust from this coating.
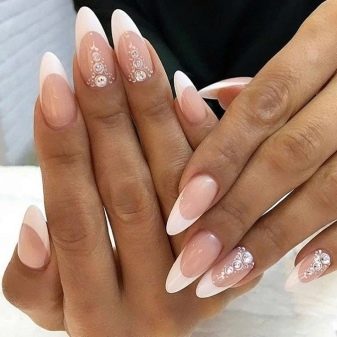
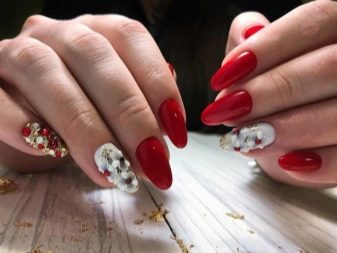
- Rhinestones. It seems that there are no girls who would be indifferent to these sparkling pebbles. It is enough to add just a few things to the nail and the manicure will sparkle in a completely new way. You cannot do without them when creating a festive or wedding manicure. Masters of their craft actively use rhinestones when painting nails. With their help, you can easily complete the pattern or decorate the created drawing.
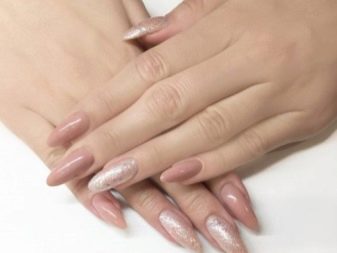
- Glitters. They can be either in the composition of the varnish itself, or applied separately. In the latter case, you are free to choose in which part of the nail and in what quantities they will be located on your nail. With their help, you can make an unusual jacket, and even a gradient. At the same time, shiny tips will invariably attract attention and delight their owner.
- Divorces. To create them, you will need several shades of varnishes at once.Almost all streak techniques involve painting on wet varnish. It is very convenient in this case to use gel polish. It freezes only in a UV lamp, which means that you can take your time in creating the desired pattern. If you have never created such a design yourself, then first practice on a regular sheet of paper. Just drip a few drops of each of the available varnishes, and then use a thin brush (you can try with a regular toothpick) to make a few streaks.
Interestingly, here you can experiment and drip one drop onto another or place them side by side.
- Monogram. Beautiful curved lines with rounded ends create a very unusual manicure. Depending on the quantity and shade, such patterns can be either very delicate and airy, or luxurious. Manicure masters are specially trained in this technique, so it seems that it will not be difficult to repeat such a design. But don't jump to conclusions. Before you start drawing monograms on your own nails, try repeating them on a regular sheet of paper. To create them, you need a thin brush, since you won't be able to repeat thin lines with a regular one.

- Geometry. These can be all kinds of rhombuses and intersections in a chaotic or strict order. And also this type of design includes striped manicure. In this case, the width and number of stripes vary at will. To keep the lines clear and straight, use special adhesive tape for manicure. Just apply it to your nail in the direction you want and draw a line (or lines). After that, it should be removed. Although there is a special decorative adhesive tape, in this case, you just need to apply it in the right direction, and cut off the excess with scissors.
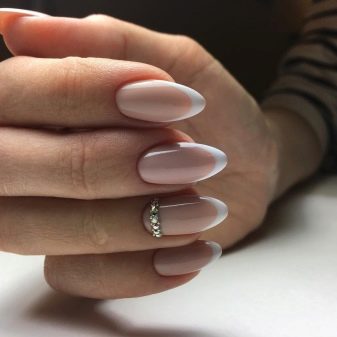
- French. This is a classic design that has a ton of variations today. Fashionistas are already tired of his traditional performance in nude tones. Therefore, keeping the technology of its implementation, they choose absolutely unexpected combinations. It can be black tips with a neutral tone, and gold edging with a bright base color of the nail plate. Nobody limits your choice.
- Lunar manicure. It is often combined with a jacket, since it is these areas on the nail that have a different shade. But you can limit yourself to simply highlighting the area at the base (which has the shape of a month) in a different color. If this option seems rather boring to you, then you can consider the moon manicure as a base for creating interesting drawings. And also rhinestones, glitter or kamifubuki will give it brightness.
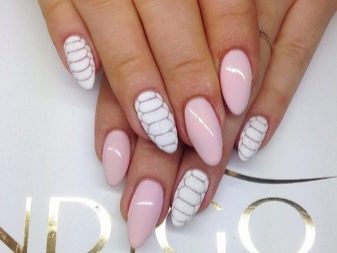
- Lace and veil. What could be softer and more feminine than thin lace. By transferring it to your own nails, you will provide yourself with a romantic mood and a seductive image. It is rather difficult to draw thin intricate threads in a small area. Therefore, manufacturers have provided special films and stickers that imitate this fabric. You just have to cut and attach the element to your finger and fix it with the top. The location of the lace can be absolutely anything. It can cover the entire nail or decorate only its edge.
- Kamifubuki. Bright little circles resembling sun bunnies will certainly cheer you up even on a gloomy autumn day. You can place them on the nail in any order. You can create the illusion of a waterfall or sun glare on the water. If you arrange them in large numbers at the base, and reduce their presence to a minimum towards the tip, you get an interesting color transition effect (ombre).
- Marble. It seems impossible to repeat such a complex natural pattern. Moreover, so that at the same time there was realism. But modern manicure masters are also subject to this. There are several techniques for performing it. The simplest is to use a special film.There is already a drawing on it, you just have to fix it on the nail. The more time-consuming process is painting the marble pattern with a paintbrush, but the effect is worth it.
At home, you can try using varnishes of various shades and regular film. Just drop a few drops next to it, attach the film, and wiggle it a little. The spots will blend and form blurry streaks.

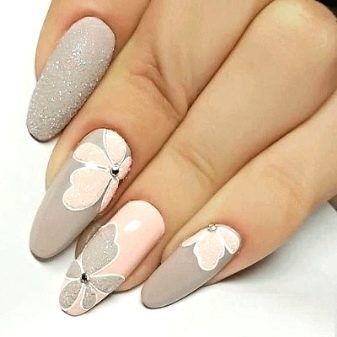
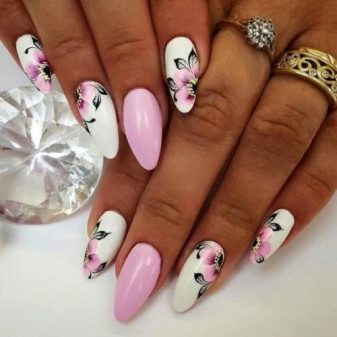
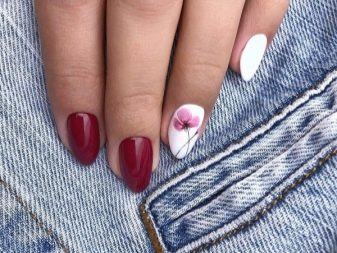
- Flowers. Floral motifs are more suitable for summer and spring. If you want to decorate a marigold with a juicy rose in winter, no one will forbid you to do this. The so-called snow or frosty flowers will also look interesting. A small flower on your ring finger will remind everyone (including at work) of the romance of your nature, because a woman should always remain a woman, even if she is a highly qualified and respected specialist.
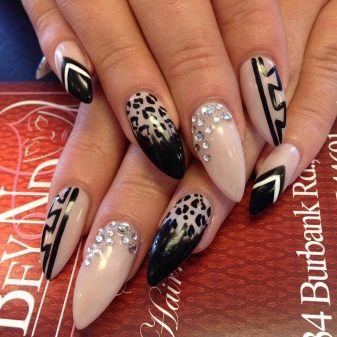
- Animal prints. It is on the almond shape that such bright accents will look as modest as possible. Do not think that only the well-known leopard spots and tiger stripes are in this category. It may well be an imitation of the plumage of birds of paradise.
- Watercolor. It is almost impossible to create beautiful watercolor drawings without preparation. The peculiarity lies in the fact that the drawing of the main pattern occurs on wet varnish. To begin with, we advise you to practice on plain paper or special forms, only then switch to marigolds. Special films or stickers can make the task easier.
- Volumetric drawings. To create them, you need an arkil or gel. Depending on the chosen design, the drawing can be laid out directly on the nail or be a blank that rolls towards the nail. The choice of theme and tone is unlimited here. It can be beautiful volumetric flowers, and imitation of knitting, and even small images of birds.
Reviews
Many girls who chose this form were satisfied with it. The variety of designs and unpretentiousness of marigolds delight the owners of this manicure for a single week. In addition, most girls note the convenience of wearing such marigolds. When doing housework and office work, they did not experience any discomfort.
How to make almond shaped nail extensions, see the video below.


