Dots for nails: what is it and how to use it correctly?
Modern technologies for performing manicure make the work of the masters as simple as possible. The maximum number of devices has been created to create an effective design without much effort and time.
Now, in order to become the owner of a trendy manicure, it is not at all necessary to go to the salon. It is enough to buy a cover, a few professional tools, decor and a lamp - and you can create!
What it is?
Dots (dotter) - one of the main tools for creating patterns on the nail plate. The device is simple, but like a brush, it allows you to bring to life the most original design ideas. The basis of his work is the arrangement of points and circles of different sizes. On their basis, more complex drawings are already being made. Dots are also suitable for performing other techniques: filling the inner surfaces inside the contour of shapes, drawing thin elements, creating monograms and other patterns.
Dots for nails is something like a ballpoint pen. This is a handle, at the end of which a metal ball (less often a plastic one) is fixed. The handle is often decorated with sparkles, bright plastic, but it can also be wooden.
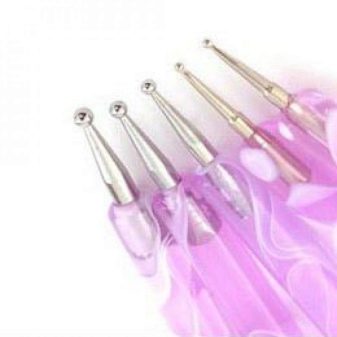
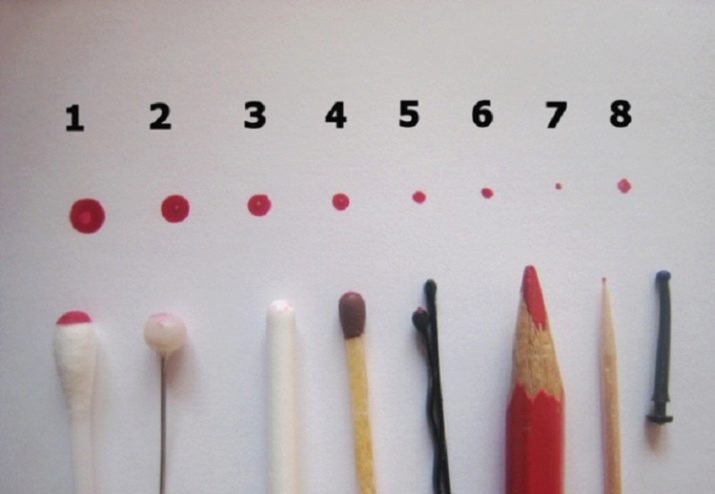
Dots are often sold in sets with balls of different diameters. The simplest inexpensive tool costs 1-2 US dollars. For beginners, you can take one dots with balls on both ends of different sizes: medium and small.
Dots work is not difficult if you use the advice of professionals. Even with one tool, you can create points and lines of different thicknesses and sizes.It is regulated by typing a certain amount of pigment on the ball and pressing on the tool.
Even a child can handle the technique. You can create an original design on nails with a dotter in the spirit of the latest trends in nail art on the very first day of use.
How to use it correctly?
When performing a manicure using dots, even beginners usually do not have problems. However, in order to feel all the capabilities of the tool, you should first use a sheet of paper or cardboard, tips for drawing the simplest patterns. Then you can move on to creating a pattern on your own nails.
To obtain the correct effect, the dots must be held perpendicular to the nail when working., in the same way put dots and take the gel or varnish from the tube. At the same time, you can hold it in your hand in any convenient way.
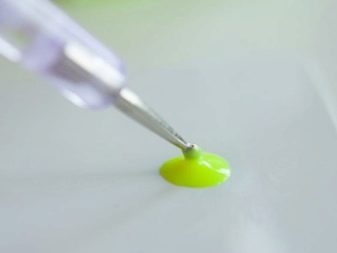
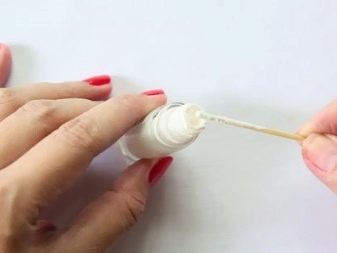
When applying a pattern or painting parts, it is better not to dip the dotter into the varnish every time, but to take a few drops of the coating on a special palette or foil. This option may seem less economical in terms of coverage. But on the other hand, the drawing will turn out to be of the right size, without smudges and of better quality.
To work with this tool, when creating a picture, it is best to use varnishes of medium or thick consistency.
If you want to get neat dots, you need to remove the sticky layer from the base color of the coating.
To prevent the pigment from drying out on the instrument, wipe the tip after each drawing and before dipping it again into the pigment. To do this, use a cloth or lint-free napkins. In general, the dots are undemanding in leaving, it is easy to clean.
Dots is a simple tool, so the choice of a manufacturer or company does not play a role in its use. You can take the simplest and cheapest one. The advantage of the dotter lies in its versatility for the execution of many drawings in different techniques: gradient, retro manicure, graphic design, monograms, ethnic patterns, floral motifs.
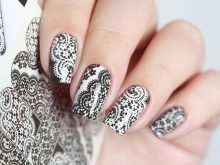
With proper skill, you can even make a drawing in the form of lace with a tool. And, of course, dots are indispensable when creating complex textured options with volumetric 3D modeling.
Dotsom design step by step
You can create different patterns according to your inspiration with the help of dots. Any manicure, whatever design you choose, begins with a thorough preparation of the nails. The accuracy of the manicure and the future appearance of the coating, as well as its durability, depend on their appearance and condition. Drawing any image with dots is easy if you follow the step-by-step beginner's guide.
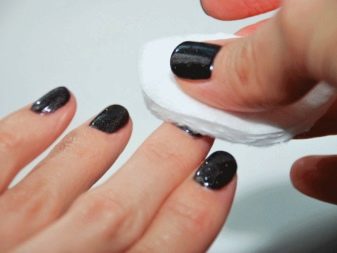
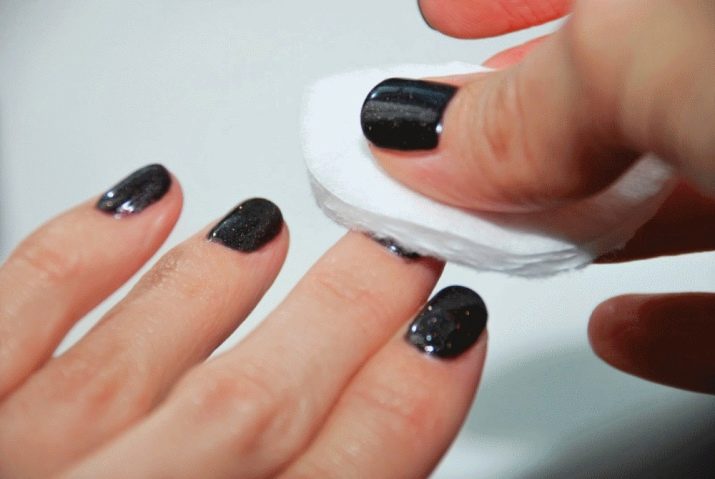
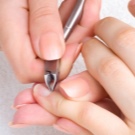
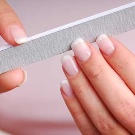
First, we put the nails in order. We remove the old coating with a liquid without acetone. We make a bath to strengthen nails and soften cuticles. We remove cuticles using the trimming method or European manicure. We give the nail plates the desired shape and length. The advantage of dots design is that such a pattern is equally suitable for everyone, without exception, and looks advantageous on all types of nails. We level the surface of the nail with a light buff. We degrease the nail plate and apply a primer.

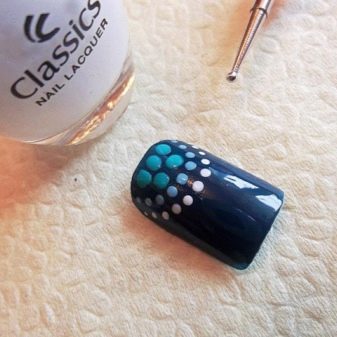
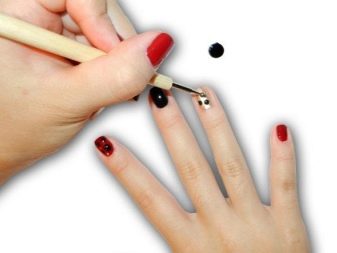
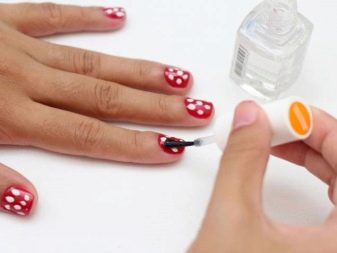
Whichever coating you choose, we must apply a transparent gel or varnish as a base for it. Dots design can be done on regular varnish. In this case, the coating will last no more than 4 days. First, we apply the main color in one or two layers, depending on the required color density. Each layer must be dried well separately. Then we lower the dots ball in a contrasting color and apply dots on the varnish surface in any order or strictly follow any shape.
After the drawing has dried, it must be secured with a transparent topcoat.
When using gel polish, the procedure will be slightly different; additional tools and application techniques will be needed.
- After the obligatory application of the base coat, dry it in a lamp for about a minute.
- Apply a layer of gel polish of the desired shade, for example, red. Dry under the lamp for three minutes. Apply a second coat if necessary and also polarize.
- To make the drawing on the gel more accurate and not spread, some recommend removing the sticky layer from the varnish before applying the pattern.
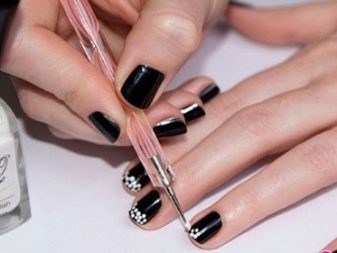
- Apply a little white and black gel polish to the palette or a piece of foil. We take dots, dip in white paint and put dots in random order over the entire surface of the nail or only in some part of it.
- We take a tool with a smaller ball, dip it in black gel polish and put a few more dots on each finger. Before each dipping in pigment, do not forget to clean the tip of the dotter with a napkin.
- We polarize in the lamp for about 5 minutes. Then be sure to cover the finish. We carefully seal the edges and end of the nail to better preserve the manicure.
- After drying in a lamp, do not forget to remove the sticky layer from the finished manicure. The current polka dot manicure is ready.
What can be replaced?
If there is no way to purchase dots, then do not worry. It can be replaced with household items with a rounded tip. The best substitute would be a regular pen with a metal ball. It should be empty, free of ink, and well cleaned. This "tool" will allow you to create small dots and neat lines with a thickness of about 0.5 mm.
A plastic or wooden toothpick with a rounded end will also come in handy. A metal hairpin for hair, which was used 20 years ago, will also be useful. They have rounded tips. To draw large circles, you will need a round-headed hairpin.
When applying a pattern with a hairpin or a fixed-head toothpick, you should press lightly on the tool so as not to damage the surface of the main coating.
Beautiful examples of manicure
Dots is the ideal assistant for creating different types of manicure from simple geometric designs to simple flower patterns and complex patterns in ethnic style. You can draw hearts, or you can decorate your nails with a ladybug. The author is limited only by fantasy. Dots work makes any process easier. They can draw straight, continuous lines and fill the space within the borders of the drawing.

We offer several effective examples of working with dots on gel polish.
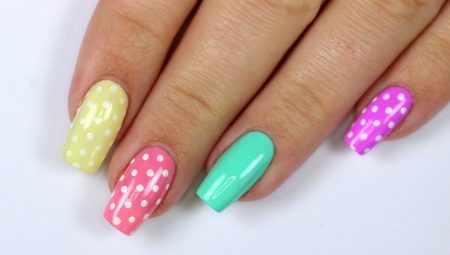
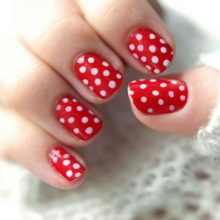
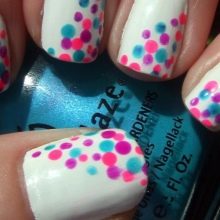
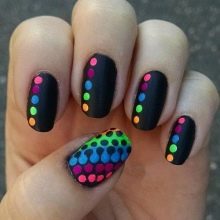
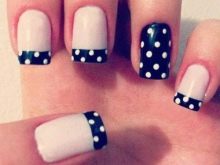
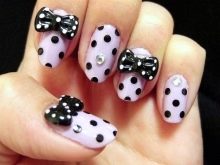
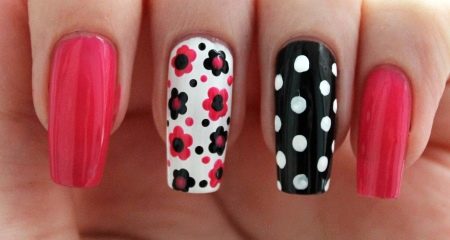
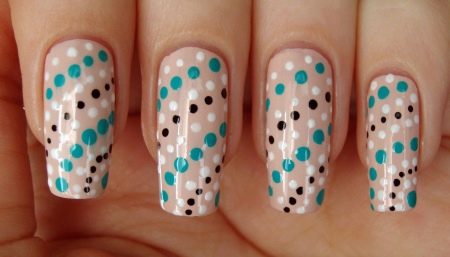
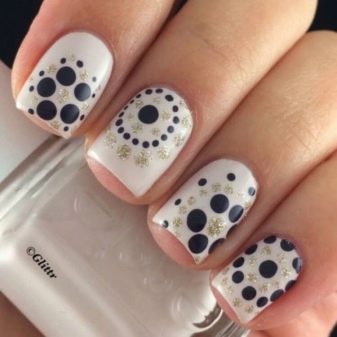
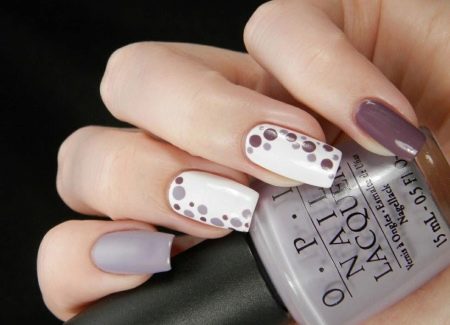
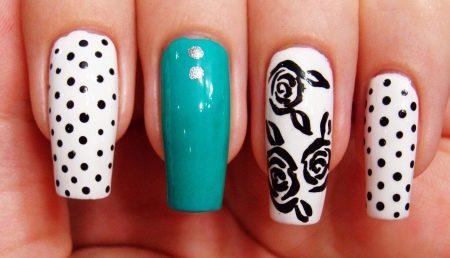
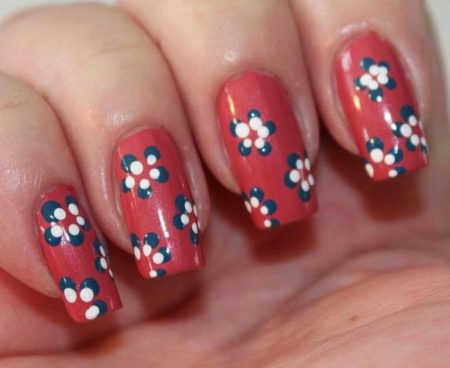
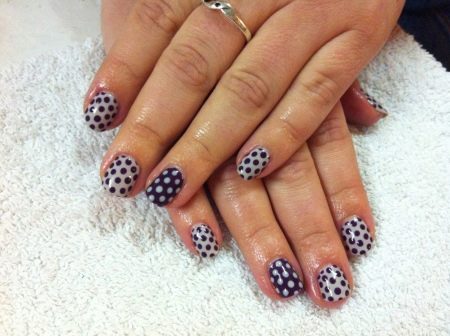
The flower and pea designs are the most popular dots designs. The colors in the classic combination of red, white and black look very impressive with all the simplicity of the pattern.
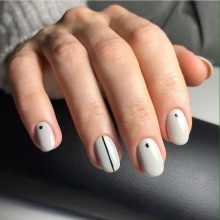
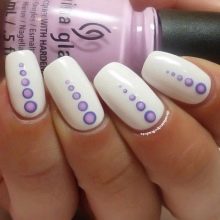
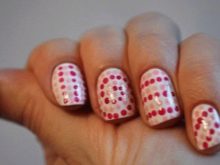
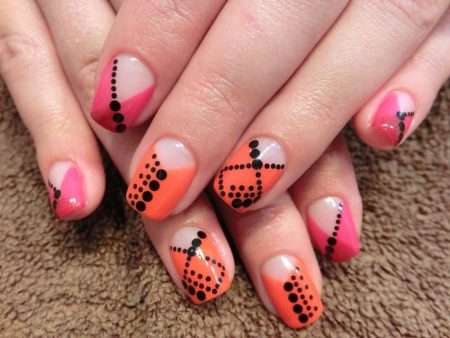
Points can be placed vertically, horizontally, diagonally, or in a circle. In this case, an original visual effect will be obtained each time.
The secret is in choosing the right color combinations.
In the popular technique, matte and glossy finishes, bright and delicate colors can be used with equal success. A pattern is made all over the marigold or on a part of it: the tip, base or side.
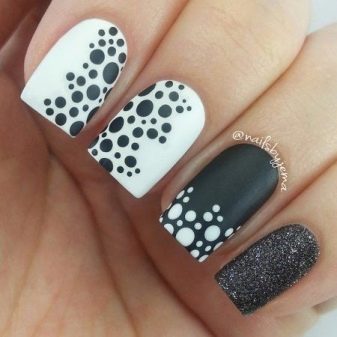
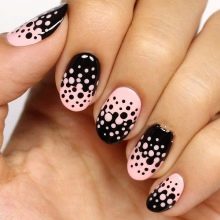
Black is the perfect base for graphic designs. Any colors look unusually advantageous on it.
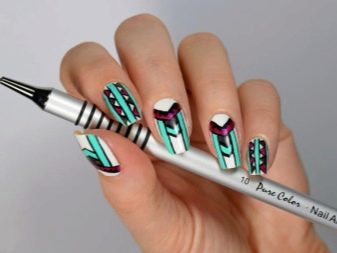
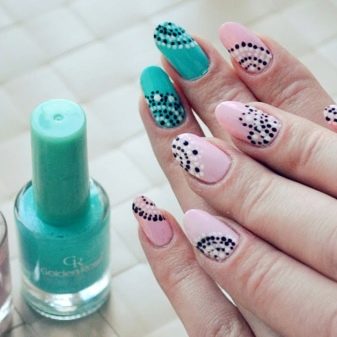
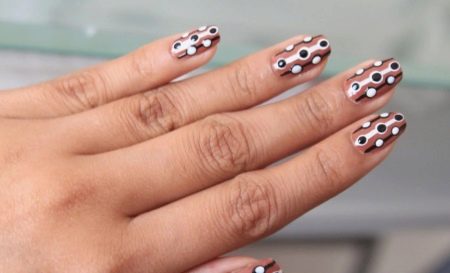
The simple clarity of the lines creates a trendy geometric pattern in a mint-peach color.

For retro manicure, choose gentle, muted, slightly “dusty” tones. It can be milky, turquoise and light beige, as in the example. Polka dots look good on any nail shape. For example, he smoothes the square and makes it more feminine.
Any popular technique can be added with dots. In this case, the moon manicure using the negative space technique is made with an original triangular design of the holes.
The black dots, built in strict order, add flavor to the uncomplicated design.
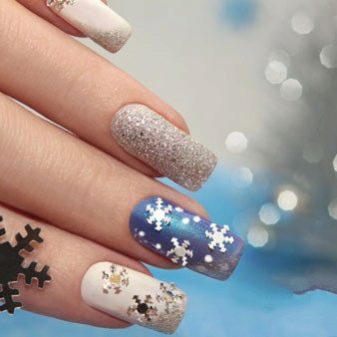
Using dots, you can create any stylized thematic decor for different seasons. Winter version of manicure with laconic dots and a silvery sheen. A pattern is formed in the form of original snowflakes. Nice and unobtrusive.
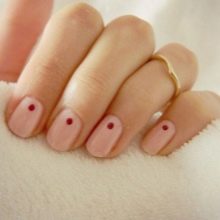
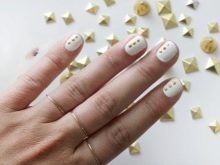
Only accent fingers can be dots.For this, the colors of the main manicure are often used in the form of dots on accent nails. It turns out a kind of tone roll call, reminiscent of the gradient coloring technique.
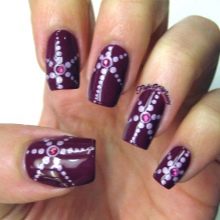
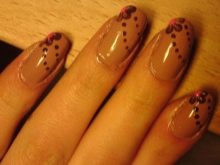
Oriental designs in Indian or Moroccan style look simply luxurious, especially against a black, creamy or chocolate background.
The most effective drawing is obtained with a minimum of effort and time.

Roses are very popular in the dots painting technique. They are often combined with polka dots or graphic circles. You can choose any color from classic combinations to fancy shades. The result is different visual effects.
Forget-me-nots bloomed on a red background. The trend is not a clear pattern in the center, but an imitation of a piece of fabric. For this, individual flowers are painted in whole, and other parts - in halves or thirds.
It looks like pieces of one piece of fabric on different nails.
With a dotter, you can create a variety of unusual images. These can be animal figures, for example. The white cat spilled milk and inherited it with black paws. And now he carefully sticks out his muzzle.
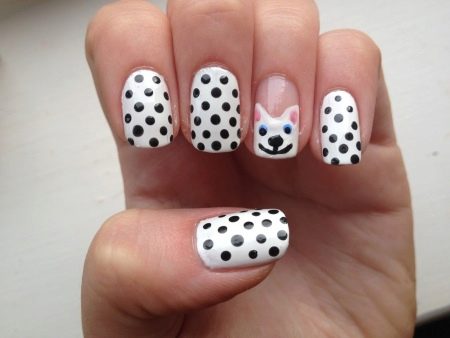
Black and white classics always look fresh.
Romantic designs are especially good for short nails.
Fashionable geometry is easily embodied in the form of straight lines and circles. One has only to choose the right shade and you are in trend.
For information on how to perform a dots manicure, see the next video.


