Tinsel Christmas trees on the wall

A tinsel Christmas tree on the wall, both with and without garlands, sometimes becomes a very good addition to the New Year's celebrations. Knowing how to make a Christmas tree with your own hands in stages according to the scheme, you can eliminate all mistakes and get an excellent product at no extra cost. It is also a good idea to familiarize yourself with basic examples of beautiful tinsel jewelry.


How to make a Christmas tree correctly?
Simple
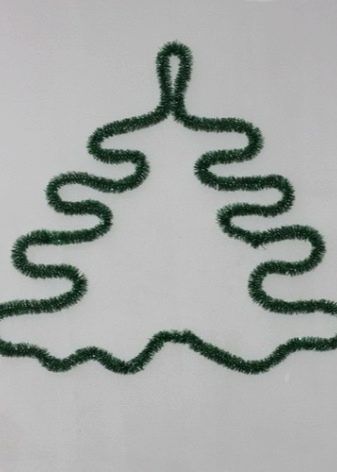
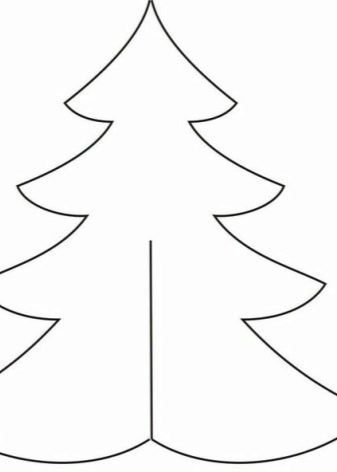
The simplest tinsel Christmas tree on the wall can be created without any problems. The tinsel itself, of course, should be green - other color options are hardly suitable. Having chosen the point of location of the structure, a plan is prepared right on the wall. Complex drawings are not needed: a sketch created with an ordinary pencil is enough. Then tinsel is fixed along this contour.
Many people fear that the wall will eventually be damaged. It is not difficult to circumvent this risk - you just need to use the pushpins. Even if they cause damage to the support, it will be relatively small. The decoration of a simple wall tree is done as the authors of the composition themselves wish. It all depends on their imagination and the materials available.

Another simple Christmas tree craft is formed on the basis of a cone. The workpiece is adjusted in such a way that it does not stagger unauthorizedly and is stably placed on the surface. Wrapping an improvised tree with tinsel comes from the top. To keep it firmly, use glue. It is very good to create such a composition from white tinsel.
It is important to increase the strength of the base. Therefore, it is more correct to create it from cardboard. It is necessary to cut the cardboard sheet with sharply sharpened scissors. If they are dull, the edges will start to shaggy, which is unlikely to please people.
The rest of the steps are quite common; do not forget about the crowning of an impromptu spruce with a curly star.


You can also consider another scheme for making a Christmas tree step by step. This option differs little from creating a garland composition. First of all, you have to create a pencil sketch on the wall. Next, use buttons, pins or small nails for fastening. Once this is done, you need to:
- take fluffy tinsel;
- fix it at the marked points;
- thoroughly fix the details;
- be careful to avoid excessive tension so that parts of the product do not tear.
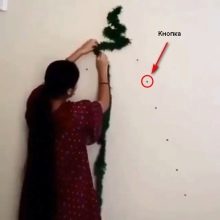


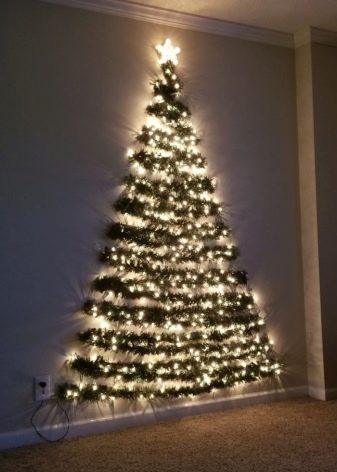
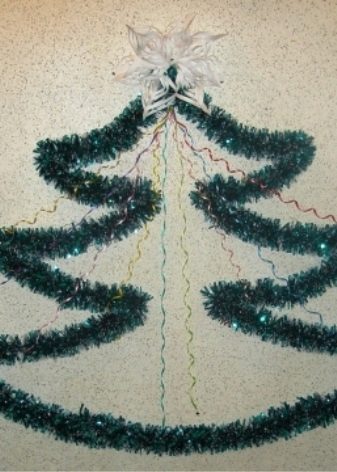
Another very attractive idea would be to hang a Christmas tree made from tinsel and garlands on the wall. The garland itself must be longer so that its supply is definitely enough. The calculation is made so that the entire contour of the figure is wrapped. Fastening is done on studs, buttons or small needles, depending on what is available. Additionally you will need:
- ruler;
- regular slate pencil;
- decorations of various types that will only please your taste.
Using a ruler and pencil, you can mark the wall to install the future Christmas tree. At this stage, you need to work very carefully and carefully. Any mistake can lead to a violation of the symmetry of the created shape. The crown, the tips of the branches, the corners and the middle of the longest segments will have to be fixed with the selected type of fastener. Then comes the time to hang the garland.

Do it from below, from either side. Gradually you need to go upstairs. The garland is immediately attached as carefully as possible. Then the time comes to bring her down. Sometimes the branches lead in a criss-cross pattern. In this case:
- start at the bottom from one side;
- raise the garland on a twig slightly higher on the other side;
- gradually go higher;
- at the top, roll the garland to the other side;
- there they operate according to the already described scheme, but only going down.

The Christmas tree is, in principle, ready on this. You can already connect the garland to a power source and admire its glow. However, it is important to take care of where the figure itself is attached to the wall. It is advisable to do this closer to an electrical outlet.
But at the same time, placing a tinsel tree in the corner is hardly reasonable - therefore, you often have to look for a compromise.
Fluffy
This version of the Christmas tree with your own hands in stages involves the use of a frame. The usual sequence is:
- draw a contour on a Whatman paper;
- cut out;
- fill the inner space with tinsel;
- decorate the tree by yourself.
The advantage of such a composition is that it can be used many times. But this is not the only option for an elegant fluffy Christmas tree. You can also lay it out according to the instructions from the snowflakes. The snowflakes themselves are made from colored paper. But the most ordinary white paper can also come in handy.

If you use sticky paper, you will be able to assemble the composition without scotch tape. As usual, a pencil line is drawn on the wall. Everything must be done strictly symmetrically. Then the entire area of the image must be covered with snowflakes. If they are made of plain (non-sticky) paper, double-sided tape is helpful; you don't need to do anything else - you should get a self-sufficient figure, and the role of tinsel is to wrap around the snowflakes, denoting the green parts.


It is also worth considering various original options for creating Christmas trees with tinsel. You should not be afraid - all such solutions are created very simply from scrap materials or regularly sold items. So, sometimes a paper cone is taken as a basis. It is wrapped in tinsel from top to bottom. Additional decorations are attached with hot glue.
You can also make a Christmas tree in various sizes out of silver or multi-colored tinsel and cardboard. The essence is the same as in the previous case. However, the increased density and stiffness of the cone turns out to be a significant advantage.Another possible type is a Christmas tree with candies. We'll have to put up with the fact that it will not remain unchanged for long - sweets are quickly disassembled.


The sweets themselves (preferably in large and catchy bright wrappers) are glued with tape. It is best to do this before wrapping with tinsel. Another option involves adding a garland to the tree. The design itself has a completely traditional shape. But its manufacture is markedly different.
You will need to take:
- brick (it will become the support of the craft);
- matches;
- wooden stick;
- newspaper;
- kitchen knife;
- cord;
- garland.
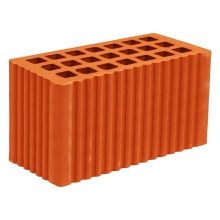


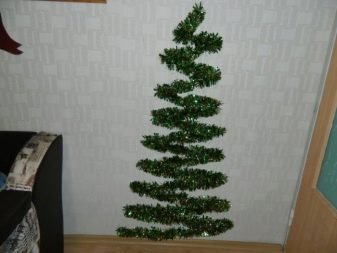
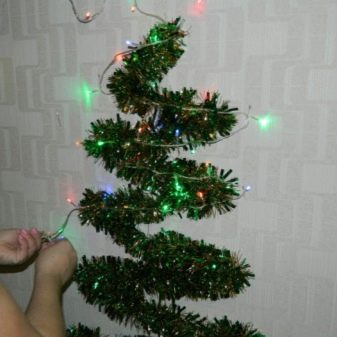
First of all, you need to roll the cord in a spiral manner. Then the stick is attached to the middle of the brick. For your information: you can also try options with other stands, the main thing is that everything is stable. At the end of the work, the assembled composition and its support are glued to the wall, but this has yet to be reached. In the meantime, the cord is straightened and a garland is thrown over it.
It is imperative to look at how much wire to leave. It will be very sad if, through an oversight, it is not possible to turn on the craft into the network. Having achieved the required shape, you need to wind the tinsel around the cord. Decorate a decorative Christmas tree, again, on their own.
But there is another solution with a similar motive, already directly calculated for fixing on the wall.

This wall tree made of garland and tinsel fully meets the requirements of the new modern design. It's pretty simple to do. Decorating methods are the same as for a "regular" tree in a tub. Begin by attaching the tinsel to the wall with tape or pins. To avoid mistakes, it is recommended to mark out all the corners of the created shape.
Pins are preferred over duct tape. All work can be done in 30 minutes. Despite the brevity, it will look amazing and will definitely create the desired mood. The product will look equally good in any room. The simplicity of such a craft allows you to build it for each room separately. And naturally, any idea can be changed and adjusted at your own discretion.

How can you decorate?
You can add tinsel Christmas tree:
- garlands with colored lights;
- paper stars;
- hanging balls and other traditional toys;
- sparkles;
- sequins;
- buttons;
- ropes, threads;
- "Rain".


Beautiful examples
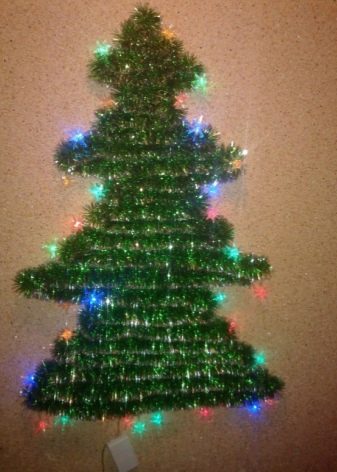
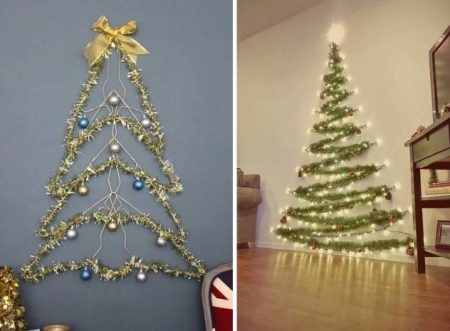
The combination of garlands and tinsel allows you to create gorgeous compositions. A Christmas tree crowned with a bow and decorated with balls will definitely allow you to tune in to a solemn mood. Green zigzags with a burning garland also turn out to be a good substitute for a natural forest beauty.
You can safely use other options:
-
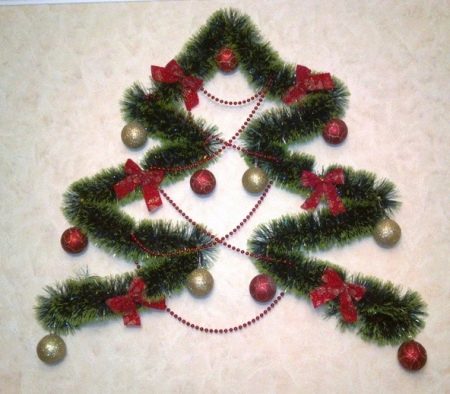
a stylized tinsel figure with bows on the turns;
-
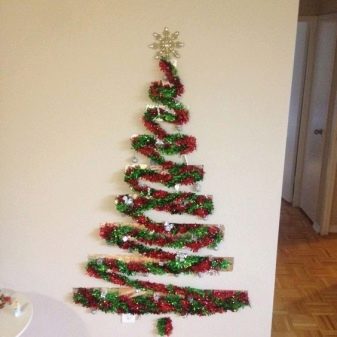
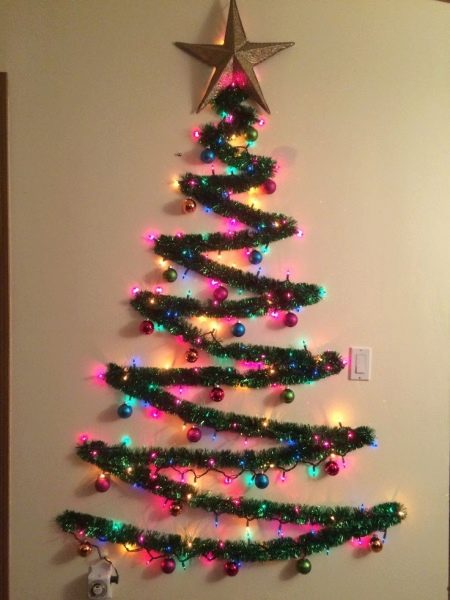
a zigzag herringbone with a star at the top;
-
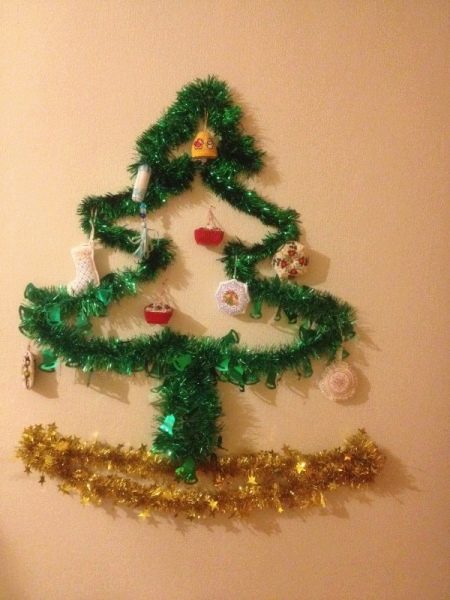
a figure with hanging decorative objects, as if placed on a light yellow support;
-
modular type - a garland from below, starting from half - a garland and tinsel;

-
a bright pink wall Christmas tree, at the top of which the star can only be guessed;

- a composition decorated with multi-colored elements inside with a powerful dense green "root".
For information on how to make a Christmas tree from tinsel on the wall with your own hands, see the next video.


