How to make origami in the shape of a turtle?
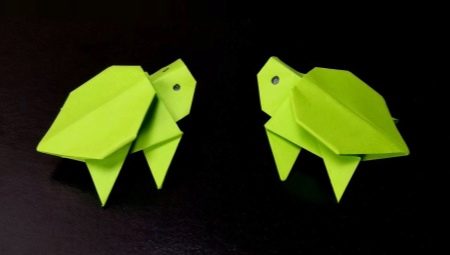
Origami crafts can be enjoyed by both adults and children. They are often used as decorative ornaments. There are many different ideas for creating such products. Today we will talk about how to make an origami turtle with your own hands.

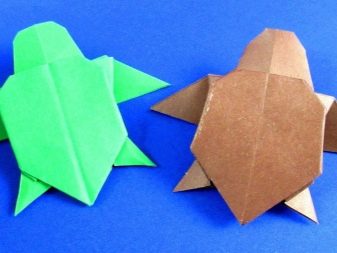
Simple options
To begin with, we will consider the simplest options for creating such a craft. The necessary materials should be prepared in advance:
- green paper;
- scissors;
- black felt-tip pen (for drawing the eyes).
A sheet of paper is placed in front of you. It should be square. It must be folded in half along the diagonal strip. The resulting triangle is placed downside down. The point on the right is raised to the top. All the same operations are repeated again on the left side.

After that, the workpiece is placed with its free part away from itself. The part on the right is folded in half from top to bottom. The right flap at the bottom folds in a diagonal line. The left side is also treated symmetrically.

The paper product is rotated 180 degrees. Using scissors, make a diagonal cut from a corner. The resulting halves are parted to the sides, repeating the previously made bends. The side sections fold inward, leaving some space for the center section.
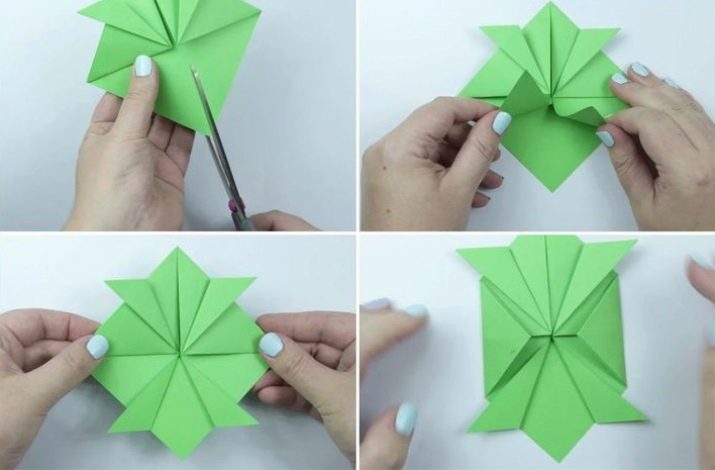
The top of such a blank is lowered. Then it is returned back to form a fold. The side flaps can be fixed with glue so that the figure does not open. You can also slightly curl the tortoise shell to make it appear more voluminous. At the end, you should draw the eyes with a black felt-tip pen or gel pen.
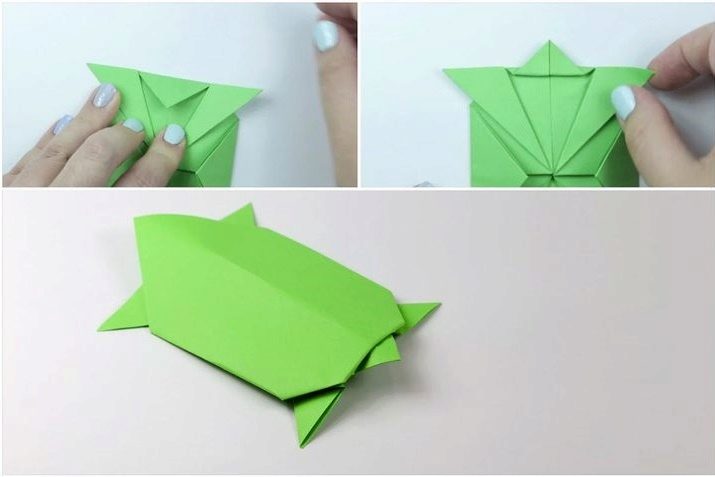
Consider another simple option for creating crafts in the form of such an animal.To begin with, you will need to take a green leaf, it is placed with the long part towards you. The material is carefully folded in half, while aligning the bottom and top edges.
The material is turned over and laid in such a way that the fold is in an upright position. The corners on top are bent towards the axis in the center. The workpiece is again put on the opposite side, the left and right parts are folded towards the center, leveling the side flaps.

All corners that will protrude beyond the base of the product should be carefully tucked. Further, the upper part is bent in half. The extreme point returns to its original state, while it is necessary to make a fold approximately in the middle of the new shape.

The corners from the bottom must be crushed, trimming them along the diagonal line and the central axis. They are then turned to the sides. They will serve as the paws of the animal. At the end, the figure is turned over.
If you wish, you can decorate the finished turtle with additional decorative details.


You can also make a 3D origami turtle shape. To do this, take single-sided paper, in which only one side is green and the other is white. The base should be square. You should start from the wrong side.
The material folds in half. The fold opens. The bottom edge is brought to the axis in the middle. These steps are also repeated with the upper part. The standard "door" shape will be ready.
The product will need to be rotated 90 degrees. It is divided into four parts in the opposite direction. The resulting folds are neatly opened. The material is bent along the diagonal line in two directions at once.

The corners are compressed so that, as a result, diagonal kinks are formed. Moreover, the product must acquire volume. The sides are flattened slightly with your fingers to create a double triangle.

A finger is then placed between the first and second layers of the blank. There should be a slight crease in the middle. You will need to lift the bottom edge of the workpiece and align with it.
Holding the top layer with your finger, the lower corner on the right is lowered, while it must be aligned with the base of the product. Similar operations are carried out with the left side. After that, the material is turned over, all actions are repeated anew.

Next, the third and second layers of the product are pushed apart with the thumb on the left. Due to the reverse fold, you will need to bring the lower side inward. We do the same with the right side.

The top half of the blank will have six layers. After that, two triangles are taken (from the upper and lower layers). A small diagonal fold is formed on each of them.

The first layer is carefully lowered, and the second is folded in half. The same actions are carried out with the other side. Next, you need to reveal the resulting figure, giving it a little volume. The layers should also be slightly opened. With the help of paints and felt-tip pens, it will be possible to draw the eyes of a turtle, as well as make a characteristic pattern on the shell.
This option can be suitable for children and beginners.


Assembly diagram from a bill
Now we will look at how you can easily assemble an origami turtle craft from a banknote. In this case, you need to prepare a bill. It must be new and intact for the product to look neat and beautiful.

Next, the banknote is folded in half lengthwise. The free edge is placed towards itself. The material is opened to its original position. Then the right corner at the bottom is bent at 90 degrees. The valve must be aligned with the center strip. All the same operations are repeated with the left side.

After that, the folds made earlier are opened. As a result, two even X-shaped folds emerge on either side of the vertical axis. Then folds are made that go through the middle of each such cross.

All the steps made are repeated with the right side of the workpiece. The corners on the left and right are folded. This will make the shell look like a hexagonal shape. The central valves inside are bent at an angle - they will become the legs of the animal.

The figure is turned over, its stability is checked. If necessary, it will be possible to slightly trim the legs of the animal. Next, they begin to create the head. One of the corners is folded back into the inside of the paper product, then it is returned back, forming a small fold.

Creation of modular origami
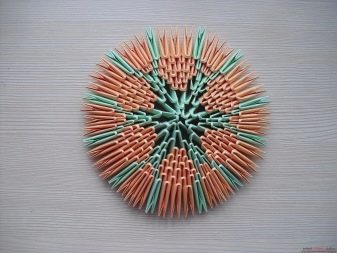
Next, we will look at detailed instructions on how to create origami in the shape of a turtle from modules. You will first need to prepare triangular modules. There are 288 green parts and 228 yellow parts to be produced.
After that, you can start making the shell. The first two tiers will be made from six green triangular blanks. Level 3 is made from 12 parts. Modules of the third level are put on all corners of the second strip.


To form 4 tiers, 12 yellow and 6 green parts are used. In this case, all pairs of yellow colors will have to occupy one place. During the manufacture of the fifth level, three yellow and two green elements alternate. There should be 18 yellow and 12 green parts in total.


The sixth strip is done without additions. In this case, the modules alternate as follows: four yellow and one green.
In total, there should be 24 and 6 of them.


When forming the seventh row, take 5 yellow, 2 green modules. Moreover, their total number is increasing (30 and 12). In rows 8-11, there should be 36 and 12 modules, level 12 will already consist of 48 green elements. The shell will be ready. Then you can start making the turtle head.



For this, the first and second levels are formed from 6 green parts. They are carefully turned inside out. 3-5 tiers are made of 12 elements of the same color, the result is a head.


Next, you will need to determine the place for the tail and legs. All legs will be assembled using the same algorithm. Modules from the first level (3 parts) will be inserted into the empty areas between the elements of the last tier of the shell. All rows are made from 3-4 green blanks.


To make the turtle's tail, lay out the first row of two parts, the second row is made of 3 blanks, the third is made of two and the fourth is made of one. At the final stage, you can start assembling all the parts into one product. It is better to glue the head to the shell with PVA glue.


For information on how you can make origami in the form of a turtle with a heart, see the next video.


