Making a garrison cap using origami technique

Convenient paper caps can not only become an original decoration, but also protect your head from the scorching sun rays. This craft option is suitable for both adults and children.
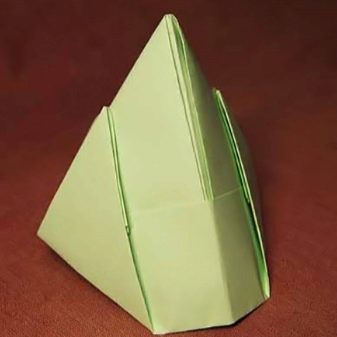
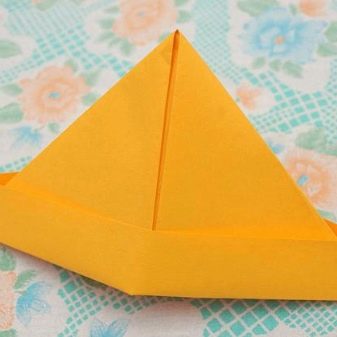


How do I fold the British version?
Now there are several basic patterns of caps using the origami technique. All of them are similar to each other and differ from each other only in small details.
For the first time, it was the British who began to make paper caps. When creating such crafts, they focused on the headdresses of the national air force. They are distinguished by high sides that can be easily folded back and, if necessary, can easily cover the ears.

The paper version of such a garrison cap is not so versatile. But outwardly, the hat looks almost the same as its prototype.
The scheme for creating such a craft is quite simple. Therefore, even a child can make a stylish headdress for himself.
-
First, fold a sheet of paper in half. The workpiece must be turned with its free edge towards you. It must be neat.
-
Next, on this workpiece, you need to outline three even folds.
-
The edges of the upper fold must be folded towards the center.
-
The bottom layer must be carefully tucked up. The workpiece must be turned over immediately.
-
After that, you need to bend the sides.
-
The free bottom edge should be tucked up and then tucked in, forming a neat headdress.
Having opened the cap, you can immediately put it on your head.
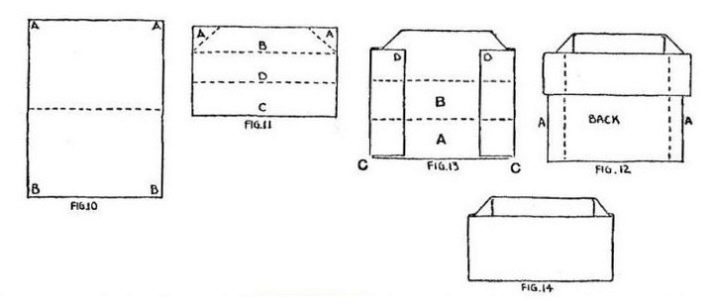
There is also a second option for creating such hats. It is even simpler.
-
The sheet must be bent in half. The upper corners must be folded immediately.
-
A small part of the bottom sheet must be lifted up.
-
Turn the product over, and fold its sides, aligning along the edges of the sheet.
-
Further, the lower strips also rise. The cap must be trimmed immediately.
You can make such a headdress either from paper or from an ordinary newspaper.

Making the Gandhi hat
The Indian leader, who ruled at the beginning of the twentieth century, wore a comfortable white cap, which in its appearance resembled a classic garrison cap. This headdress once became a symbol of the struggle for freedom. You can try to make such an accessory now.
The scheme of a convenient garrison cap looks very simple. Therefore, a beginner can repeat it.
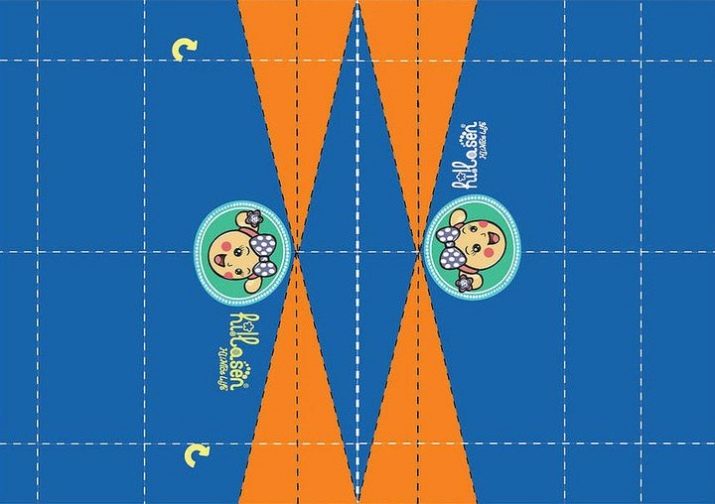
The most convenient way is to print the finished workpiece.
-
The first step is to fold a large sheet of paper in half and open it immediately.
-
You need to step back a little from the central part and make a few bends. You need to fold each of the triangles marked on the paper. The middle of each triangle should be folded inward.

- After that, the side edges from the outside must be carefully folded. The product must be turned over.
- On the basis of the craft, you need to outline the places of the folds, folding the craft with an accordion along the outlined lines. Next, the product needs to be deployed.
- The side edges of the sheet must also be folded inward.
- The upper part of the sheet must be lifted up, bending it several times with an accordion.

- The craft needs to be turned over. The same must be done on the other side.
- The edges of the cap must be fixed with glue.
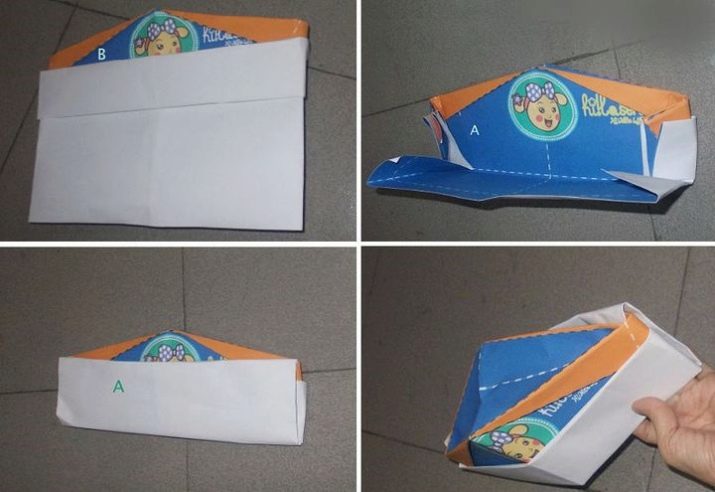
The finished headdress must be carefully unfolded. It turns out to be voluminous and neat.

How to make other caps?
There are other convenient step-by-step schemes for creating beautiful hats.
Military
A simple soldier's cap can be used to decorate a gift for February 23 or to create a thematic image.
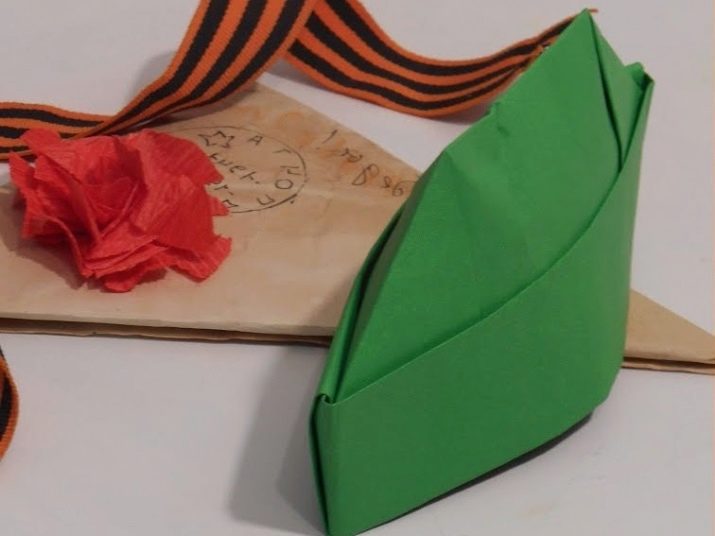
A bright headdress made of green paper with a red star is made as follows.
-
To begin with, a rectangular A4 sheet of paper must be folded in half twice.
-
The upper side corners need to be bent to the center line.
-
The edge of the top layer must be lifted up. After that, the workpiece needs to be turned, and the same is done with the back of the product.
-
The corners protruding beyond the edge of the triangle must be carefully tucked into the base of the figure.
-
Next, the workpiece must be turned over. The protruding corners at this stage are bent inward.
-
The triangle must be carefully straightened. Next, you need to fold it in the form of a diamond.
-
The lower part of the top layer of the sheet must be carefully lifted up.
-
The same must be done with the second side of the workpiece.
-
Next, the resulting craft must be carefully straightened.

You can decorate the garrison cap made using this technique with an ordinary red star. It also needs to be cut out of double-sided paper.


The volumetric star made using the origami technique also looks interesting. Folding such a figure takes very little time. Step-by-step instructions for creating crafts are as follows.
-
Cut a long strip from a sheet of red paper.
-
Next, the paper tape must be tied with a knot. Its edges must be carefully smoothed.
-
The upper end of the tape must be hidden in the resulting pocket.
-
Next, the workpiece must be turned over and fixed with glue. All unnecessary must be cut off.
-
After that, you can start creating a small star.
-
All rays of the star must be carefully stroked. In this case, they will turn out to be smooth.

This part is glued to paper using ordinary glue or double-sided tape. The star can be fixed both from the top and to the front of the workpiece.
In the next video, you can see another option for making a volumetric star.
A similar accessory can be made from a regular newspaper.... When the cap is ready, all that remains is to paint it with green paint. You need to apply gouache in several layers. There should be no translucent letters on the paper. After finishing with staining, the workpiece must be dried well. After that, you can draw or glue a scarlet star on the side.
This option is suitable even for preschoolers.Any child can make a headdress for a lesson or an exhibition.
Pirate
You can also make a stylish pirate hat with your own hands.

A headdress can even be made from an ordinary newspaper.
-
First you need to find a newspaper spread of the right size. The material should be fairly dense. Instead of newspaper pages, you can use magazine pages.
-
The resulting spread must be folded in half.
-
The left corner must be bent down. It should go slightly beyond the middle of the workpiece.
-
The second corner is folded in the same way. It should neatly overlap the left one.
-
The junction of the two corners must be securely fixed with tape.
-
Next, the lower part of the cap must be carefully tucked two times.
-
Having turned the workpiece over, the procedure must be repeated.
-
The resulting hat must be opened by straightening its edges. They can also be additionally fixed with tape.


Such a headdress will be an excellent addition to the image of a young pirate.

If desired, it can be painted, as well as decorated with some thematic details.

Pionerskaya
This unusual headdress resembles the garrison caps previously worn by the pioneers.

It is best to make it from red paper.
-
A standard A4 sheet of paper must be folded in half.
-
Further, from the top of the workpiece, you need to bend a small strip. It must be ironed thoroughly.
-
The upper corners need to be bent towards the middle. At the same time, a thin strip should remain at the bottom.
-
The front of the sheet must be gently lifted up. The same must be done with the back.
-
The lower corners must be hidden by bending inward.
- Further, large corners also need to be bent, slightly lifting. You will get a neat pentagon.
- The upper part of this figure must be lowered, hiding the corner behind the strip.

Further, the cap can only be straightened and used for its intended purpose.

Any of these caps can be made with your baby or with children in kindergarten.

In addition, these hats can be used to protect the head while working on the site or at home.


