How to fold a dinosaur using origami technique?

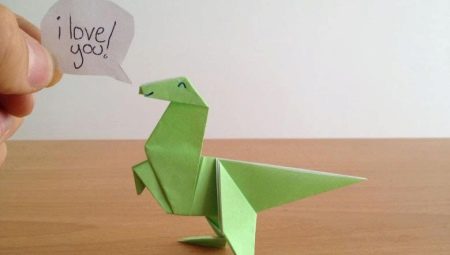
Dinosaurs are interesting to almost all children. Their impressive appearance and size, time and habitat are so different from what we are used to that it is difficult to imagine. That is why all kinds of films, cartoons and books with this topic are so popular. Dinosaur figurines do not have to be bought in the store, because you can make them out of paper with your own hands, following the step-by-step origami diagrams.


Option for children
So that novice lovers of paper crafts do not lose their enthusiasm, it is better to start with simple options, the creation of which does not take a lot of time. For example, you can make a giant herbivorous dinosaur with a long neck, with which it feeds on leaves from trees. The instructions are pretty simple:
- cut a square out of paper, bend it diagonally, then fold each half in half from one corner;
- fold the workpiece in half, put the short side down;
- bend the upper corner to the right, unbend and turn in the opposite direction;
- continuing to work with the same part, bend the corner to the left and jam its tip inward;
- bend the lower corner to the left, bend back, forming a fold, then unfold and jam along the first fold inward;
- in the resulting figure, cut out a part near the neck, marking the back and a square between the legs.
The dinosaur can be made from colored paper or painted, eyes, nose and mouth can be drawn.

Flying dinosaurs look no less impressive. The diagram of one of them, the pterosaur, is a little more complicated than the one described above:
- fold a square sheet, first along one diagonal, and then along the second;
- put the triangle with a fold away from you and wrap the side corners to the bottom, aligning the joint in the middle;
- turn over, bend the adjacent sides of the upper corner to the center and straighten the side parts from the back side;
- fold the right and left sides of the bottom in half from one corner;
- turn over and wrap them in the same way as on the other side;
- bend the upper corner down a third, and then bend it up so that a warehouse is formed, turn it over, bend up the inner corners of the lower part of the wings.
Another advantage of paper crafts is that they can be decorated (painted, pasted, etc.).
Scientists still do not reliably know what color the dinosaurs were, so when painting them, you can show your imagination: draw colored spots and stripes.


Folding the stegosaurus
Stegosaurus is remembered by absolutely everyone thanks to the sharp plates on the back and tail: they served as an excellent defense against predators. And it is precisely these details that complicate the work, require thoughtfulness, precision and accuracy. In order not to get confused, you need to take a larger sheet as a basis: this will make all the folds easier to see. If you follow a phased scheme, there should be no difficulties:
- take a square, fold it diagonally from corner to corner, unfold and repeat the same with other corners;
- then fold it in half lengthwise and bend the opposite edges to the midline;
- bend all four corners to the middle, then unfold and flatten down, getting two kind of rhombuses on the workpiece;
- bend each of the adjacent sides of the vertex facing the center of the future figure up, aligning in the middle;
- turn over, bend and unfold the side corners again, getting noticeable folds on both sides;
- we incline each corner to the far fold, unbend, then additionally bring it together in the center of the paper blank and get three more additional folds (all of them are needed as a guide);
- turn over to the opposite side, the first folds from the center alternately bend to the middle so that shallow folds are obtained;
- turn the workpiece over, wrap the corners at the folds, joining them in the middle, repeat the same on the other side;
- bend the corners, bending the resulting top towards the center, flatten them;
- turn off the upper left side of the workpiece (the fold should go from the center of the rhombus to the side corner);
- we work with the same part: we turn the inner fold in the opposite direction and make a fold, combining its corners;
- we smooth everything well and do similar actions from the three remaining sides;
- fold the workpiece in half lengthwise;
- in the resulting figure, bend the inner parts of the legs and bring them inward;
- bend the left corner towards the body and bend it back, forming a fold, and then bend the upper part, making it more beveled;
- bend the ends of the legs to make them more voluminous.
We straighten the resulting figure, align, decorate and add volume.


How to make a modular dinosaur?
One of the directions of origami allows you to collect magnificent crafts from small modules that interlock in a special way. Such a dinosaur figurine will look amazingly believable.... In addition, this technique allows you to use parts of different colors in one craft. The standard paper size for their manufacture is A4 sheet, divided into 16 parts, but you can take larger ones if you observe the proportions.

First you need to master the folding scheme of the modules themselves. It is extremely simple:
- fold a rectangular leaf in half lengthwise, and then again across;
- bend the side cuts down, aligning them parallel to each other in the middle;
- turn over, bend both lower corners up;
- wrap the bottom half over the top and fold in half.
These details are universal, therefore, if desired, it is easy to construct any three-dimensional figure from them, you just need to practice. To assemble a herbivorous dinosaur from them, you need to make 1337 parts of the same color (all shades of green or brown are suitable) and 16 parts of white or gray.

The assembly workshop begins with the torso and tail:
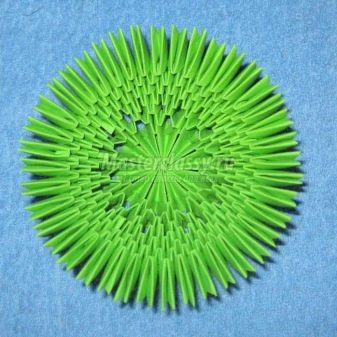
- connect 10 parts in a circle, the second row will be the same;
- turn out and put on another 10 for the third circle;
- the fourth and fifth rows are 20 parts each (first, each module is put on one corner of the lower one, in the next row they are located as usual);
- from the sixth row, 40 parts will already be required (the assembly principle is the same as in the previous paragraph);
- in the fifteenth row there will be 35 of them (you must skip 5 places at the same distance from each other);
- continue assembly up to 23 rows, subtracting every third of them by 5 parts (from 18 rows - 30 pieces, from 21 - 25 pieces);
- in the 24th row, you need to put on 15 parts and subtract each row by one part, skipping two adjacent corners of the previous circle;
- thus, in the 36th row, three colored parts should remain, and up to the 46th row, they should be alternated with two;
- then, up to row 56, you need to alternate two parts with one;
- 8 modules put on top of each other complete the tail.
Then you should collect the legs of the dinosaur, which are constructed in rows in one line. For the rear, you first need to dial 5 parts, and then alternate 6 and 7 parts until the seventh row (in which there should be 5 of them). Up to the 10th row, their number decreases (4, 3 and 2, respectively). In the 11th row you need to put on 3 pieces, in the 12th - 2 pieces, and in the 13th - 3 pieces.
For the front leg, we collect five rows, alternating 4 and 5 parts, and then seven rows of 3 and 2 parts. These parts are paired, so it is necessary to prepare the second back and front legs in the same way.


It remains to collect the neck and head according to the same principle:
- dial 6 colored parts and increase the fifth row by one;
- in the sixth there should be 9 of them;
- from the 7th to the 10th row, the parts will go in a circle (16 pcs.);
- then two circles of 14 pcs. and two more 10 each (subtract on one side);
- then there are semicircles: in the 15th, 16th and 17th rows there should be 8,7 and 5 parts each (set along the front of the neck);
- from 19 to 32, they alternate in 4 and 3 pieces;
- and from 33 to 42 - 2 and 3 pcs.;
- dialing 44 row, turn the neck over and put on 3 more parts;
- from 45 to 49 we alternate 4 and 5 pieces;
- in the 50th row we put on 3 parts and in the 51st - 2 parts.
We fix the neck and legs well in place with glue. We put on 4 white claws on each paw and glue the eyes. If the design is not stable enough, you can use skewers painted in the desired color.


For information on how to make a dinosaur using origami technique, see the next video.


