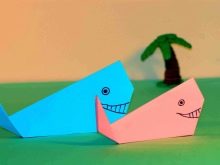
Origami ideas for kids 4-5 years old

Origami is a popular form of creativity that captivates both adults and children. A child can learn to fold original figures from plain paper at a very early age.


Peculiarities
Doing origami at the age of 4-5 years is not only interesting, but also useful. This type of creativity develops accuracy, fine motor skills and even memory. In addition, it is believed that working with geometric shapes will help the kid to better understand mathematics in the future, because he learns to handle triangles, squares and rectangles.


This type of creativity has other advantages as well.
- No additional tools are needed to work. The process uses only plain paper. It can be both one-sided and two-sided.
- Beautiful figurines can be made both independently and together with parents. This is a great way to enjoy your time with your family.
- Working with paper crafts allows you to develop perseverance, as well as the ability to bring any business started to the end.
So that the child does not lose interest in this type of creativity, it is worth choosing simple schemes for him. It is very easy to do this, because the choice of various ideas and step-by-step instructions is now large.


Creation of animals and birds
First of all, the kid usually learns to create figurines of various birds and animals. This allows him not only to develop fine motor skills, but also to study the world around him.
Cat
One of the most popular animals is the cat. To create a figurine of a cute cat, you can use beige, brown or orange paper. It is done as follows:
- an even square sheet of paper must be folded in half, carefully trimming the edges;
- further, the lower corners must be bent up;
- the resulting figure must be rotated, all lines must be carefully aligned;
- after that, the central corner must be bent back.
The front of the resulting figure must be carefully painted, drawing the cat's eyes, whiskers and nose.

Fox
A fox made of double-sided colored paper will also look cute and cute. A three-dimensional figurine depicting this cunning animal is very simple to do.
- A large square sheet is used to create a craft. It is best to use thick, double-sided material.
- The paper needs to be folded diagonally and then unfold. After that, the sheet must be bent again. But this time, other corners are connected. It is important to keep your figure straight.
- The corners of the resulting triangle must be brought to its central edge. The figurine will turn out to be square.
- Then it must be folded in half again. One edge of the triangle must be taken to the side.
- The middle part of the figure must be carefully separated from the outer ones and folded towards the middle of the craft. You will get a neat animal face.
- The opposite corner of the triangle should also be folded, forming a neat tail. It shouldn't be too long. Otherwise, the chanterelle itself will turn out to be very small.
Then it remains only to paint the animal's face with markers or felt-tip pens.

Dog
A kid who goes to kindergarten can try to make a cute dog with his own hands. The instructions for creating it are very simple.
- First, fold the square sheet diagonally. The corners must be connected together.
- Next, the edges of the resulting triangle must be carefully bent, creating beautiful ears.
- The bottom corner of the triangle must be folded up.
The finished figurine, if desired, can be neatly decorated with black spots, depicting eyes and nose on the face.

Crow
A bright and cute crow can be made from both dark paper and yellow or even pink. If it is difficult for a child to cope with the creation of such a figure, one of the adults can always help him.
- To begin with, an even square must be bent in half and immediately unbent.
- Long corners on both sides must be folded.
- Next, the upper part of the craft needs to be bent towards the middle.
- Part of this corner must be raised.
- The beak must be lowered. It will turn out to be voluminous, and the bird will be realistic.
- The lower part of the sheet must be folded back. After that, you need to form a small tail.
You can decorate the craft with eyes purchased in the store for creativity. The craft will look beautiful on a twig decorated with felt leaves.


How to make fruit?
Kids can make a beautiful bunch of bananas out of colored paper.
- You also need to craft from a square sheet of paper. It must be folded in half.
- The upper corner of the triangle must be carefully folded.
- The edge protruding beyond the line should be folded back. As a result, an even triangle should remain in the hands.
- Further, its individual parts must be folded one by one. You will get three bananas connected by one tail.
The craft turns out to be quite interesting and unusual.


Having learned how to make bananas out of paper, you can make a bright pineapple from the remnants of yellow material. The craft creation process is described below.
- A flat square sheet must be bent in half, and then unfold back.
- The side edges need to be folded neatly. You will get a shape with a long sharp angle.
- The sides of the upper triangle must be bent towards the center.
- The lower sharp corner must be bent up.
- Upper - cut carefully with scissors. The resulting ponytails must be bent to the sides, and then crossed. The top edges should be gently lifted.
The finished pineapple can be additionally colored with a felt-tip pen, drawing scales on it.

These fruits can be used to decorate summer cards or gifts. They look bright and colorful.
What else can be folded?
There are other simple origami schemes for children 4-5 years old. Among the proposed options, both boys and girls will be able to find something interesting for themselves.

Tulip
Delicate spring flower can be a great gift for mom or grandmother. Such a figurine is made from paper of red and green colors.
- First, a double-sided sheet of red paper needs to be carefully folded diagonally.
- Next, the corners must be raised, and the lower tip of the flower must be bent.
- You need to make a green stem from green paper. For this, a square sheet is used. Its corners must be carefully bent towards the center.
- The resulting figure must be bent in half.
- The lower part of the stem must be bent up.
- Next, the bud and stem should be connected together. For reliability, they can even be glued together.
Such a voluminous figure can be used to decorate a postcard.

Hat
From one-sided colored paper, you can make a pretty hat. It can be small or large. To create such a craft, a sheet of A4 paper is suitable.
- The sheet must be carefully bent in half.
- Further, its upper corners need to be bent to the middle.
- The edges must be ironed gently.
- The lower strips on both sides must be bent upward.
- Next, the workpiece must be opened from the inside. As a result, the hat turns out to be voluminous.
You can wear it yourself in the summer or use it to decorate some paper figures. To prevent the hat from falling off, you can attach a string to its edges.


Airplane
Children who are fond of origami should learn how to make beautiful airplanes, because this is one of the most popular crafts in this technique. The step-by-step instructions for creating such figures look very simple.
- First, a regular sheet of paper needs to be folded in half, and then straightened.
- The upper corners of the sheet must be bent, forming a small triangle.
- Next, it must be carefully bent inward.
- The corners of the sheet are bent to the middle a second time.
- Next, all the lines must be carefully ironed.
- The edge of the paper that looks out from behind the triangle must be carefully folded back.
- The sheet must be folded in half again. After that, it remains only to bend the wings of the aircraft and level the figure.
The finished airplane can be used immediately as a toy. He flies very well.


Bookmark
One of the most practical crafts is the origami corner bookmark. It is made of double-sided colored paper.
- First, fold an even square of paper in half, forming a neat triangle.
- The side edges need to be folded up and then folded back. Fold lines should be clear and straight.
- Next, the figure must be turned over.
- The top corner of the triangle must be gently bent towards its base.
- Its lateral edges also need to be led to the middle. It turns out a convenient pocket, which is very easy to attach to the pages of the book.
These bookmarks are universal. They can be used for both textbooks and fiction books. The base of such a bookmark can be colored in any way you like.


Father Frost
Preparing for the New Year holidays, you can teach your child how to make beautiful themed figurines. One of the most popular options is Santa Claus.
- Cut an even rectangle from an ordinary sheet of one-sided colored paper.
- It needs to be folded in half, unbent and bent again.
- Bend the edges to the center of the craft.
- The sharp edge must be lifted gently. The tip of this ponytail should line up with the top of the triangle.
- Next, the resulting shape must be rotated. Its edges must be leveled.
- Bend the top edge of the triangle towards the bottom of the shape. Next, you need to gently bend a thin strip.
- The side edges of the figure should be folded back.
Further, the image of a little Santa Claus should be supplemented with small dark eyes. The character turns out to be pretty cute. A similar craft can be used to decorate a gift or as a Christmas tree decoration.


Do not be upset if the child does not succeed in something the first time.Parents or other adults can always help him with his work.
For origami ideas for kids, see the next video.


