Making origami paper for beginners

Origami is rightfully considered a universal hobby, because you can come to it "from scratch" at any age and with any level of development of artistic skills. It is not always possible to enter origami successfully - the very first MK causes a bunch of questions and annoyance, why everything works out on the video, but I don't. Perhaps a difficult master class was chosen, and, most likely, they began to study "from a running start." You need to follow the principle from simple to complex, and learn origami for your own pleasure.

Basic basic forms
By the way, there are also a lot of them, as you master each subsequent one will be easier.
Description of basic forms - how to make them.
-
Triangle... It couldn't be easier: the square is in a rhombus, the bottom corner rises to the top, everything is ready.

- Book... It's also simple - fold the square in half, here's a book.

- Door... First you need to make a book, open it - there will be a line in the middle. Further, on both sides, the edges are bent so that the sides on this line come together. Since it will look like a wardrobe with two doors, the instructions may not contain a "door", but a "wardrobe".

- Kite... The square needs to be turned sideways so that it becomes a diamond. It must be bent in half, a line is formed in the middle. The tops of the right and left sides should be bent towards the center line. Connect. This form is sometimes referred to as "ice cream".

- Pancake... The square sheet is bent in half diagonally, you need to find the center point. Further, each corner is bent towards the middle, you get a smaller square. But it looks like it's no longer a pancake, but an envelope.

- Double triangle. The square is bent diagonally, first in one direction, and then in the other. And it unbends. This will leave lines.You need to bend in half, unfold. The side triangles must be bent inward, folding them in half - they will be between the top and bottom of the square.

- Double house. Bend the square in half from top to bottom, then fold it in half, connecting the two sides, and then straighten it (a line will remain). The sides are bent towards the center, a line will remain in the middle. The right extreme quarter opens, the upper right corner folds to the middle right line - it will be triangular (you can call it a roof). The leaf is straightened on the front side. The same is repeated on the other side.

- A fish... It starts with a kite, the figure is turned face down. It must be folded in half, the upper and lower points will be connected, the figure is turned over. The corner of the right "pocket" rises, it should be on a dais. It's the same with the other side. You will get a short version of the fish, but that's not all. It is necessary to lift the bottom corner up, turn it over to the other side with the legs - and now it's done.

- Double square... The square folds in half twice: first from top to bottom, then straightens, then from right to left. Everything is straightened out. The same is duplicated diagonally. You will get four squares with a diagonal in the middle. They can be folded inward so that all the diagonals converge in the center. The figure expands to indicate a diamond.

For a start, this is enough, especially if you have to do the simplest step-by-step schemes.
By the way, if suddenly someone has a question how to make a square (well, what if), then a regular A4 sheet must be folded in a triangle: pull the upper corner down to fold it along the opposite edge. The strip that remains below is cut off, and the unfolded triangle will be the square.
How to make birds?
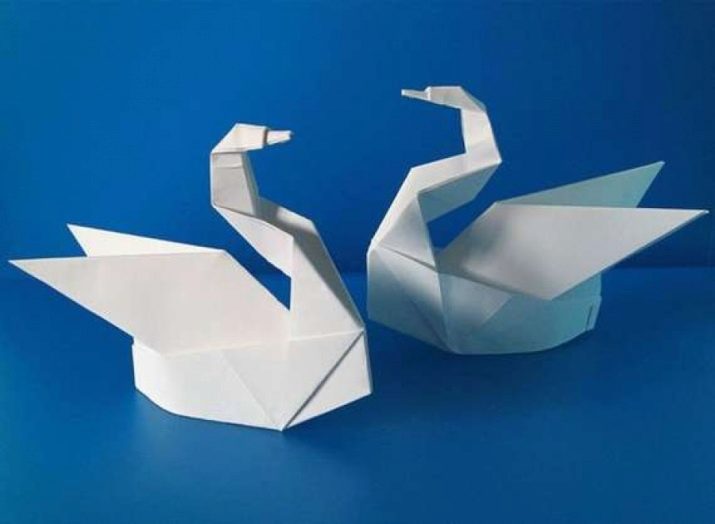
A simple, quite feasible task for beginners will be the addition of a swan using the origami technique.
How to make a swan is a clear diagram.
-
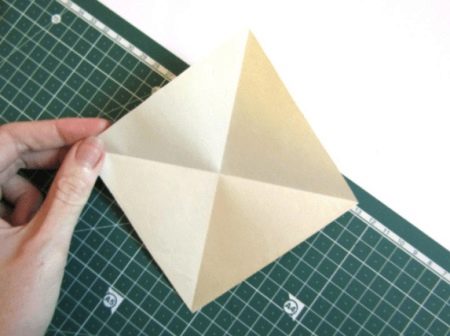
Bend a square sheet diagonally, then unfold it. There will be a fold trace in the middle, which will divide the square into triangles.
-
Bend the corners of the right and left edges towards the center.
-
Turn the leaf over, repeat the same on the other side - the left and right edges are bent to the midline.
-
Bend the resulting model in half. It is necessary that the upper edge is in contact with the opposite corner.
-
The tip is bent by a third (at the junction of the folded sides).
-
The model folds in half along the center created at the very beginning.
-
You need to look at the figure from the side, raise the swan's neck.
-
Bend the tip, you get a head with a sharp beak.


You can draw the eyes, or you can leave the figure just white.

If you want to do something more difficult, and at the same time repeat the classic craft, you need to take up the crane. This is one of the most recognizable origami pieces.
A beautiful crane for children and adults.
-
Fold the square in half by connecting the top and bottom corners.
-
Connect the opposite corners of the triangle.
-
Open the upper pocket, "crush" until you get a square.
-
Turn over.
-
Move the triangle to the right, "crush" it too, you get a new square.
-
So we came to the "double square".
-
On each side, bend the bottom side to the middle.
-
Turn over, repeat on the other side.
-
Make a fold inside the closed upper corner, then unbend - a fold will remain.
-
It is necessary to open the side flaps, and then raise the lower corner above the upper corner.
-
The basic bird shape will come out.
-
At the legs, the outer sides must be connected in the center.
-
Turn over the design, so you can look at the legs from the side.
-
Bend the leg along the fold, turn the structure back, tilt the formed tail by 45 degrees.
-
Do the same with the second leg, you get a head. The tip is bent to indicate the beak.
-
It remains for the crane to spread its wings.

With a crane, you can do this trick: with one hand, grab the tail at the base, with the other, pull a little by the neck. Then the bird will wave its wings as if.

Easy animal creation options
And now there are mini-instructions that will help you to successfully walk through animalistic origami.
Cat
It can be done like this - take a rectangle, half a square sheet. The color is arbitrary.
Cat figurine step by step.
-
Bend the sheet in half.

-
Pull the free sides to the fold line, an accordion will come out. Expand the last two folds.

- Bend the lower left corner to the top, ironing the fold line. Expand the workpiece so that the triangle points down.

- Fold the top down where the triangle meets the verticals. Iron and unfold.

- Turn the workpiece over, squeeze the upper corners for the ears. Press down the middle a little, you get a triangular cat head. Fold the sheet, you get a flat strip.

- Turn the workpiece horizontally, the corner should point up. The top layer is folded to the top edge until the start of the face.

- The same on the other side. It is necessary to prevent bruising of the muzzle.

- Pick up a figurine, form a neck, unfold the head.

- Form the ears, fold them over the forehead. On the reverse side, fold the upper edge down half a centimeter, the head is done.

- It is necessary to bend the strip in the middle.

- Expand the workpiece, make a clear fold in place of the fold. Bend part of the strip back with a reverse fold, you get two legs.

- Twist the tail part, and then slightly untwist it - you get a curled tail.

The kitty is ready!

Hare
This option is done relatively quickly, according to the description, younger students can also do it. It is still difficult for children 5-6 years old, but together with their parents it is real.
Origami hare in stages.
-
You will need a square 15 by 15 cm. We must start from the wrong side: combine two opposite vertices, folding the figure from top to bottom.
-
The right and left corners need to be bent towards the open edge directed towards the master.
-
You will get a rhombus, its sides fold to the central axis.
-
The top layer's right pocket opens from the inside. Flatten, get an oblique triangle. Repeat the same actions on the left.
-
Rotate the figure counterclockwise. Fold both halves in a mountain.
-
Take the valve (bottom and right), fold back, and then up. Repeat overleaf. This will form the ears of the bunny.
-
Bend the ears forward.
-
Make the fold a mountain, and then a valley along the line in the diagram. Press on the upper sharp corner, move it back, as if putting it on the little body.
-
To form a tail at the bottom of the back, make two folds - a mountain and a valley, so a zigzag is formed.
-
Bring the sharp corner of the muzzle inward with a reverse fold. Open from the inside, spread the ears to the sides.
Ready!


Frog
You can make a whole children's composition - from four frogs at once. By the way, such croaks will be a wonderful decoration for a gift box with your own hands.
Instructions.
-
Take a square 15 by 15 cm. Mark the axis of the square.
-
Bend the right and left edges to the middle.
-
Fold the top and bottom of the model, reveal the folds.
-
Move the lower part along the arrows, while bending along the dotted line.
-
Press on the trapezoidal valve.
-
Repeat the previous 2 steps at the top.
-
Expand the side triangles in the direction of the arrow and flattening.
-
Make folds in the form of a zigzag along the dotted line.
-
Fold the corners back.

All that remains is to draw on the eyes, stick it on, designate it as you like.

Crab
Such a cute crab will appeal to children, as well as the fact that you can get almost a cartoon quickly and at home.
Technique for making a crab from paper.
-
Bend the square in half, marking the central axes - vertical and horizontal. Open the sheet.
-
Fold the right and left edges with the "doors" towards the center.
-
Bend the upper and lower halves towards the middle. Make notes, reveal.
-
Move the top half apart along the arrows, fold along the dotted lines. Press and flatten.
-
So it is with the bottom half. You get the basic shape, which is called a catamaran.
-
Raise the corners of the upper half, fold along the dotted line.
-
Bend the side parts along the folds, looking at the arrows.
-
Make folds by dropping the corners down.
-
Raise the bottom.
-
Turn the figurine over.
The crab is ready!

Fox
It is necessary to please even the smallest origamists - even preschoolers will master such a fox.
How to make a chanterelle quickly and easily.
-
Fold the square in half diagonally, and in both directions. The folds on the inside should be valley. Expand.

- Fold diagonally, facing out. The top should be facing to the right.

- The sharp corners fold towards the top.

- Bend the top down.

- Bend the right corner obliquely to the left.

- Turn the upper corner of the folded part down to form the muzzle.

- Bend the left corner to the right to form a tail.

- It remains only to form the nose and eyes with a black felt-tip pen.
Here it is, a very simple and cute fox.

How to fold flowers?
Origami offers very interesting color schemes that you can even make as a gift for mom, girl on March 8 and other holidays. But it's better to start with simpler methods, which does not deny the beauty of the result. Consider this idea using the iris as an example.
How to fold iris using origami technique.
-
Take a square of blue, cyan or purple paper.

- Fold the square in half.

- Expand and position the sheet so as to obtain a vertical fold.

- Align the lower right corner with the center line.

- Expand, and repeat the same with the right top.

- Expand.

- Cut out the triangle outlined by the fold lines.

- Fold in half.

- Bend the lower left corner to the right edge.

- Expand.

- Fold along the fold lines of the triangles.

- Bend the fold on the right down, heading towards the center line.

- Straighten the fold into a rhombus.

- The other two folds are the same.

- Bend the edges to the center of each rhombus.

- Bend the edges of the petals outward.

- Tighten them slightly with scissors. The flower is done!


More ideas
There are no master classes here, but the information can be inspiring. It is about how to make simple origami figures a part of the interior.
Take, for example, cranes: simple, understandable, beautiful birds can be folded from printed, designer paper. And then hang them on a beautiful branch / branches in a vase - the composition will be touching and graceful. And it is quite suitable for beginners.

Even boats folded using the origami technique can be built by a whole flotilla on a shelf, or made of them a vertical pendant garland.

The origami heart will also be beautiful, which will become part of the table setting for the holidays - just put it under each plate as a decor. Or, again, make it a garland and lay it out in the middle of the table, instead of a tablecloth or on it.

Origami is not just a fun technique, but also a way to create unique, simple and self-contained home decor.... An example of easy origami for beginners in the video below.


