3D origami paper ideas

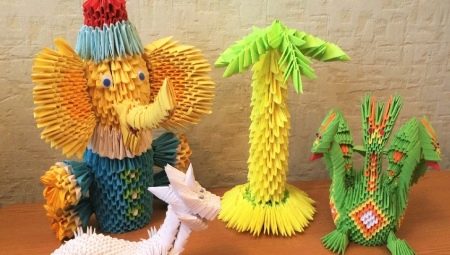
The most common origami technique involves making figures using simple folds, but there is also another type of paper folding art that allows you to create bulky items - modular origami. The method involves folding crafts from many modules folded in the same way. In this article, we will look at several options for creating such 3D shapes.


How to make a swan?
The white swan figurine is one of the easiest modular origami to use, so it is great for beginners.... At the same time, it is possible to complicate the method of making a beautiful bird, for example, by adding modules of a different color or creating several more layers of "feathers".
And you can also improve the craft with various decorative elements, such as eyes, a black border at the base of the beak, or flowers.

For those who are just starting to get acquainted with the technique of making 3D origami, it is better to first try to make a simple figurine. It is very easy to assemble a white swan, because to assemble it you will need very few modules, so the assembly of the craft will take very little time and will not be put on the back burner.

To assemble a figurine of a beautiful bird yourself, follow the instructions step by step.
-
Before work, you need to prepare blanks for the modules - the most convenient for creating modules are rectangles 1/16 of the A4 sheet. In total, you need 1 orange and 375 white rectangles. All blanks must be folded according to the scheme into modular triangles that will be used to assemble the swan. The only triangle that differs in color from the rest of the modules is the future beak of the bird.
-
The assembly of the first two rows of the bird's body is as follows: place all the details of the first row with the long side of the "legs" up.Then put the modules of the 2nd row on the legs of the adjacent parts of the 1st row, but turning them with the long side down. Each row should consist of 30 parts, after which they must be closed in a circle, connecting with the first parts.
-
Collect the third, fourth and fifth rows in the same way as the second - long side down... In total, each of these rows should contain 30 parts.
-
Place your thumbs in the middle of the circle and hook the edges of the figurine, then gently press in the center, turning the product inside out... The result should be a figurine that resembles a small flower pot.
-
Create the sixth row of 30 modules in the same way as the previous ones.
-
To start creating wings, attach 12 triangles on top of the 7th row, then skip 2 "legs" and fasten 12 modules again... In the future, the head will be attached to the narrow pass, in which 2 "legs" were left, and a wide space at the other end of the circle is left for the tail of the bird.
-
Create swan wings - attach modules to the base of the wings, reducing their number by 1 triangle in each new row. Continue until there is only 1 piece left in the row.
-
Next, collect the hvosm - first create a base of 5 modules and build up, reducing the number of parts in the same way as for the wings.
-
Adding 24 white pieces into each other, create a curved neck and attach an orange beak to the end of it.
-
Attach the neck to the small gap left between the wings. Craft "swan" from modular origami is ready!


Folding the spruce
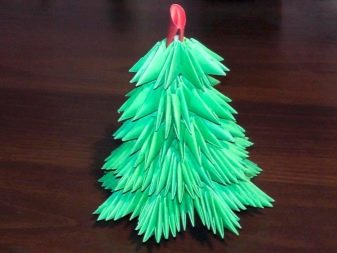
The modular origami Christmas tree is an excellent Christmas decoration for a festive or desktop.


A simple step-by-step instruction will help you make such a cute craft.
-
To complete the master class, you will need to fold 2028 green modules - all parts must be of the same size. The craft looks best when the triangles are assembled from 1/32 A4 sheet blanks. And also you will need a small wooden block (base), an even stick (barrel), PVA glue and a glue gun.
-
The assembly of the herringbone starts from the bottom tier - you need to collect 10 spruce branches, consisting of 33 modules. To make the structure stronger, grease each part with PVA glue on the short side.
-
Connect the first tier, fastening adjacent branches with one additional module, and close the circle.
-
With a glue gun glue the trunk to the base of the tree - a wooden block. Then install the first tier of branches, and secure it with glue.
-
Create the second tier in the same way as the first, but use 30 pieces for each twig... Attach it over the top of the first tier.
-
Continue to create new tiers, reducing the length of the branches by three modules in each of them, until you get to tier 9. In this layer, you need to create a total of 9 branches, assembled from 9 parts.
-
The tenth circle consists of 4 rows, and you need to start collecting them from the center: the first two circles consist of 16 modules, the third also consists of 16, but the parts are put on only at one corner, and the fourth of 8 parts with gaps.
-
The eleventh tier is assembled in the same way as the tenth, but with a different number of modules: the first and second circles consist of 8 modules, the third is assembled from 16 parts, put on one "leg", and the fourth - again from 8 parts.
-
The last twelfth layer is assembled from two rows of 8 modules.
-
Glue all the tiers to the base of the tree and cut off the excess part of the trunk.


3D origami from paper "Herringbone" is ready, you can leave it as it is, or add decorations to your liking.
Other models
The principles of assembling modular figures are very simple - by creating 2-3 crafts according to master classes, you can start creating simple crafts according to your own ideas. For mid- to high-end products, you will first need assembly diagrams, but over time, this will also disappear. Here are some interesting ideas for creating 3D origami.
-
Flowers... Modular origami opens up a huge space for craftsmen to embody their creative ideas, because any flower can be assembled from the details - a rose, a lily, a tulip and even a chamomile. Homemade flowers are a beautiful decoration for a room, as well as a great gift for a birthday or March 8th.


- Animals... Each person probably has his own favorite animal, which is not always possible to keep at home, for example, due to allergies. You can make any animals from the modules - from domestic cats and dogs, to wild mice, snakes, lions and even giraffes.


- Movie and cartoon characters... You can also create your favorite cartoon characters with your own hands using modules - you just need to spend a certain amount of time and effort to make crafts. In the 3D origami technique, characters from a variety of cartoons are very beautiful, for example, Judy Hopps from Zootopia, Pikachu, Iron Man or Mickey Mouse.


- Interior elements. Modular origami allows you to create not only decorations, but also quite useful things, for example, a jewelry box, pencil holder, tray for sweets or a basket.


For more 3D paper origami ideas, see the video below.


