How to make origami toys?

Modeling toys using the popular origami technique is a fun and interesting experience. Volumetric figures can be both static and mobile. They are done simply, but they turn out to be very original. In today's article, we will learn how you can make beautiful origami toys.


Simple options
The origami technique is not too complicated, but you should not immediately start making intricate toys.
It is recommended to start acquaintance with such creative operations with simpler and more accessible schemes. Having mastered the modeling of elementary options, it will be possible to move on to complex homemade products.
You can easily and quickly make a beautiful paper swan using the origami technique. Let's take a look at the step-by-step instructions for modeling such a toy.
- You need to take a snow-white paper sheet.
- You will need to mark the first diagonal line on the piece of paper. Bend the upper and lower corners to it.
- The ends of the corners must be bent in the opposite direction. The part must be folded in half, and then laid out on the table, like an open book.
- From a long corner with an elongated structure, you will need to carefully shape the neck and head of the bird.
- Make the beak of a paper swan by bending the tip of the head back and forth. At the final stage, do not forget to draw the eyes of a beautiful snow-white bird.


This is a very simple but beautiful homemade product. Even a small child under the supervision of adults can make it.
A cute paper bunny will become a charming simple craft. It can be a wonderful result of children's creativity. Such an origami toy is made extremely simply.
- First you need to take a square-shaped paper sheet.
- The paper base is folded in half, and then the middle of the prepared triangular blank is marked out.
- The triangle is folded back slightly. After that, the triangles-ears of the bunny are wrapped up.
- The corners above and below are carefully tucked and hidden in such a way that the animal's muzzle is formed. At the very end of modeling an origami toy, it is recommended to paint it.


You can quickly and easily make a handsome whale using the origami technique. Let's analyze the step-by-step instructions for modeling such a toy.
- First you need to take a gray or blue sheet of paper.
- It is necessary to mark a diagonal on a square workpiece.
- The lower part is folded to the highlighted diagonal.
- The workpiece is turned over, and then folded to the middle of the parts located at the top and bottom.
- At the top, you need to fold another corner to form the back of the paper whale.
- The part is turned again and the whale's tail is formed.


Simple and cute origami toy - paper penguin. Let's analyze in stages how it can be modeled.
- At the square base, you need to mark 2 diagonals.
- Next, the workpiece is unrolled so that its corner is directed downward.
- Then turn the lower tip upward, not reaching the central point 1–2 cm.
- The tip is lowered back. It will play the role of a penguin's beak.
- The toy is turned over, the lateral parts of the pentagonal part are bent so that they completely overlap each other.
- The edges are folded back with a ladder to create the wings.
- The part is unfold again, and then the eyes are drawn.


Movable toys
With your own hands, you can model not only simple and static, but also movable origami toys. Moving homemade products look very original, and making them turns out to be a very exciting process.


This is a great activity for children as it promotes the development of fine motor skills.
One of the most popular origami toys is the jumping frog. It can be modeled quite easily even by novice craftsmen. Let's highlight the correct scheme for creating such an original craft.
- As in the cases discussed above, you first need to prepare a square-shaped paper sheet.
- A square piece must be folded in half to end up with a rectangular piece.
- Along the fold, the corners must be folded to the middle so that a triangular part is formed as a result.
- Now the corners need to be expanded and pulled from below to the line in the middle. The structure must be expanded.
- Further, on both sides, you will need to carefully fold the triangles along the formed fold lines, inserting rectangular elements into the inner part of the wall.
- The remaining free corners of one of the triangles must be raised to the corner of the square of the structure. Similar actions should be carried out for the other side of the paper blank.
- The corners of the folded triangular elements are turned outward. As a result of these manipulations, cute frog legs are obtained. The workpiece is turned over, and then the corner is raised between the paws.
- The sides are folded away from the tail. The structure is turned over, folded in half and the hind legs are folded back.


At this stage, the modeling of the moving origami frog is completed. A funny jumping toy can be made of paper of different colors, but it is better to choose sheets of green or yellow-green hue.


Another interesting homemade product is a finger trap. It is very easy to do. Let's consider the steps that make up the modeling of such an original little thing.
- You will need a small paper square of any color you like.
- The prepared sheet is folded diagonally, and then carefully opened.
- After opening, the paper sheet is folded again, but already along the second diagonal line. Then the workpiece is opened again.
- In the next step, the square paper blank is folded in half.
- You will need another fold in half, but on the other side of the structure.
- Next, with your fingers, you need to grasp the extreme sides of the workpiece in order to fold the figure in the form of a double square.
- One of the sides of the homemade product is bent to a vertical line. On the other hand, the same should be done. As a result, two triangles should be formed.
- The workpiece is turned over to the other side, after which the same steps are repeated as described above.
- Next, all the folds of the paper structure are opened. Using scissors, cuts are made along the selected bent lines. The incisions should not be too long or too deep.
- Further, the corners are folded along the folds made. When all the necessary parts are bent, you should get a star-shaped figure with four rays.
- The finished figurine is turned over to the other side. Each of the corners is folded up.
- Next, the paper is folded along the edge of the triangles on both sides. Next, the second corner is folded. Thus, you need to act in relation to all four rays of the workpiece.
- The pointed triangles of the structure will serve as grips for the homemade paper trap.
- Make sure that all the folded triangles are the same.
- Next, the paper structure is pressed, focusing all the rays in the center. The result is a small trap. At this stage, the original origami trap will be ready.


The manufacturing scheme for this funny toy is simple. Children are very fond of tinkering with such things, because they are easy to do, but at the same time they perfectly cheer up.
Creation of modular origami
The modular origami technique has appeared relatively recently. Every year it becomes more and more popular, since it allows you to make simple, but very beautiful voluminous crafts. Correctly made toys and interior products made according to this scheme look quite realistic. The assembly of such structures is carried out from several parts - modules. They add up without unnecessary problems.


Consider the features of independent modeling of modern origami toys in accordance with modular technique.
- For the manufacture of the module, you can use a standard A4 paper sheet. This base is divided into 4, 8 or 16 identical parts - based on the size of the figure that is planned to be made.
- Next, the resulting rectangles are folded in half. The elongated sides pull towards each other. The middle part is revealed along the fold line, after which the corner is folded, like in a small airplane.
- The workpiece is turned over. At the ends of the improvised "airplane", the corners on the outside are bent up.
- The lower free ends are tucked up.
- All component parts are bent inward (along the centerline). As a result, a triangular element should come out with two caps inside.
- You can build almost anything from the prepared parts - the number of original modular origami homemade products is endless.
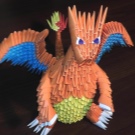
- Useful things look very interesting and attractive, for example, modular stands for pens and pencils. You can also simulate various animals and birds.
- To make a beautiful and voluminous figure from individual modules, you need to start by folding the round base. It is easiest to make it from three equal rows, made up of modular elements. Parts must be inserted extremely tightly to each other.
- Crafts are more reliable and sturdy if you insert the modules closer to each other.
- If you are using standard colored paper, you must take into account that it is too thin. Writing paper is heavier. For this reason, modular components from the first variety will always be less durable.
- Beautiful modular origami is best done with a large company or with the whole family. The fact is that even a very small homemade product of this type can be modeled from a very large number of modular components. Their number can be more than 500 pieces.


For more on how to make origami toys, see the video below.


