Interesting and beautiful origami from paper

Origami is not at all a childish type of paperwork, or rather, it can be interesting not only for children. And in this technique you can make amazing, very unusual models of animals, people, mythological creatures, worthy of becoming the decor of any space. And if you want something even more sophisticated, you can try yourself in modular origami.


Beautiful animals
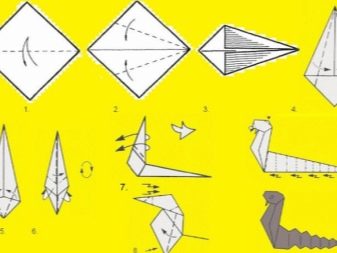
Cobra is a very vivid image, symbolizing cunning and deceit, and these animals also live in Buddhist temples. There are several options for how you can make a beautiful cobra out of plain paper. It makes sense to start with a basic model - only 7 steps, but the result is great.
Do-it-yourself paper cobra in stages:
- the basic figure is a square, which is formed from A4 sheet, it must be folded diagonally, and then opened;
- the right and left sides of the figure should be bent towards the formed axis;
- a second fold is made, the top is lowered by a few centimeters;
- the figure must be folded in half in a "mountain";
- a fold is made along the dotted line, it is revealed;
- the upper part must be straightened, the lower one must be moved to the side to form the future tail - the figure will stand on it;
- the tail must be collected "accordion".
A very simple figurine, but immediately recognizable.


It may be useful for beginners to make one of the most popular origami figurines - the crane. And if you make several, multi-colored, you can get a chic pendant module.
Craft "crane" step by step:
- the square must be folded into a triangle, carefully highlighting the fold;
- then you need to make another fold, and then unfold the figure into a square;
- the sheet is turned over, these actions are repeated;
- the square sheet must be laid out in front of you, the upper corners are bent to the center, the resulting triangle must be tucked to the middle of the sheet;
- the triangle turns back, a new fold is obtained, this time horizontal;
- the lower corners are tucked towards the center to make a rhombus;
- the figure must be turned over, on the back side, repeat all the same actions;
- the lower part is bent along the inner contour to form a crane neck;
- the tail is carried out by analogy.
The classic crane is ready!


Now we will find out how you can make a cool deer face - a very fashionable type of crafts now.
- It is necessary to take a square 15 by 15 cm, fold diagonally from top to bottom.
- Then fold from right to left.
- The top layer opens from the inside.
- The figurine needs to be flattened to form a rhombus.
- We turn over to the reverse side.
- And again steps 3, 4 are repeated. "Double square" - such a basic shape should be obtained.
- The workpiece is positioned with its free end towards itself. The right and left corners are added to the center. Further, the upper triangle goes down, the folds must be opened.
- The lower point rises "all the way".
- The side flaps are smoothed out. You will get a new basic shape - "bird".
- The product is to be turned over.
- The reverse side has the same layout.
- The bifurcated ends must be raised, then bent to the sides, making a fold at an angle.
- The front triangle valve must be lowered.
- The acute lower corner is folded twice.
- The upper one bends slightly under itself.
- The ears of the animal must be twisted according to the scheme.
- Then they must be tucked up again.
- The upper triangle is cut in half.
- Both ends must be opened to the sides.
- The extreme points rise upward.
- The corners are smoothed, you need to bend them back.
- You can add the muzzle to the deer, or you don't have to.
It will turn out to be a very beautiful and graceful work.

Origami people
It is really very interesting and not difficult at all. For example, even a beginner can make a person out of a square sheet.
- It is necessary to outline the fold lines in a standard way: across and diagonally.

- The lower part must be folded in half by pulling up.

- In the lower part, an accordion is formed, 4 folds are obtained as a mountain.

- The same is done at the top.

- The sheet should be turned 90 degrees. And again the same accordion is formed.

- The sheet must be straightened. The lower and two lateral folds are folded in a mountain at the same time. You will get diagonal folds on the sides from the bottom.

- The upper fold is also made by the mountain.

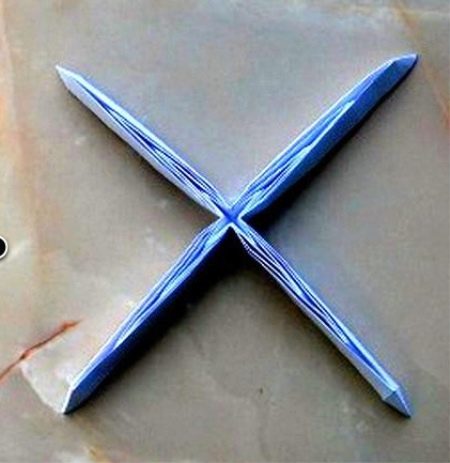
- We must continue to fold towards the center. As a result - the letter X.

- You need to straighten the top.

- The body and handles are formed with a reference to the ready-made fold lines.

- The workpiece is turned over. The arms fold in half lengthwise.

- The legs fold in half lengthwise to continue folding the body.

- You can straighten your hands, bend your arms to the elbows.

- The feet are straightened, the legs are bent at the knees.
All is ready!

You can make a little man in a cap. It consists of only three parts, each of which is a square of paper. Since the paper is double-sided, the design of the little man will turn out to be interesting. And the places where the skin should be will be as realistic as possible.
- Cut the paper into squares, double-sided, so that one part of them is beige.

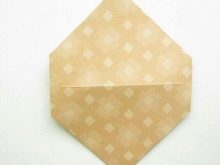
- Take one square, turn the beige side towards you.

- Bend it diagonally. Then make a "snake" shape. Turn it over.


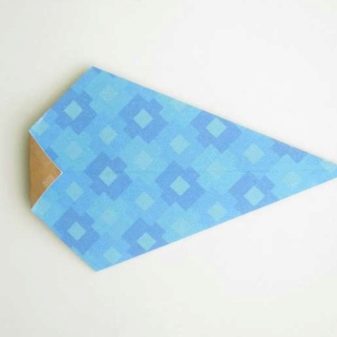
- Fold back the bottom sharp corner, as in the photo.


- Bend back even before getting the line. Wrap the corners.


- Take a new square, start over. Bend the bottom corner with the colored side up.


- Make an accordion bend with a tail.

- Make an incision as in the photo.

- Unscrew the notched corners.

- Turn the figurine over. Connect the two parts.


- Take one more square. Make a fold line. Rotate the corners as in the photo.


- Turn the figurine over to the other side. Connect its two parts as in the picture.


- The figurine is getting closer to the rhombus. And now she is half. You can connect the handles to the head and torso.


The little man in the cap is ready!
A simple figurine of an origami man is probably one of the most uncomplicated master classes that can be completed in a few minutes.
Step by step algorithm:
- take a sheet of colored paper, fold it in half, as in the photo;

- make such a bend, and the second part - to it;

- unscrew the upper corner; with the second, do a more radical action;


- now such a bend is strictly according to the picture, the edge should turn out;

- corners to each other and up, and then to the sides; and fold almost like an accordion;


- the tip is neatly straightened; now there is a fold of the strip - here is an inverted view;


- press, smooth; see if the little corners are even. Now you can make legs - the figure is more and more recognizable;


- in the same way - with the second side;


- then the legs need to be straightened, bent up; and bend again.
So it turned out to be a very simple person, but the figure is quite traditional and recognizable.


Mythical creatures
Totoro, a cult hero created by the genius Miyazaki, is simply obliged to be repeated in the origami technique by all anime fans.
Let's describe the step-by-step instructions.
- The square must be folded in half from right to left, and then opened.
- The diagonal connects the lower right corner and the upper point on the central axis. The fold is made along the marked line.
- Step # 2 is repeated on the other side.
- Both folds must be opened.
- The upper edge goes down by 2 centimeters.
- The right and left edges are folded to the same lines as defined in steps 2 and 3.

- We need to evaluate what happened.
- The left side folds up diagonally.
- Do the same on the right - you get the ears of the hero. The figure must be turned over.
- The lower right corner folds to the centerline in the center.
- With the left - the same action. And turn the product over again.
- The right side folds towards the middle.
- On the left is the same.

- It is necessary to open the right valve laid back.
- With the left - everything is the same.
- The outer right corner folds to the closest line.
- And again step 16, only to the left.
- The triangular valve folds along the line from step 16.
- And again we "mirror".

- Open the right "pocket", flatten it.
- And with the left - the same thing.
- The lower sharp triangle must be raised.
- This valve must be bent obliquely in both directions. And then you need to make it voluminous by creating the so-called petal fold.
- All folds are carefully ironed to prevent them from opening. The tail is ready.
- It is necessary to grasp the upper legs, the outer corners are bent.

- Zigzag folds are made so that the hero's legs extend beyond the boundaries of the body.
- The ponytail should be perpendicular to the main figure, as it will be a stand.
- The figurine turns to the front side.
- You need to glue the white shirt front (circle) to the hero's belly.
So Totoro is ready!


Well, what are the mythical heroes without a dragon.
- A square is made from A4 sheet. First, it must be folded along two diagonals, and then straightened so that the folds remain outlined.
- The square is bent in half twice, unbent back so that there are 8 fold lines on the square. It is necessary to take for opposite corners, forming a rhombus along the outlined lines. It must be turned upward in folds.
- The edges of the rhombus on both sides are bent towards the middle. In some ways, the figure will resemble a primitive kite. The upper triangular section folds completely to one side and needs to be smoothed out. The rhombus will expand, and a triangle will appear inside.
- When the upper rhombus layer is folded back, the boat will come out (this is how it should be). And on the back of the rhombus, the actions will be the same. The straightened workpiece is obtained as an elongated rhombus with pointed corners.
- The upper corners must be bent on both sides from the top and bottom, and again you get a snake. The top of the figure is bent to the fold line, in different directions.
- Then the figure must be very carefully stretched, grasping at sharp corners - the dragon will become voluminous, and a pyramid will appear at the top of the figure.
- With your finger, very carefully, you need to bend the top of the pyramid inside the entire structure.The figure is pressed against the central part, folds more compactly, and the snake comes out again.
- The corners are folded on each side, the lower ones on both sides are folded up. And here is the crucial moment - the figurine has to be turned over and then turned out.
- From the bottom up, the corners are bent, a triangle emerges. And again the figure is turned over, but still it is still a triangle. There will be 2 triangles with sharp corners, these will be the wings of a dragon. They should be on both sides, and they are folded perpendicularly.
- In the middle, triangles will remain, as well as small legs on the fold, trapezoidal. The head and tail are formed from them.
- It is necessary to take a triangle located near, and turn this part out again - on the contrary, there will be a middle fold. It is necessary to make sure that one more pointed triangle is parallel, that is, it must be turned down.
- The small remaining triangles are folded back in turn. Then the foot is formed, and the same - with the rest of the triangles.
- The paws for the stability of the dragon are made unidirectional. On the neck (which is slightly to the side), the head is bent.
- The wings fold back at an angle. You can even make dragon folds on them.
- In the tail part, a relief is made into 3 folds, then the tail is straightened, but while maintaining the relief. And the figure must be straightened to obtain volume.


It will take an inexperienced person about an hour to complete such a dragon, but the work will be impressive.
See the video with the master class below.
Interesting modular origami
One of the cutest (and not very complicated figures) is the colored lizard from the modules.
It will require:
- blanks: 38 faded green, 22 dark green, 20 light yellow, 15 red, 13 dark yellow, 4 orange;
- a pair of peepholes;
- PVA;
- scissors;
- toothpick.
How to do it:
- from all blanks (with the exception of red ones), ordinary triangular modules are formed;
- 12 dark green pieces and 4 faded green are set aside (these will be the legs);
- to assemble the little body, you need to make a starting row of three modules: red and two dark green;
- the third row is formed from three modules: dark green at the edges, faded - in the middle;


- the body is assembled strictly according to photos and diagrams;
- closing the edges of the modules, you can hang them a row earlier so that the figure is mobile;
- in the 22nd row, 2 modules are inserted with broaches;
- in the 23rd row, 3 modules in the center - with broaches, and on the sides - with loops;


- to assemble the paws, you need to connect two green (faded and dark) modules into one pocket;
- a dark green module is hung on the right triangle;
- the latter is put on, closing the edge;
- and again the same foot;
- the other two legs are made in a mirror manner;
- free triangles of the faded green modules of the paws are inserted into the pockets of the faded green modules in the 14th row, while the hind legs are fixed to the modules in the 23rd row;

- the eyes of the lizard are glued on the PVA;
- the red tab is cut out and fixed.


The beauty lizard is ready!
The modular technique produces gorgeous swans, pandas, mice, sheep and goats - and the same dragons. But you need to understand that it is very energy-consuming: it will take a lot of both time and effort.


