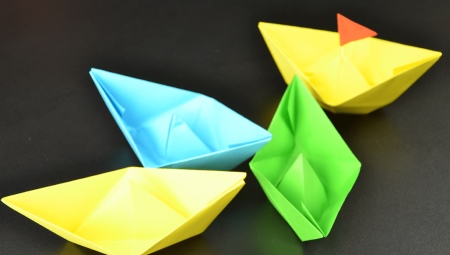
Origami in the form of a boat

Various paper crafts are loved by both children and adults. Often, various decorative products are made from this material using the origami technique. Today we will talk about how you can make an origami boat craft.


Peculiarities
Even a beginner can make an origami boat. They are often made from plain white paper. An excellent option would be a special material for origami, as well as corrugated paper, various bases with a print.
When making such a paper craft, you don't even need scissors and glue. If you wish, you can make several different models of boats from different materials to create a beautiful composition.


Scheme and instructions for folding the ship
The origami boat can be made in a variety of ways. Let's consider some options in more detail.
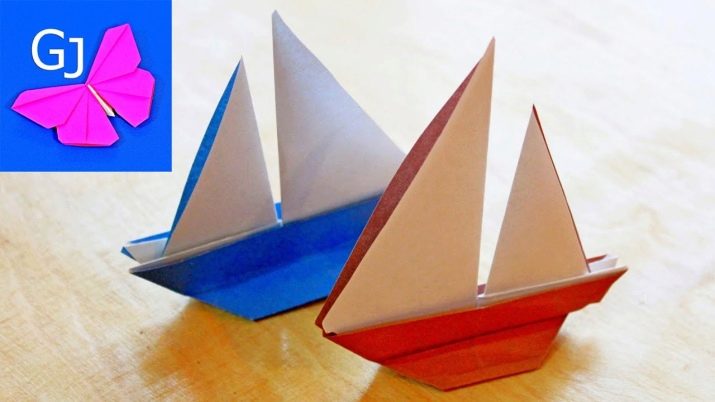
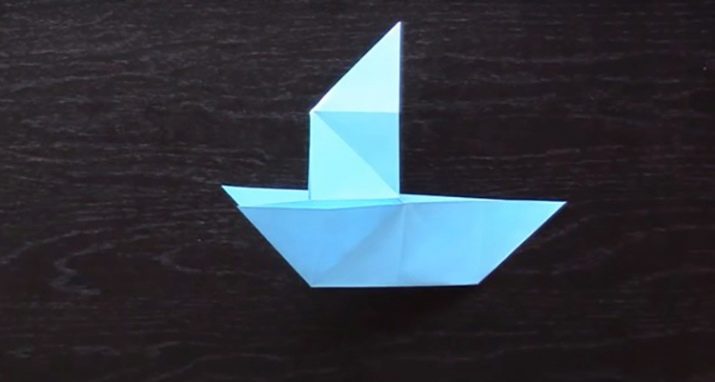
Simple sailboat
In this case, the following actions are performed.
- A square base is cut out of paper (any color can be). It can be of any size.
- Diagonal lines are drawn on the material.
- Further, all four corners are neatly bent to the middle. The material spreads out in the opposite direction.
- The square is turned over to the other side and folded in half.
- Each half obtained is folded in half again.
- The workpiece is unrolled and laid in front of you, and then folded again in the same way.
- Along the marked diagonal stripes, the paper is opened and folded in the other direction.
- The resulting workpiece is turned over again, the figure is bent diagonally.
- After that, the product is turned over, the free corner is bent.
This master class is perfect for children. Often, such crafts are used to decorate homemade postcards.


Military two-pipe
To make such a boat with your own hands, you must perform the following steps.
- A square base is cut out of a sheet of colored paper. Two folds are marked on it along the diagonals.
- All four corners are bent towards the center. Then the product is turned over to the other side.
- The four corners are bent to the middle again. The product is being turned over.
- Two opposite squares reveal, these parts will become the pipes of the ship.
- Next, the figure is folded in half, while you need to carefully turn out the right and left squares.
For the manufacture of such a warship, you can use both plain paper and material with a camouflage print.


Modular craft
This scheme is considered more complex.
- First, a large number of paper modules are made. They can be of any color.
- Next, the first three rows of 47 ready-made modules are formed. All of them need to be closed in a ring. Then the product is turned over.
- In the fourth level, you need to fix 4 more parts (in those places that are located on the sides of the stern, bow).
- In the fifth level, four modules are added (a total of 55 pieces).
- In 6-7 rows, 55 paper parts are also fixed. Moreover, in the process, you need to give the boat an appropriate shape, slightly squeezing the sides. The eighth row is performed in a similar way.
- In the 9th row, they begin to use paper modules of a different color. At the same time, they are fixed with short parts outward.
- In the tenth level, 8 parts are attached to the sides. They should fit neatly between the corners of adjacent parts. Moreover, the "pockets" stick out, the long part is laid inward.
- Next, the edging is made at the stern of the ship. To do this, the elements, just like on the sides, must be inserted between the corners, but with the long side outward. In this case, the "pockets" will be directed inward.
- At the stern, if desired, you can form a side. In this case, a paper module is inserted into 2 adjacent "pockets" located on the edging.
- To form the bow of the ship, you need to determine the extreme point, and put on the elements symmetrically from it.
- The eleventh row will consist of 9 modules, the 12th - from 6, the 13th - from 3.
- 2 parts are put on the entire nose, they must be of a different color.
- After that, a border is also formed on the bow.
- To make the bottom, you need to take about 130-150 modules (the shape and size of the ship may vary). When forming this part, you need to periodically try it on to the rest of it so that everything fits in size.
- In the first row of the bottom, 3 modules are attached, in the second - 4, and in the third - 5. Further, in each subsequent row, one element must be added.
- When there are 8 modules at the level, the addition is stopped. Next, row 9 is performed without him. In this case, you need to alternate 7 and 8 elements.
- When creating the last levels, you need to reduce the number of details. At the end, only 1 module will have to be placed.
- After that, you can start creating the sail. The first row is formed from 17 parts. Then 10 levels are formed with alternation of 16 and 17 modules. Make sure the edges are smooth.
- Starting from row 12, the number of parts is gradually reduced by one piece. The resulting sail is folded slightly and attached to the rest of the ship.
- It is better to take a skewer about 20 cm long as a mast. You can pre-glue it with paper. And also, if desired, make a small flag of paper or cardboard.
The finished product is perfect for a gift on February 23rd.


Volumetric ship
To make such an interesting craft on your own, you need to perform the following manipulations.
- A rectangular sheet of paper of any color is taken. It is folded in half, the upper corners are folded to the middle.
- After that, the free edges on the sides are folded up until an even triangle is formed.
- The resulting figure needs to be given volume, folded along the base in such a way as to make a square.
- Further, a triangle is again formed, but already of a smaller size, while the lower corners are bent.
- The base is squared again.
- At the end, it only remains to pull up the edges a little in different directions, and part the product until it acquires the desired shape.
Even a kid can handle such a craft.

More ideas
Let's take a look at a few more popular master classes on making origami ships.
Boat
To make such a ship, follow these steps step by step.
- An A4 sheet is being prepared.
- The leaf is folded in half, then a basic double triangle shape is formed.
- The resulting pieces are folded to the middle of the line.
- After that, the corners stretch to the center.
- The points should be connected to each other. The corners are inserted towards the middle.
- Water wings are formed from the rest of the folds.


Canoe
When making this craft, the following steps are performed.
- Take a square paper sheet.
- The two sides are neatly folded into a rectangular shape, in total there should be 3 such blanks, with one rectangle being the base, and the other two being the sides.
- The right and left sides are folded in such a way that you get right angles.
- Then, two more sharp corners are formed from the left side. Further, the same actions are performed on the other side.
- At the end, the product is carefully turned inside out, resulting in a finished canoe-shaped craft.


Volumetric boat-hat
The creation of such a paper craft is also carried out in stages.
- The sheet is placed vertically. The wrong side should be on top.
- The bottom edge is attached to the top.
- The corner on the right bends to the left corner, a mark is made there.
- The workpiece is opened back.
- The right and left corners are raised upward. These parts will need to touch in the center.
- The fold line is ironed well with your hands.
- Then the product is rotated 180 degrees.
- The bottom edge of the nearest layer is folded over the base of the triangle.
- The piece of paper is flipped over again and the previous step is repeated.
- The resulting fold is opened while simultaneously folding the right corner. The same actions are carried out on the left.
- The lower part returns to its original position.
- The craft is revealed from the inside. Then it is gently flattened laterally.
- The protruding left corner is sent under the received right valve. On the other hand, everyone is doing the same.
- The nearest paper layer is folded in half from bottom to top. Then the previous step is repeated.
- The figure is turned with its side towards you. Then it opens from the inside, and again flattens a little.
- After that, you need to take the left and right valves, they are pulled in different directions. When the product takes the shape of a boat, all the folds are well ironed.
- The central sections on the lateral sides are slightly bent, while the inside triangle should be visible. It will become the sail of the ship.
If the product is turned over and the central section is opened, then the boat will stand steadily on a flat surface.


Pirate ship
To make such a craft with your own hands, you need to take the following steps.
- An A4 sheet is taken. The rectangular material is folded in half and folded up in front of you.
- To better define the center line, you can fold the sheet again.
- The corners are folded from above to the resulting central strip.
- After that, free edges should form at the bottom, they must be bent up.
- The corners of the resulting strips are also folded down.
- The paper blank is folded in half. The result is a rhombus.
- The figure is placed in front of you, the corners from the bottom are bent up.
- The craft is straightened, for this you need to slightly pull the corners of the deck.


And also we will analyze a simple master class for beginners.
- A square base is cut out of the sheet. It is bent in half in the horizontal direction.
- Further, the material is expanded. The lower part of the sheet is folded towards the middle.
- The top folds towards the center line.
- The product is neatly folded in the middle to the other side. The result should be an accordion-shaped figure with 4 folds.
- The corners are folded, then one side of the workpiece is revealed.
- The top left corner folds towards the center.
- The corner on the right folds to the center fold.
- On the other hand, you also need to bend the corners towards the middle.
- The material is unfolded. Further, the whole craft is folded in half.
- The paper opens again. The result is a neat little boat.
- The product needs to be trimmed a little. For this, the bow section of the boat is turned to the central fold. All bends are carefully ironed with your fingers.
- The nasal section, on the other hand, must also be turned towards the middle. The end result is a hexagonal shape.
- The opposite corners of this figure must be symmetrically bent by about 0.5 centimeters.
- The craft is revealed. The onboard compartment folds to the middle on one side. The same is done from the opposite side.
- The corners inside the boat are well pressed with your fingers. This must be done from all four sides at once so that the lower part of the product looks neat.
- They reveal the craft, align the places where it is needed.


Lamprey boat
Such products are created from a banknote. You can take any banknote.
- The bill is folded twice in height. The material is ironed well with a ruler.
- Then the product unfolds back. A cruciform pattern will form in the center.
- After that, the material is folded across so that the front is inside. Further, the side where the bend is visible is bent with a house, while the two upper corners close in the center.
- Next, the resulting house is turned over to the other side.
- The bottom layer is lifted up, while it must be aligned with the base of the isosceles triangle.
- The second side rises in the same way.
- The two square pieces of the material should be bent symmetrically while keeping the triangular shape inside.
- The top layer is folded back to its previous position.
- One bottom corner goes down, while the inflection line will be aligned with the base of the triangle.
- The second corner also folds, also aligning with the base of the triangular shape. Do the same with the bottom. The result is a product that consists of two isosceles triangles connected by bases.
- Then the product is folded in half so that a multi-layered triangular shape is obtained. At the bottom, you can split it with your fingers.
- The fingers are gently wound inward at the bottom, then the material is stretched so that the triangle again looks like a square. Moreover, the figure will become smaller and smaller.
- The corners on the side are pulled back a little, while the bill is straightened.
- The resulting square is bent again, the figure will become even smaller.
Sharp corners are again stretched in different directions so that a small boat is formed.


For information on how to make an origami boat, see the next video.


