Origami in the form of a circle

In accordance with the Japanese origami technique, almost any figurine can be made. Crafts in the form of simple household items, for example, mugs, look very original. There are many schemes for modeling such structures. In this article, we will learn how to correctly make origami in the form of a circle.


How to make a simple cup?
Creative origami cup-shaped figures can be made based on a variety of schemes. Among them there are both very complex and extremely simple, adapted for preschoolers.
Before getting acquainted with the complicated instructions, it is advisable to master easy master classes.

To assemble a beautiful simple cup yourself, you should prepare a square-shaped paper sheet. It is recommended that you use good quality paper with sufficient thickness.
- At the first stage, the selected piece of paper will need to be doubled. In this case, the corner located at the bottom is folded towards the upper corner.
- After that, you will need to bend the left edge of the upper triangle towards the lower edge. Next, the workpiece must be straightened. Achieve a pronounced curved line on the paper.
- In the next step, the left corner of the triangle will need to be bent towards the end of the fold line on the right side.
- Now the corner on the right is folded to the corner on the left.
- The next step will involve bending the top of the blank downward.
- The paper blank will need to be turned over to the other side.
- The upper half of the workpiece is folded again.
- The paper product is now turned over again.
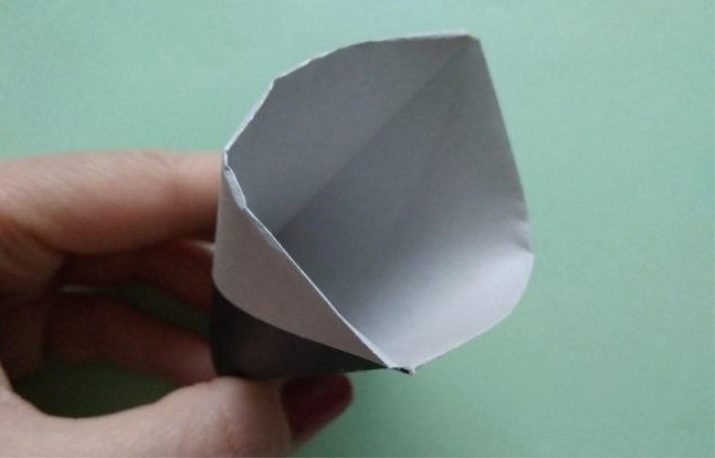
- At the final stage, the formed pocket of the structure should be carefully opened.


This is a very simple diagram that is perfect for beginner origami artists and young children. Making such a paper mug requires a minimum of free time. The color of the paper square can be chosen absolutely any, based on the wishes of the master.

Diagram of a mug from modules
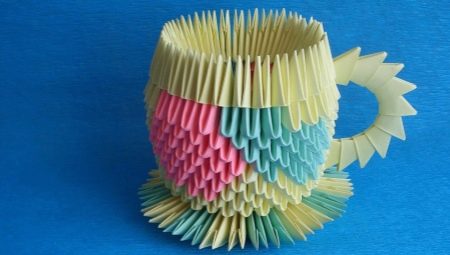
The modular origami technique is more complex. It takes a lot more free time to model such crafts. The very principle of the technique lies in the preliminary production of individual parts - modules, which are then assembled into a single paper structure of a certain shape.

The mug figurine can be made according to the modular technique. To do this, first of all, you need to prepare the required number of modular components of the future craft:
- 271 white modules;
- 71 triangular blanks of orange color.
Also, the master should prepare high-quality glue in advance, by means of which the paper mug figure will be fixed.


Let's consider step by step how to correctly assemble a modular shape in the form of an original circle from the specified components.
- It will be necessary to separately collect the 3 main components of the mug: a bowl, a saucer, a handle. As a result, all these elements will need to be connected by means of an adhesive composition.
- You should start with a mug. It is necessary to make a base of a standard type using 21 white modules.
- It is required to collect at once a couple of rows from the 21st snow-white module. After that, the formed circles should be closed.
- Install orange modular components from the third row. You will need to alternate 1 orange and 6 white paper pieces.
- In the 4th row, it will be necessary to alternately fix 2 orange and 5 white triangular blanks.
- It is necessary to continue assembling the future modular mug. In each of the rows, 21 modular elements should be exhibited throughout the entire assembly.
- In the 5th crown, the pattern will change. You need to install 1 orange, 1 white, 1 orange and 1 more snow-white module.
- In the 6th crown, the master will need to fix 1 orange, 3 white, 1 more orange and 3 more white triangular components.
- To assemble the 7th row, you need to use 1 orange, 2 white, 1 orange and 3 more white components.
- Making the 8th row of the design, the master will need to alternate 1 orange and 1 white modular parts, and then again orange and 4 white ones.
- So gradually the assembly of the original mug will approach its finale. When assembling the 9th row, you will need to use a pair of orange and 5 white triangular blanks.
- Collecting the 10th crown of the product, insert one orange modular part through 6 snow-white ones. In the final row, you need to install 21 white modules.
- Now you can tinker with the handle of the mug. To do this, you need to assemble a chain of 12 triangular elements. In this case, two colors should be alternated - you can start from absolutely any of them.
- The formed part must be attached to the side of the cup. Previously, the handle will need to bend in an arcuate manner.
- At the final stage, the saucer is assembled. It is done very simply. To do this, you do not need to model the base - you just need to insert all modular elements in the same direction. In this case, the long side should fit into the pockets.
- The saucer should be made up of 4 rows. Three of them need to be made white, and the final one - orange.
- The formed saucer should be attached to the bottom of the paper cup. On this, an original and beautiful craft will be ready!


Such a craft can serve as a creative interior decoration or an unusual gift for a loved one, for example: for dad, mom, grandmother or grandfather.
A beautiful modular design in the form of a tea mug with a saucer is sure to pleasantly surprise any person.


Other interesting ideas
Many origamists use other interesting workshops on modeling a figurine in the form of a circle.For example, origami paper cups designed for decorating greeting or invitation cards are very cute. Such a craft should have a two-dimensional structure and a festive appearance.


Let's get acquainted with the step-by-step instructions for modeling such an original and beautiful figure with our own hands.
- First, the master should choose a suitable square-shaped paper sheet. The optimal size is 15x15 cm. Work should be started from the wrong side. The square should be folded in accordance with the vertical axis.
- Now the workpiece should be opened.
- The edges on the right and left sides will need to be folded towards the center.
- As a result of the above actions, the basic form "Doors" should come out.
- Now the corners are placed from below to the middle.
- A triangular piece will form.
- The bottom of the workpiece is folded in a "mountain", guided by the dotted line.
- The bottom corners are folded over and overturned again.
- A diamond will be visible at the bottom. It should be revealed from the inside.
- The edges are turned to the sides and flattened. The bottom will form.
- The paper cup can be left as it is, glued to the base, and then finished or finished with the handle.
To make the look of the craft more spectacular, it is worth resorting to applique decorations.


There are also very unusual and cute kawaii paper mugs. For how to make them yourself, see the next video.


