Origami in the form of a bat
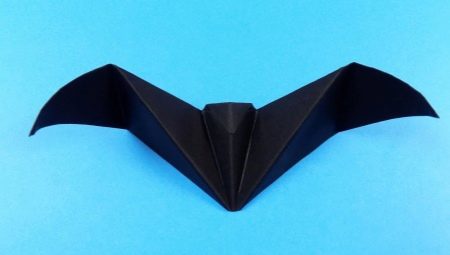
The Japanese origami technique allows you to craft almost any figurine. Origamists can create beautiful and original bats from an ordinary piece of paper. There are many simple and complex schemes for modeling such crafts. In this article, we will learn how to correctly make origami in the form of a bat.
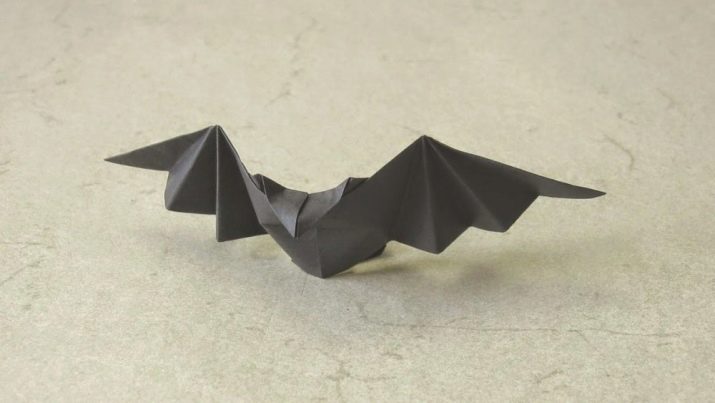




How to make a simple bat?
It is not recommended to immediately resort to making very complex origami bat-shaped figures. It is better to start acquaintance with Japanese technology with simpler schemes. After that, it will be easier for the master to make complicated and non-standard types of figures.

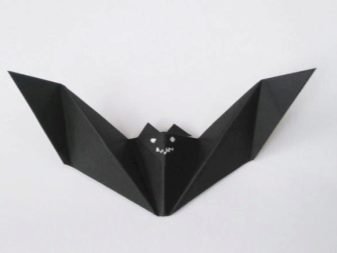


A simple bat is a great option for kids and aspiring origamists. You can assemble it in just a few minutes. Consider a step-by-step instruction on modeling such a paper craft.
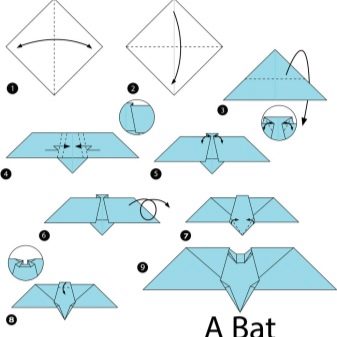
- You will need to prepare a sheet of black paper. It should be placed on a smooth and level surface. The top corner on the left side will need to be folded diagonally. It is necessary to draw a straight line from the base of the diagonal fold to the edge of the opposite leaf. As a result, two geometric shapes should be formed - a rectangle and a square. The last quadrangular structural element will need to be folded to the side, since no work will be carried out with it.
- You should pick up a square piece of paper. It must be folded diagonally in half. As a result, a triangular piece will be formed. It must be positioned so that the top is directed downward.
- The figure will need to draw a middle line horizontally. The top of the triangular blank is bent in accordance with this line so that it looks out.The product will take the shape of a crown. It should be turned over to the other side.
- Before reaching the middle, you need to bend both sides of the workpiece. In this case, the corners should be directed upward.
- Now the formed wings of the figure are folded in half again, but already towards themselves. The future origami figurine is turned.
- The next step is to take scissors with sharp blades. They should make small cuts on the bat's head. The middle of the product is bent backwards so that the ears acquire the desired structure and shape.
- Next, details are cut out of white paper - an oval or a circle. The master can choose absolutely any saturated color from which he will make the pupils. It is necessary to glue the pupils onto a white circle or oval.
As a result, you will get excellent eyes of the animal.


Wing Flapping Mouse Assembly Diagram
A bat, assembled in Japanese papermaking technique, can be not only simple, but also more original. For example, you can make an interesting craft with flapping wings. In the manufacture of such a figurine will be more complicated.


Let's analyze the detailed instructions for modeling such a paper flying figure with our own hands.
- As in the case above, first take a square piece of black paper. It is folded in half horizontally, and then opened. The same steps should be done vertically. After that, the product is returned to its original position.
- The lower half of the sheet is applied to the middle. Thus, a line will be outlined. Next, the sheet is unfolded. Its tip is applied to the previously formed line. After that, you need to return to the original position of the product again.
- The sheet is folded in the form of a triangular piece, and then turned over. The workpiece must be positioned so that its top is directed downward. You should take a closer look at all the lines. It is necessary to bend the tip from the bottom up along the extreme bends. After that, the shape of the craft will look like a boat.
- At the corner joints in the upper part, you need to bend the strip on the right inward. Then it is folded back. This step must be repeated on the left side of the product. After that, new lines are formed. They are bent towards the middle on both sides. Then the product is turned over.
- A pentagon of an elongated structure should be located in the middle of the workpiece. Wrap a couple of the bottom corners to the central part of the craft. Then it is opened. The resulting two small triangles are pressed inward. Now the craft is turned over.
- The corners near the center are bent in opposite directions. Thus, it will turn out to make the legs of the bat. After that, it is turned over again.
- The tip at the top of the product is folded towards itself and to the very bottom. As a result, the head of the animal is formed. The paper structure is unrolled.
- To form the right wing of the mouse, you need to bend the line to the right, and then bend the wing itself behind it. You also need to act on the other side of the product. The figurine is turned with its muzzle towards itself.
- The wings are folded like an accordion, and then spread slightly, but not too much.
- The two lower points located on the head of the figure must be carefully bent.
The tip of the muzzle is wrapped downward.


Other interesting ideas
The origami bat figurine can be modeled according to other interesting schemes. Among them there are both extremely simple and very complex, suitable for experienced origamiists.
Let's consider how to correctly make a bat figurine in accordance with the instructions for children.
- We must take a square sheet of black paper. It is folded in half and then opened. Then the product is folded again, but in the other direction, then it is opened again.
- Now the workpiece is folded diagonally and opened again. Then the product is returned to its original position.
- 4 large triangles can be seen along the lines formed. Two of them should be bent inward.Now the product must be positioned towards you in such a way that the top of the triangular element is at the bottom, and a couple of corners are on the right.
- Using scissors with sharp blades, you will need to make an incision on the right side near the bottom corner. Above it, another similar incision should be made, but so that the second is connected to the first incision. The resulting small piece of paper, resembling a crescent in shape, is carefully pulled out.
- The triangle is opened in both directions. The remaining two solid triangles are also placed to the sides.
- One corner is bent to the side, and then it is bent to the line in the center. Then the entire triangle is wrapped inward. It will be necessary to duplicate the steps in the opposite direction. The torso should be shaped.
- The uppermost corner is folded down. You will get a muzzle of a mouse with ears.

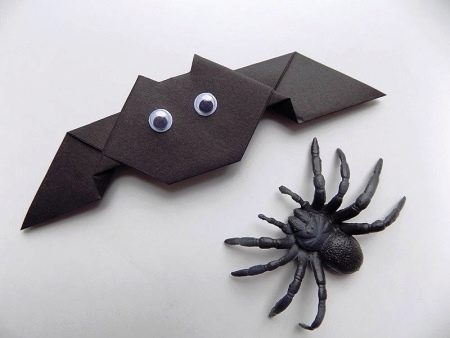
You can make a cool bat out of black paper, which will become a decoration on the occasion of Halloween. To make it, you will need not only paper, but also toy plastic eyes and scissors.
- The black square is folded diagonally in half.


- The top of the triangular-shaped product is neatly bent downwards so that the corner extends beyond the lower part.

- The craft is turned over to the other side.

- To form the wings of a bat, you will need to bend the right side of the wing so that they line up in a diagonal strip. On the other side of the product, a symmetrical fold is formed.

- Then you will need to carefully bend the wings, and then arrange them horizontally.


- The corner at the bottom is tucked up.

- Now the blank of the future bat is turned right side up.

- With the help of scissors, it will be necessary to very carefully form the ears of a nocturnal animal. For this purpose, it is enough to make several symmetrical cuts in the upper half of the product.

- To make the bat more original, funny and lively, you will need to glue ready-made plastic eyes to it.
Such parts can be purchased in shops where everything for creativity and art is sold.
Useful Tips
Let's take a look at some helpful tips for modeling origami bat shapes.
- You need to make paper bats very carefully and without unnecessary haste. If you hurry at a certain stage of folding, the figure may turn out to be sloppy and unattractive.
- If the manufacture of crafts involves the use of scissors, and a small child will work on it, all operations should be carried out under the supervision of adults. This will avoid possible injury to the young origamist.
- For assembling the figures, it is recommended to use only high-quality and not too thin paper. Special origami sheets are available for purchase.
- If it is necessary to use glue in the modeling, then it should not be applied in large quantities. This can negatively affect the beauty and accuracy of the craft.


For information on how you can make origami in the shape of a bat, see the next video.


