How can you make origami in the shape of a lion?

In the well-known Japanese origami technique, you can model almost any paper figurine. Lions made of colored or special paper are beautiful and original. There are many schemes for making such crafts. In today's article, we will find out how you can make origami in the form of the king of beasts - a lion.


How to make a lion cub?
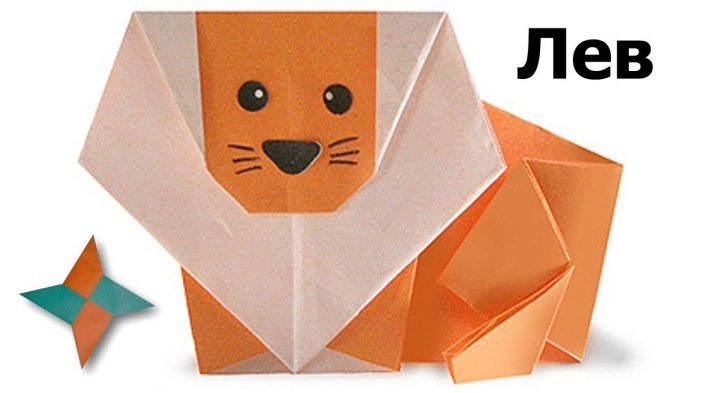
This craft is a simplified version of the origami lion. Its modeling is perfect for children aged 6 to 8 years. To make the animal's face more expressive, it is recommended to choose colored paper bases with contrasting sides.
Better to resort to a combination of light yellow with brown or orange.


Consider the step-by-step instructions for modeling a lion cub from paper with your own hands.
- It is necessary to pick up the original paper square with parameters 15x15 cm. It will need to be put with the dark side up.
- The product will need to be folded along both diagonals, and then open.
- At the next stage, the corner located at the bottom of the workpiece will need to be bent by about ¼.
- The sides on the sides of the product must be folded obliquely, guided by the dotted lines, which are indicated in the diagram.
- Next, you need to bend the half of the head in the upper part towards the back.
- Now you can take a marker or black felt-tip pen. With the help of such tools, you should design the lion cub's face: draw the eyes, nose, mouth and mustache.
Such a simple and understandable manufacturing scheme is perfect for children, as well as for beginner origamists.


The scheme of creating a seated lion
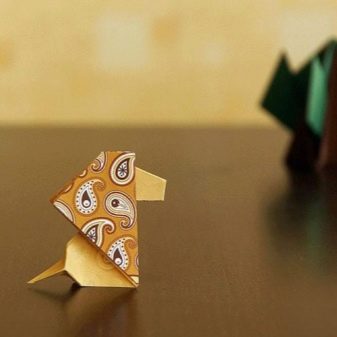
Using the origami technique, you can make a beautiful lion in a seated position with your own hands. For example, the model of such a craft, developed by the Spanish master Rui Rhoda, is made quite simply, but at the same time it looks cool, especially if you use not ordinary, but craft paper with sides that have different colors.


Let's analyze the detailed instructions for modeling a paper figure in the form of a seated lion.
- The master will need to prepare a square of paper with parameters 15x15 cm. It must be placed on the table with the wrong side up. Each master chooses the color of the source material at his discretion. It can be not only yellow, but also any other shade.
- The next step is to fold the workpiece diagonally in two steps. Once it is necessary to make a bend "mountain", and the second time - "valley".
- After that, the resulting product will need to be opened to its original shape.
- The corners at the top and bottom will need to be gently bent towards the center. This should be done so that the fold "mountain" is located vertically.
- Next, along it, you will need to fold the existing figure in half. After that, the workpiece is turned 90 degrees.
- The corners on the right and left must be raised, aligning the edges along the axis in the center.
- The product is turned over in the next step.
- The layer on the bottom on the left side will need to be carefully bent along the strip indicated in the diagram.
- Then you will need to make a fold of the reverse type, relying on the dotted line.
- The closest layer of the "head" should be opened downward.
- Now the pointed corner on the right will need to be folded onto the left side, guided by the arrow.
- The head must be closed again.
- The triangular element at the base of the torso of the craft should be folded in half.
- The closer layer is folded along a diagonal line.
- The body of the figure must be folded along the bisector, and then opened. The wizard will then have to return to the steps from step 11.
- In the next step, the master will have to form a "petal" fold by clicking on the figure in accordance with the directions of the arrows.
- Next, the first layer of the lion's mane will need to be folded back. The rest should be tucked along the red line marked in the diagram.
- After this stage, the figurine of a seated origami lion will be ready.
All actions must be accurate and accurate. The master should avoid haste and haste, otherwise the origami craft will turn out to be careless and unattractive.


More ideas
An origami lion figurine can be made according to many other patterns. Among them there are both extremely simple and quite complex ones. The latter category includes crafts that are collected using the modular origami technique. Such products are modeled by pre-fabricating triangular modules. Subsequently, they are connected to each other in a certain sequence, forming a single structure.


So, in order to make a beautiful figurine in the form of a paper lion cub, you will need modular components in the following quantities:
- you need to prepare 155 white modules;
- 207 yellow ingredients.
The master will also need: glue, ready-made plastic eyes and a nose (they can also be drawn on a thick paper sheet), small pieces of yellow and black paper to form antennae, black or brown wire, yellow pieces of corrugated paper. From the latter, the legs and tail of a lion cub will be made.


When all the necessary modular components are ready, you should proceed to the assembly of the origami figurine in the form of a lion cub (in stages, from top to bottom).
- First you need to collect the starting row. It will consist of 2 crowns. Each of them should have 12 yellow modules.
- Next, you need to take 3 more yellow elements. They need to be positioned as shown in the diagram.
- The steps must be repeated, collecting 5 more yellow modules in the same way.
- After that, you will need to add yellow elements to the first and second rows. They will need to be closed in a single circle.
- Both 1 and 2 rows should have 12 modules each.
- The 3rd row of the structure should be assembled from 4 white and 8 yellow modules.
- The formed workpiece will need to be turned out so that the broaches are on the outside of the structure.
- In the fourth crown, it is necessary to perform an addition (2 times). Each corner must be fitted with 1 additional modular component.
- Modules of the same color should be put on the snow-white modules in the third row, similar elements should be placed on the yellow elements of the third row.
- In the 4th row, a total of 24 elements should be installed.
- You should continue assembling the lion cub figurine in accordance with the diagram.
- In all rows of the structure (up to 17 rows), 24 modular elements must be installed.
- In the 17th row, you need to start closing the top of the figure. On the 18th row, the assembly of the entire paper structure will be completed.
- Now you need to beautifully and neatly arrange the made structure. From the yellow modules, it is necessary to form the ears of a lion cub, slightly rounding them at the very edges with scissors.
- From the wire, you will need to cut out the components that will be used to design the legs and tail of the lion cub.
- Paws should be formed from a combination of wire and corrugated paper. The latter is glued to the wire base. The ponytail can also be made from corrugated paper attached to a wire.
- The prepared components will need to be attached to the lion cub's body.
- Next, you will need to cut antennae and cheeks from yellow and black paper to decorate the head and muzzle of the craft.
- Prepare plastic eyes. Such things can be purchased in specialized stores, where everything for creativity and needlework is sold. You can make eyes for a lion cub with your own hands by cutting them out of thick cardboard of the appropriate colors.
- All the prepared details for the design of the muzzle will need to be fixed in the right places. At this stage, the assembly of the original and very cute craft will be completed!
The finished unusual craft can be additionally decorated with any details that the master chooses.


For information on how to make origami in the form of a lion, see the next video.


