How to fold origami in the shape of a bear?
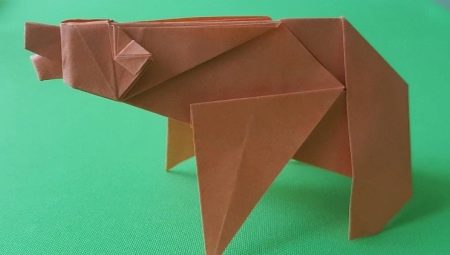
One of the most famous forest animals is the bear. Such a soft toy was or is in everyone. The named animal can be seen as a hero of cartoons, films, fairy tales and stories. You can do it yourself using origami.




Simple circuits
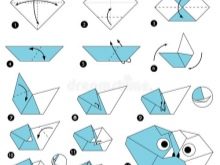
Paper figures can be folded from 4-5 years old. Such activities not only make your hands more dexterous, but also improve attention, imagination and memory. Better to start with simple step-by-step schemes. To keep young children interested, you can make a funny teddy bear that looks like a funny toy:
- bend a square made of double-sided colored paper diagonally and open it back;
- then we bend it along the second diagonal and straighten it again;
- bend the right and left corners to the center of the sheet;
- after that, we wrap the sides one by one, joining them in the middle;
- straighten everything back;
- along the line closest to the central diagonal, bend the left corner to the right;
- turn it back along the next line;
- do the same on the right side;
- the lower sides adjacent to the protruding right and left corners of the workpiece are slightly wrapped towards the middle;
- bend the bottom corner up, while using our fingers on both sides, we open the lower part of the middle folds;
- bend down the central corner;
- we wrap the right and left corners down, going into the part bent before this;
- bend the upper part of the workpiece and hide its corner inside;
- bend back the narrow strip at the bottom;
- we wrap the upper corners on the opposite side, step back from the fold and raise the rest of the part back to get small but symmetrical ears, if desired, they can be rounded off with scissors.


There is a short step-by-step tutorial for a more realistic teddy bear. We start with the head.
- We outline the diagonals and bend all the corners by a quarter: the upper one - to the opposite side, and the three remaining ones - to the center.
- Fold the workpiece in half so that the corner bent back is in the foreground.
- We turn the future head over and wrap the upper corners down, joining them in the middle. Then bend the lower edges of these parts up at the same height.
- Bend the middle corner down and turn the workpiece over.
- We draw the face of a teddy bear.
The body becomes even faster.
- We fold the same square across.
- Bend the upper right corner down, and the lower left - up. Align the slices in the middle.
- We fold the workpiece along the middle line.
- Cut the sharp corners with scissors in a straight line or bend them slightly.
- Bend one of the side corners back and forth to form a fold in the form of a short tail. We glue the head to the body.


Another simple option that can be offered to preschoolers and beginner origami lovers is the scheme for creating a polar bear.
- Fold the white square up and down (you can cut it out of office paper).
- Then bend diagonally, matching opposite corners.
- Rotate the resulting triangle down on one of the short sides. Fold the adjacent side to the middle, focusing on the fold obtained earlier. Unscrew the top layer of paper to the left and crush down the top corner.
- Bend the left corner to the side along the beveled line, straighten it.
- Bend the left corner inward. Draw the nose and eyes.


Complicated options
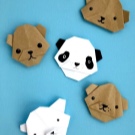
You can also make a craft in the form of a company of two friendly bears: white and brown. To do this, take brown single-sided paper and put the white side up. And then follow a few simple steps.
- Fold the paper from corner to corner and straighten it, mark the middle at the intersection of the resulting folds.
- Fold opposite corners to the marked center. It is important to iron each fold well - then the craft will be neat.
- Fold the workpiece in half lengthwise.
- Bend the right side to the left (parallel to the edge of the line) and straighten it back.
- Turn the folded part up.
- Turn the workpiece right side down.
- Wrap the left (colored) corner.
- Bend the tip of this corner up.
- Straighten and twist, smoothing the top fold in the opposite direction.
- Wrap the right (white) corner.
- Bend the tip of the white corner, and then straighten it.
- Jam the white corner inward.
- Fold down the top colored and white corners. Draw faces.


As your skills improve, you can take more complex schemes. For example, make a figurine that really looks like a real forest bear.
- Take a large square sheet of paper (it is better to make it from A3 format), fold it diagonally, and then in half, unfold and mark the upper point of the middle fold.
- Bend the lower right corner of the sheet to the intended point, unfold it and mark the beginning of the fold on the left.
- Bend the upper edge down to the marked start of the fold, align it parallel to the lower cut.
- Bend the lower half of the right side to the side (until it intersects with the diagonal), open it and mark the lower point of the resulting fold.
- Bend the lower left corner, aligning it with the marked point, smooth out the folds, keeping parallel with the opposite edge.
- Bend the lower half of the left side to the midline, unbend and mark the lower point of the resulting fold.
- At this point, there will be a line along which you need to wrap the right side.
- We bend the transverse line and bend it down, combining it with the oblique fold obtained in step 6, and then we wrap the lower left corner to it (at the beginning of this fold we put another point).
- We straighten.
- Bend the bottom edge to the last point and wrap the top corners towards the middle.
- Turn over, bend the side corners along the line from the upper corner to the ends of the transverse fold.
- At the same time, we turn off the corners on the back side and bend them, aligning the adjacent sides in the middle.
- Turn over, make a transverse fold in the center of the workpiece.
- We press the sides inward, making a petal fold (you need to monitor the symmetry of the folds on the back side).
- Fold the workpiece in half lengthwise.
- We put the bottom corner of the head under the top layer, and then we make the hind legs narrower - we bend the extreme corners inward (repeat from the back side).
- We knead the right corner inward and bend it back so that a fold is obtained, then bend the side angle at the front paws.
- Make a fold on both sides of the neck.
- We hide the corners of the folds behind the legs and shape the nose - we press the corner inside the head.
- We bend the ears to the back and bend them back in the form of a fold. We knead the muzzle inward (to make it easier to do, you can first bend it to the side, then step back a little from the fold and wrap it back).
- We form the paws - we turn the lower corners in the opposite direction.
Since there are many small details and folds in the craft, all folds must be carefully smoothed, paying attention to the corners.


How to make modular origami?
One of the areas of origami is creating shapes from multi-colored modules. In order not to be distracted, they must be done in advance. For a medium-sized bear you will need 15 black, 82 yellow and 610 brown parts.


We start with the torso, in which the modules are arranged in a circle:
- in the first row there are 16 brown parts, they are laid with the long side down;
- in 2 and 3, the same number of brown ones (hereinafter, the parts are put on with the short side down, the rows need to be shifted and given the shape of a bowl);
- 4 - 3 yellow and 13 brown parts;
- then, in each row from 4 to 10, we increase the number of yellow modules by one and add a circle with brown ones, so that in total we get 16 pieces;
- at 10 we get 7 yellow and 9 brown parts;
- then in each row we decrease by one yellow module and complement the circle with brown ones;
- at 15 there should be 2 yellow and 14 brown;
- at 16 and 17 we put on only brown ones (we move the last circle closer to the center).


Next, we proceed to the head:
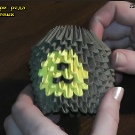
- we collect the first three rows of 22 brown modules, placing them with the short side down;
- in the 4th row there should be 4 yellow and 18 brown;
- in 5 - 5 yellow and 17 brown;
- in 6, we strictly follow the sequence: 1 yellow, 1 black (and put 1 yellow on top of it), 1 black (1 yellow on it), 1 yellow and 18 brown;
- in 7 - 2 yellow, 1 black, 2 yellow and 17 brown;
- 8 - 4 yellow and 18 brown;
- in 9 - 3 yellow and 19 brown;
- from 10 to 12 - 22 brown parts;
- in 13 - 18 brown ones (as the parts become smaller, several of them at regular intervals will have to be put on 3 corners);
- in 14 and 15 rows - 15 and 12 parts, respectively.


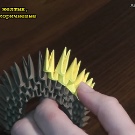

We collect the front foot in straight rows:
- 1 row must have 3 blacks;
- from 2 to 7 rows we alternate 4 and 3 brown parts;
- from 8 to 11 we alternate parts 2 and 3.
There are even fewer rows in the hind leg:
- from 1 to 4 rows we alternate 3 and 4 brown parts;
- in the 5th row we put on 3 black ones.
Then we collect the eyelet: we collect 11 brown parts and glue them onto a cardboard blank.
It should be remembered that it is necessary to complete the paired limbs and ears. And finally, you can proceed to the final assembly - carefully glue the head and torso, and then glue the eyes, ears and legs.


To learn how to make a simple paper bear using the origami technique, see the next video.


