What origami can you make for your birthday?
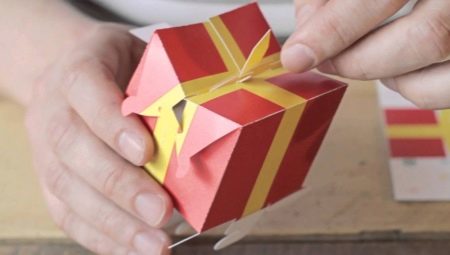
There are many interesting ideas for creating beautiful origami for the birthday of loved ones. There are both very simple and affordable, and quite complex schemes that only experienced origamiists can handle. In today's article, we will find out what origami you can do with your own hands for your birthday.
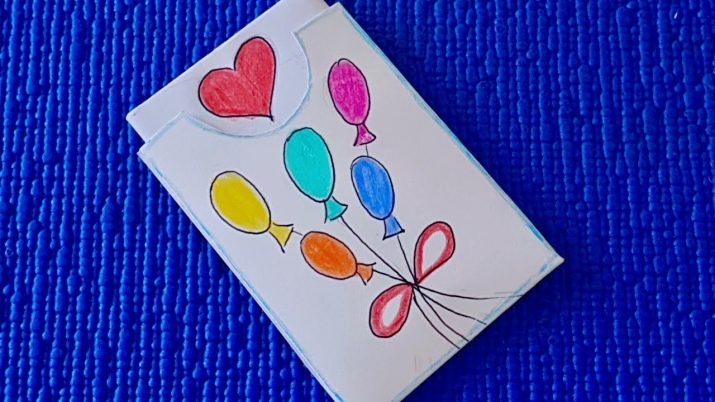


Folding paper flowers
The most popular birthday gift is pretty flowers. It can be not only live plants, but also handmade origami flowers. When done correctly, such crafts turn out to be very attractive and original. With such a present, you can pleasantly surprise the hero of the occasion and cause a sincere smile on his face.
Using origami technique, you can make first-class flowers for a birthday present for your grandmother, girlfriend, sister, aunt or mother. Both beginners and experienced origamists can model original tulips, lilies and roses from plain paper.


Tulip
Paper tulips made in accordance with the origami technique are beautiful and unusual. To design a birthday present like this, you need the following important components:
- colored cardboard;
- special paper for scrapbooking;
- thick A4 sheet;
- glue and scissors with sharp blades.
Using the listed components, you can make chic gift tulips. Let's analyze step by step how they are modeled correctly.
- At the first stage, you should take a sheet of paper, for example, yellow. You will need to carefully cut a square out of it. It needs to be folded in half diagonally.
- At the next stage, the paper blank will need to be carefully folded with the corners towards the inside and towards the fold in the center. Due to such manipulations, a neat tulip bud will be formed.
- Now you need to prepare a green sheet of paper. You will also need to cut a square out of it. After that, it will need to be bent diagonally.
- The side parts of the formed triangular part must be rolled up to the center point of the workpiece.
- Similar actions will need to be repeated for the main workpiece.
- It is necessary to bend the tips located at the bottom. This should be done in different directions. As a result, you will get ready-made and neat leaves of the future gift flower made of paper.
- Next, a prepared paper bud is glued to the stem.
- After that, you need to take a large sheet of paper. It is necessary to make indents along the edges, which are approximately 6 cm.
- Neat cuts will need to be made on both sides. Their depth should be at least 2.5 cm.
- The trimmed parts will need to be bent towards the middle. The result is the correct trapezoid, which will play the role of the original flower pot.
- Turn the paper sheet over. The upper part is folded over. The corners of the base should be bent. The bottom edge will need to be wrapped up.
- The protruding parts in the workpiece structure will need to be bent back.
- At the final stage, the finished charming flower should be glued to a paper pot.


the Rose
A wonderful birthday present will be a rose made using origami technique. A similar craft can be an addition or decoration to the main gift. Modeling a paper rose takes place in several main stages. In addition, the following components will be required:
- thick cardboard (it can be used to make an original postcard);
- green sheet of paper:
- a sheet of paper of any bright shade;
- glue and toothpick.
Let's take a look at the detailed instructions for self-modeling origami in the form of a rose.
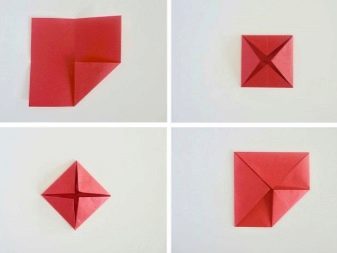
- The paper square, which will be used to make the bud, will need to be bent diagonally, and then unfold.
- In the next step, you will need to roll up the side sections of the workpiece. This should be done in the direction of the formed bend. After that, the paper blank must be laid out.
- The short edges of the product will need to be bent towards the central part.
- The upper square, which is on the right side, needs to be folded diagonally.
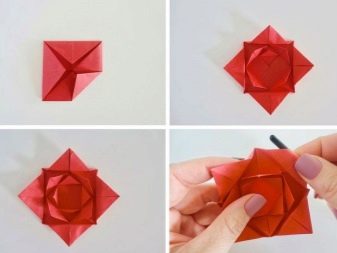
- On the right side, the paper blank should be bent, holding the central corner from the bottom, pulling it to the side.
- The formed corner will need to be carefully bent inward and towards the middle of the workpiece.
- With regard to the remaining squares, you will need to carry out the same manipulations.
- Now you need to bend the corners from the middle to the edge sections of the future paper rose.
- The corners inside are bent to the sides.
- Fold the outer corners back.
- Next, you will need to cut a long strip from a sheet of green paper. It should be very carefully screwed onto a toothpick.
- It is necessary to make sheets of paper from the remnants. For these purposes, you need to bend up the shortened sides. The product must be turned over. After that, the central corners of the structure will need to be bent down.
- You will need to attach a bud and a stem of a homemade rose to the formed leaves.


Lily
A bouquet of paper lilies will be a gorgeous gift. If you make these flowers carefully using good materials, you can achieve amazing results.
Consider the step-by-step instructions for modeling gorgeous paper lilies.
- First, fold a square piece of paper in half diagonally. This should be done in two directions.
- Next, the sheet is folded in half both lengthwise and across.
- It is necessary to form a base shape - "double square".
- The sides of the upper layer of the product must be folded towards the middle in accordance with the "kite" shape.
- Similar actions will be needed on the other side of the workpiece.
- The formed triangles are folded inward by means of a reverse fold.
- The workpiece will need to be turned 180 degrees.
- The sides of the product are folded towards the middle.
- The same actions must be performed on the reverse side.
- The workpiece is turned over 180 degrees again. The middle part needs to be bent, and then folded like a triangle.
- Repeat the same steps with the other three folds.
- The folds formed in the center of the workpiece should be wrapped inward.
- Now the future lily should be bent in the form of a diamond.
- The side halves are placed in the middle of the workpiece.
- The specified manipulations will have to be carried out with all the other rhombuses in the workpiece design.
- The petals now need to be carefully expanded and rounded.
You can simulate a pair of identical lilies, and then insert one into the other to get a more voluminous and original flower.


How to make a postcard?
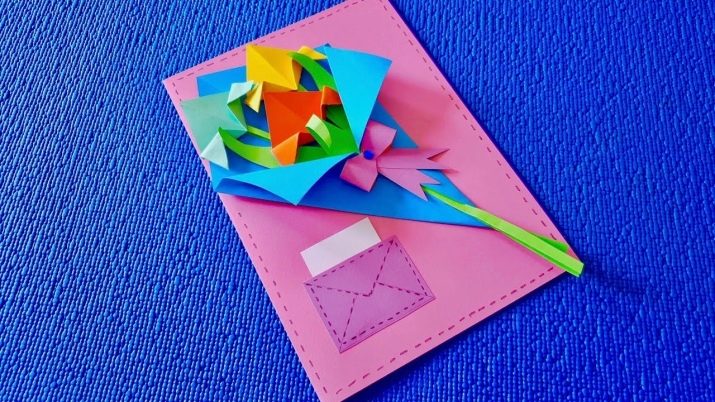
A creative postcard made by yourself will be no less original and memorable gift.
Such a present can be given not only to a woman, but also to a man, for example, a grandfather from a granddaughter, uncle, brother, father, or a boy who likes it. Homemade postcards can be both extremely simple and quite difficult to make.


A very good gift will be an original volumetric kirigami card, decorated with the image of a birthday cake. This craft can be presented to both friends and relatives. To simulate such a product, the following components will be needed:
- thick paper;
- templates prepared in advance;
- glue;
- utility knife or scissors with sharp blades;
- double-sided paper (its color can be absolutely any).


Let's figure out in stages how from the listed components you need to correctly make a beautiful volumetric birthday card.
- You will need to print a variety of decorative components on a sheet of paper, which will decorate an unusual festive craft. In addition, the preparation of the future product itself should be prepared.
- With a sharp clerical knife the master will have to make the necessary cuts along the finished lines marked on the diagram.
- In the next step the elements printed on paper will need to be cut out as accurately as possible... You need to act without haste so as not to spoil the neat appearance of the original postcard.
- Now you need to bend, and then bend paper blank in the direction away from you.
- On top of a paper product pre-prepared decorative components are applied. They will need to be very carefully and securely glued to the blank of the future paper card.
- At the next stage, the sheet will need to be bent in half. After that, kirigami should be glued into it.
Using this example, you can show your imagination and use a variety of images and inscriptions, and not just decor in the form of a festive cake.


More ideas
At the listed master classes, the options for making origami birthday presentations do not end there. There are countless other creative crafts that make amazing gifts for women, men, and kids of all ages.... These can be voluminous, modular, and flat options.



Money invested in a creative and attractive origami envelope can be a cool present. To simulate such a product, you will need:
- 2 multi-colored leaves;
- glue or double-sided tape;
- pencil;
- ruler;
- scissors with sharp blades.
Let's analyze the process of making such an attractive and useful gift.
- At the first stage, you will need to very carefully cut out a blank from a sheet of colored paper intended for one of the sides of the future original envelope.
- From another piece of paper, cut out a paper blank intended for the inside of the planned gift item.
- The inner part of the envelope should be made slightly smaller in size than the outer part. This is necessary so that later the product can be easily glued.
- The next step is to glue the inside of the paper envelope.
- The edges of the paper product must be very carefully bent, and then glue them.


Uncle, dad or grandfather can make a wonderful version of an envelope postcard in the form of a charming shirt. You can put a note with congratulations in such a gift craft. A similar presentation is modeled as follows.
- You need to take a rectangular paper sheet, the dimensions of which are 21.5x30 cm. It must be put with the wrong side up.
- The rectangle will need to be folded in half and lengthwise in order to mark out the central strip on it. After that, the product will need to be deployed.
- The side halves of the future gift craft must be folded towards the center line.
- The paper blank will need to be rotated 90 degrees.
- At the next stage, you need to carefully bend the right side of the workpiece literally 1 cm.
- The product must be placed vertically and then turned over.
- The corners on the side of the fold are folded to the line in the middle. This will be the collar of the future shirt.
- In the lower part, the corners of the upper layer are opened by about 1/3 of the height of the paper blank itself.
- The bottom of the existing paper structure will need to be folded up. In this case, the edge will need to be carefully brought under the formed collar. At this point, your original origami shirt will be completely finished!
You can additionally decorate such a present with a separately formed tie glued to the shirt.


For information on how to make a postcard out of paper, see the next video.


