Making origami cards

Postcards made in origami style look interesting and beautiful. In this article, we will figure out how you can make a postcard step by step for any holiday using a similar technique.
How to do it on March 8?
With a dress
To fold your origami card dress, you will need a square piece of colored paper. It must be folded in half, ironing the fold line well, so that the white side, if any, is inside, and the colored side is outside. After that, the workpiece must be expanded and its sides bend to the center line. Expand the workpiece again.


As a result, you should get a square piece of paper, divided into several identical sectors of a rectangular shape. After that, you need to bend the side folds to the central one in turn - as shown in the figure.

Now we bend the resulting part in half so that a little less than one centimeter remains on top. Fold the shorter part back, slightly stepping back from the resulting fold.

As a result, your workpiece should look from the back as shown in the figure.

Now the part needs to be turned over, after which you can start working with its lower part to form a skirt. This requires pulling the inner corner of the workpiece as much as possible while holding the fold at the top in the middle. The same machinations must be done with the reverse side.


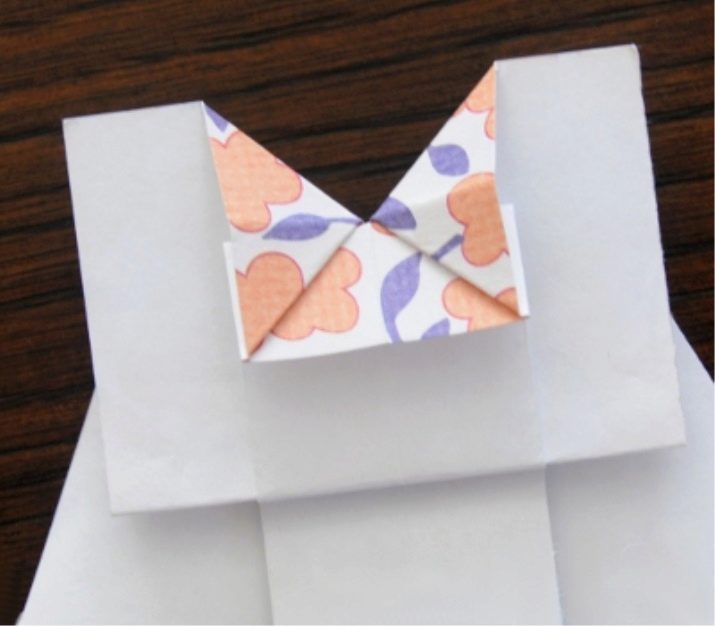
Now we return to work on the upper part, namely, over the neckline. To do this, bend the corners from above at a right angle, as shown in the image - this is how you will form the collar.The resulting collar must be bent back, thus obtaining a pocket, and the workpiece itself must be turned over with the reverse side. Gently pull the top layer of it, while opening the resulting pocket.


As a result, everything should turn out as shown in the image.

After that, you need to bend the sides of the workpiece alternately. Along with this, the sides of the skirt will also be bent. Now we fold the other side.


There is very little left. You need to bend the top corners of the dress from the back side as much as possible.

All that remains is to attach the dress to the postcard and give it to mom.

With flowers
A craft in the form of a bouquet or a postcard with paper lilies will look very unusual. It's easy to make them.

To work, you need a square piece of paper. It needs to be bent in half in two directions, well ironing the fold lines, so that the result is a cross. Unfold the sheet and fold it again twice, but this time along and across. After that, it is necessary to form the base of the flower, it is the so-called double square.


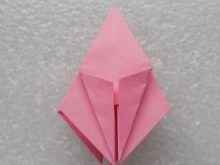
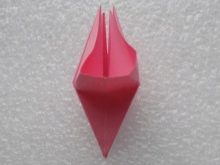
After that, the sides of the top layer need to be folded towards the center to create what looks like a kite. Do the same with the other side. As a result, triangles will be obtained, which must be folded backward fold inward, as shown in the image.


We turn the future flower 180 degrees and fold it on both sides of the side to the center. Unfold the flower again, fold back its middle part and fold it in a triangle.


All these shenanigans need to be done with the remaining three folds. The central folds must be wrapped inward.


Then the workpiece is folded with a rhombus, the sides of which are bent towards the center. We do the same with the remaining rhombuses, after which we unfold the petals and straighten them.


With a small envelope
Making a small envelope with your own hands using origami technique is easy. To do this, you will need a sheet of A4 paper. It must be bent in half and ironed, then open and bend the two upper corners to the resulting fold line.
Now we turn the sheet over, its lower part must be folded along the fold line, as shown in the image. Turn the sheet over again to the front side and bend its sides to the center line.
Now open the outer corners of the workpiece using a reverse fold and bring them inward. Expand the workpiece again. Its upper part must be folded in a "valley" along the line indicated on the diagram. The outer corners must be bent inward, and the inner corners must be bent.
As a result of the work, you should have a small envelope with a heart, in which you can put a note with sweet wishes. Such an envelope can be presented for any holiday, be it Mother's Day or March 8th.

Birthday Ideas
You can also make an origami card for your birthday. Even children can make such a craft, the most important thing here is to act in stages. For such work, you will need colored cardboard and paper, scissors and glue.
First, we fold the cardboard sheet, which will be the basis of the craft, in half. We cut out several balls from colored paper, having previously outlined them with a simple pencil. Separately, cut out a paper strip and write a congratulation there - this part must be attached to the base of the balls.
The postcard is ready.

Such crafts can be decorated with a variety of additional elements in the style in which you want.

Options for February 23
For Defender of the Fatherland Day, you can also make a very beautiful and simple craft - a shirt that can be presented to any boy, dad or grandfather.

The workflow is simple. You need to take a sheet of 21.5 by 30 centimeters and put it with the wrong side up. Fold it in half to mark the center line and unfold it, after which we fold the sides to the center.

Now the workpiece needs to be turned 90 degrees, and its right side must be bent by a centimeter.

After that, we put the workpiece vertically and turn it over. We fold the corners on the side of the hem to the center line, forming the collar of the shirt. In the lower part, the corners of the upper layer must be opened by a third of the workpiece height. It remains only to bend the lower part of the base upward, and bring the edge behind the collar.

The shirt is ready. Separately, you can fold the tie, proceeding in stages, as shown in the diagram:

Original postcards for February 14
For Valentine's Day, you can also make a beautiful postcard with your own hand, for example, in the form of lips or a kiss. The peculiarity of such a postcard will be that it will turn out to be voluminous.
To work, you need a square piece of red. It needs to be folded in half. You will get an isosceles triangle, which must be visually divided into three parts. After that, the corners of the triangle must be bent so that they are on the approximate fold line and do not intersect the edges of the shape.


That corner of the triangle, which turned out to be lying on top, must be bent in half twice. The resulting small triangle must be bent along the black line, as shown in the image. The triangle that protrudes beyond the figure must be folded in half. We do all this for the other side as well.


Now you need to expand the shape to a square. The square itself should be turned with the colored side towards you, and its corners should be bent back. Bend the large upper corner to the middle. After that, bend up the bottom edges along the fold line, which is marked in black in the figure. It turned out to be a part of the lip. To form the second, do all these shenanigans from the other side.


After that, the workpiece must be folded in half as shown in the image. In this case, the red triangles should stick out.


We unfold the workpiece back, but not completely. Now bend the corners on one side as shown in the image. We do the same on the other side and turn the craft over.


A fold is formed in the middle of the figure, which will divide it in half. We make another fold, as shown in the figure. Bend the side in half again, but in the opposite direction. Repeat all this on the other side, then turn the workpiece over.


How to make origami postcards, see the video below.


