Making origami in the form of a penguin

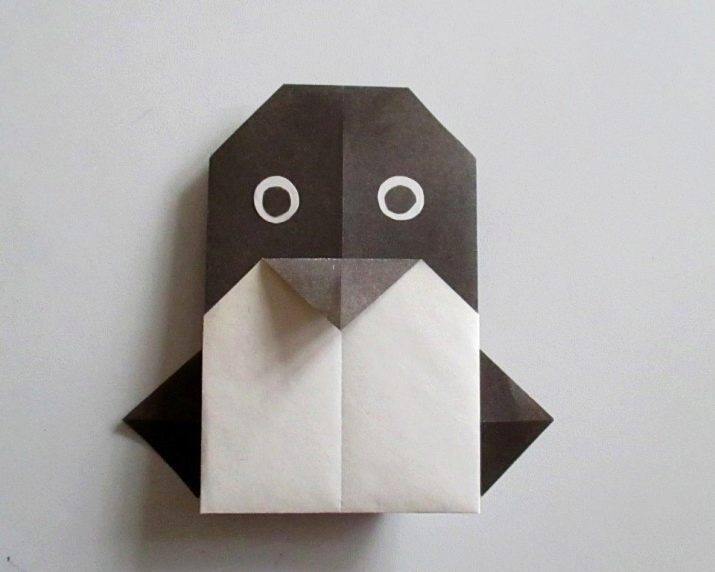
The Japanese origami paper folding technique allows craftsmen to make a wide variety of figurines. For example, you can make an adorable penguin from a simple paper square. There are many techniques in accordance with which such a craft is modeled. In today's article, we will learn how to properly make a penguin-shaped figurine.


Options for children
Even a small child at any age can master the origami technique. There are many schemes and instructions that are suitable for small craftsmen ages 4-5, 6-7 and older. Most often, master classes for children are extremely simple and straightforward.

If a child is just getting to know the basics of the Japanese origami technique, then he should not immediately start modeling very complex crafts with many small details. It is best to start with simpler schematics. So, with little craftsmen at the age of 5-6 years, it will be possible to make an adorable penguin from a black and white paper sheet.


Before starting to create such a figurine, it is advisable for a child to first study the basic forms of origami.

Let's analyze the features of making a simple children's crafts step by step.
- The first step is to put a sheet of paper on the table so that its black side is facing up. Then the sheet is folded in half along a diagonal line to outline the center fold.
- The corner located at the bottom must be bent up to approximately the middle of the sheet.
- At the next stage, the sheet of paper will need to be folded in a "valley" along the center line.
- Next, you need to bend the sides of the figure in the direction from the pointed corner, without reaching the edges.
- The corner that protrudes must be turned towards you.This will mark the fold.
- Another fold should be placed from the point of the previous fold and the corner of the wing of the future penguin.
- In accordance with the intended folds, the wing of the figurine should be formed.
- Next, the product needs to be opened. The sharp corner must be laid inward and then outward to form the beak.
- Now the workpiece will need to be folded in half again. The head should then be bent to the side.
- Along the formed folds, you need to straighten the head of the paper penguin, after which the volumetric craft will be ready.

You can easily make a penguin looking up.
- A double-sided square sheet of paper is folded in half, then unfolded.
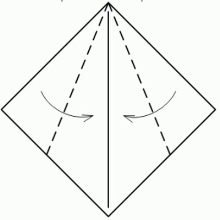
- The corners are folded to the center line.
- The sides from the bottom are folded to the center line and unfold.
- The product is folded in half. At the same time, the corner that is the most pointed must be carefully wrapped upwards.
- Along the existing marked lines, it will be necessary to fold the paper blank as shown in the diagram.
- At the next stage, you will need to carefully bend the corners of the wings of the future penguin. The tail should be bent towards the inside of the structure.
- It will be necessary to very carefully turn out the pointed beak of the paper origami penguin in the direction in the opposite direction. As a result, it will turn out to form the head of the bird.
- At the final stage of modeling, you will need to form the bird's beak.
- The original paper craft is ready. The master will only have to draw the eyes of the penguin. The best way to do this is to use a marker or felt-tip pen.


How to make an emperor penguin?
With your own hands, you can model a gorgeous emperor penguin out of paper. To make such an interesting origami figurine, the master will need to prepare:
- colored paper;
- scissors with sharp blades so that all cuts are neat and not torn;
- glue;
- hole punch "snowflake" or "star".


Consider a master class on creating an emperor penguin figurine using the origami technique.
- Prepare a dark blue or black piece of paper on one side. The other side must be white. It is desirable that this component measures 14x14 cm.
- The sheet must be folded so that the folds are formed diagonally.
- Next, the workpiece is placed with the colored side facing you in the form of a rhombus. Another fold is made, but slightly higher than the central part.
- At the formed fold, bend the upper corner. This will be the beak of the future penguin figurine.
- The workpiece is turned over, after which both of its edges are bent so that their ends abut against the formed folds.
- Now for triangular bases, you need to bend the ends again in different directions. In this case, it is necessary to indent from the central vertical fold (about 1.5 cm).
- The uppermost corner must be gently bent towards you. The workpiece is turned over again.
- At the next stage, the master will need to cut out the penguin's beak, as well as the eyes. The finished components must be glued to the muzzle of the formed craft.


The figurine can be originally decorated with a scattering of paper snowflakes and stars obtained after using a hole punch.


Creation of modular origami
Classic origami options look attractive and original, especially if this is not just a flat craft, but, for example, a jumping or volumetric variation. However, in terms of showiness, such things are inferior to structures assembled in accordance with the modular origami technique.


Such figures are created by making triangular modules, which are then assembled into a single shape of any size. Modular products take longer to create and are more sophisticated options.

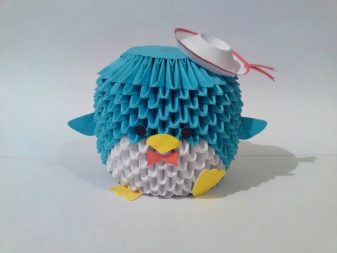
To make an original modular penguin, the master will need to pre-prepare 304 blue triangles from paper and 112 white components.If the specified elements are ready, you can proceed to the assembly of the penguin figurine. Let's consider how it should be modeled in stages.
- In the starting and 2nd row of the structure, you need to install 26 snow-white modules each. In the 3rd row, the master must expose 18 blue and 8 white components.
- The fourth row of the craft being created must be assembled from 17 blue and 9 white modules. At this moment, the created figure must be given the correct shape.
- The fifth row of the product must be modeled from 18 blue and 8 snow-white modules.
- To assemble a 6 row, the master must use 17 blue and 9 snow-white components.
- The 7th row will take 18 blue modules and 8 white modules.
- The eighth row should be constructed from 19 blue and 7 snow-white paper triangles.
- For row 9, select 20 blue and 6 white elements.
- The tenth row should be made up of 21 blue and 5 white modular components.
- Rows 11 through 16 should be formed with blue elements exclusively. In the final crowns, the modules will need to be gradually narrowed as they approach the top.
- The hole in the structure will need to be sealed with a pre-cut paper circle. It is desirable that this component is made from a blue sheet of paper.
- At the final stages of assembling the original figurine, the master will need to design the face of a paper modular penguin. For these purposes, it is necessary to cut out all the necessary components from sheets of colored paper: eyes, beak, wings and legs. To make the craft more creative and vibrant, it can be supplemented with various kinds of decorations. For example, it can be a hat cut out of colored paper, an elegant bow or other elements that the master wants to add. After adding these components, a beautiful modular craft is ready!


Origami in the form of a penguin for beginners, see below.


