How to make origami in the form of a parrot?

Making various origami crafts is a fun activity that can be suitable for both children and adults. Often in this technique, various decorative products are made in the form of animals. Today we will talk about how to make a parrot on your own in this way.


Interesting simple ideas
To begin with, we will look at simple options for creating these decorative items that can be suitable for beginners and children.
Macaw
The manufacture of this craft takes place in several stages.
- You must first prepare a square sheet of paper, its side should be 15 centimeters. Then it is folded in half diagonally. Then the material is turned back. The right and left edges of the paper are folded to the marked line. All this is also then revealed back.
- Opposite parts are folded in the same way.
- Next, folds are made in such a way that the result is a standard origami "fish" shape.
- The resulting upper sashes are folded, the left and right edges are folded. Then the workpiece is folded into two equal parts by the "valley".
- An acute angle from below is folded along an oblique line.
- The top folds up in a zigzag pattern. Next, folds are made so that the bird's beak begins to form. The tip is curled slightly to give it its characteristic shape. Almost any person can handle this way. It does not take much time and effort.


There is another instruction for making such a parrot. The product is produced rather quickly, it is made on the basis of the standard origami "bird" shape. In this case, you will need to follow the steps described below.
- The lower part of the workpiece is revealed.Small folds are made by "valley", "mountain".
- The triangular valve is moved to the left.
- The figure is turned over. The valve opens from the inside and flattens slightly.
- The paper product is folded into two equal parts with a "valley".
- The left side is folded and then the workpiece is flipped over to the other side again.
The beak is formed due to the reverse folds, after which the product is turned at 90 degrees, the tip of the beak is slightly bent down.


Schematic by Robert Lang
Origamist Robert Lang created his own workshop on making the bird in question. In this case, you also need to prepare a square sheet of paper. You can cut this base from a standard A4. It is folded in a diagonal strip. After that, the upper corner on the right is bent, then returned to its original position.
The workpiece is folded in half so that a triangle-shaped part is obtained. The tip of the corner, which was previously bent, is cut, it is bent in the opposite direction, this element will serve as the bird's beak.
After that, a triangle is bent down from one side folded side, it will serve as the tail of the bird. You will also need to make another small triangle at the bottom, cut it off so that you get the legs of the parrot.


Necklace parrot
This bird is distinguished by its grace and special beauty. It can also be easily done by hand in a few steps.
- A square paper base is prepared (light green material must be used). It is folded twice along the diagonal strip. The fold line is ironed well, then the whole thing is revealed.
- The corners in the upper part are folded towards the central side. The edges (left and right) are folded to the vertical centerline. The product is gently bent "mountain".
- The lower part is tucked in, while it will be necessary to focus on the near corner of the triangular figure.
- The resulting fold is opened, all the steps taken earlier are repeated in the opposite direction.
- The square flap on the left is folded diagonally.
- The fold made before opens back.
- With the help of a reverse fold, the valve on the left is brought into the inner part of the workpiece - this is how the bird's tail is formed.
- The top corner will need to be tilted slightly to the left to get a neat parrot's beak.
- Next, the fold that was made before is unfolded. All this also starts in the inner part of the figure.
- The material is turned counterclockwise approximately 45 degrees. This is done in order to give the bird a sitting position.
- At the final stage, you can decorate the craft. Often, together with such a paper product, various paintings and panels are made. They are most often decorated in a beautiful Japanese style, supplemented with various natural materials.
You can make several of these birds at once and make a single composition out of them.


Budgie
To make such a bird with your own hands, you should also perform several steps step by step.
- Prepare single-sided paper in advance. In this case, the sheet should have a square shape (the optimal size is 10x10 centimeters).
- You will need to outline one of the diagonal stripes. Then both edges must be folded to this line.
- Next, you need to bend the triangle from above. The corners on the left and right are fixed to the center centerline.
- The resulting "pockets" are straightened out. Both corners are slightly raised upward. The lower section is neatly folded in a zigzag pattern.
- The figure is folded in half with a "mountain". After that, it is turned at an angle of 90 degrees.
- With the help of a small reverse fold, the top is carefully bent at a right angle, as a result of which the bird's head should be formed. At the end, you can draw eyes with a black felt-tip pen. They can also be cut out of black paper and glued to the base. These budgerigars will be an interesting decorative decoration for your home.


Creating a modular parrot
In this case, you will first need to prepare the required number of individual modules from paper material. We will need 160 larger red pieces, 18 smaller pieces of the same color, and we also need to make 90 blue pieces, 62 light blue, 54 yellow, 20 green, 125 pink. You need to make standard triangular blanks.
When all the elements are ready, you can start making the parrot. In this case, you will need to step by step follow the steps described below.
- Initially, five blue and six pink parts are connected in a circle. All of them are inserted into each other. According to the same algorithm, stripes 3 to 5 are added. At the transition to the sixth level, the back and front sections are selected separately.


- Next, add one paper element to the last paper module. Moreover, such an addition is performed up to level 8. In this row, 2 pink elements will need to be included in the central part.


- After that, the formation of the ninth tier can begin., the front and rear sections of the workpiece are fixed together. The front will eventually be the belly of the bird, and the back will be its back.


- 5 pink and 4 blue elements are added to the dorsal region, also on the edge you will need to add two blue blanks.
At the front, nine details are also added.


- Level 11 is formed from 2 red blanks in the middle of the front section. On the back, 3 modules of the same shade are fixed. After that, all the blanks used will be pink.


- Later, one by one, red details will be added to both the back and the belly of the parrot. The same steps will have to be done on the next two levels.

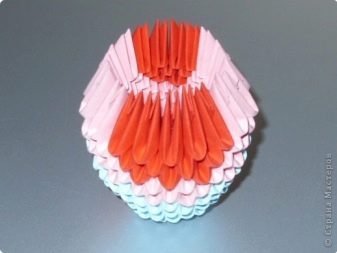
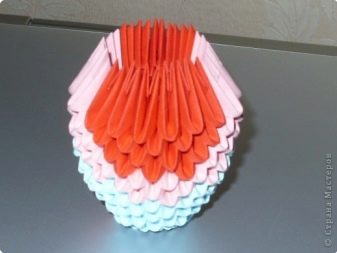

- From the 16th tier, they begin to fix the red parts for one module. This is done in order to begin the formation of the head and cervical regions in the bird.


- To make level 17, you need 6 red blanks, on the 18th row it is necessary to use already 5 such parts, on 21 - 4, and on 22 - 3.
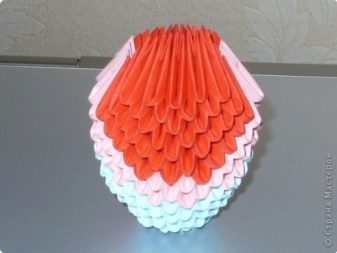


- Starting from 23 stripes, up to four red blanks are being added.
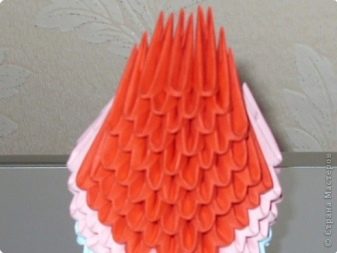

- On the 24th row you will need to add three such modules, on the final tier - only two modules.


- The last two parts are fixed to each other.


- The head department is assembled separately. It should be assembled from five red parts, and in the first row only two such elements are used, in the second - three. The finished part is glued to the body. In this case, it is better to use PVA glue.


- At the final stage, the tail is assembled. In this case, you will need to use both blue and red elements. At the same time, they are laid out in a checkerboard pattern. If necessary, the tail length can be slightly adjusted.

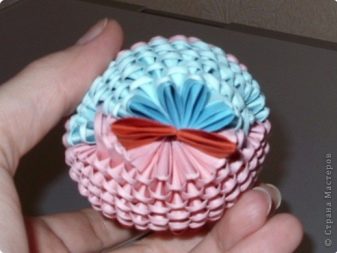


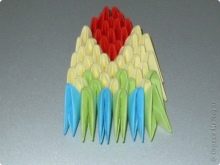
- You will also need to assemble the bird's wings. For this, all colors are used at once. A small oval blank is formed from modules of each color. Further, they are all connected together into one oval and attached to the body of the parrot. So that they do not fall off over time, it is better to fix them with PVA glue. The result should be a bright and voluminous craft.




Useful Tips
When doing various origami crafts, it is worth remembering some important recommendations. So, do not forget that you should only work on a table or other flat surface so that all the details are neat.
In the manufacturing process, it is better to use a thin but dense paper base.
This material will allow you to maintain and maintain the necessary shape for a long time, and at the same time it will be quite convenient to work with it.

If you are just starting out with origami or want to make an interesting craft with your children, then it is best for you to first search the Internet for a suitable ready-made scheme that will reflect all the stages of manufacturing the product. Wherein you can pick up ready-made templates on which all the necessary dotted lines will already be marked, along which the folds are formed. These stencils will be the best option for beginners.
For how to make origami in the form of a parrot with your own hands, see the next video.


