Origami from paper in the form of a heart

Many people like to make various beautiful crafts out of paper. Often they are made using the origami technique. Today we will talk about how to make a beautiful decorative heart with your own hands.


Peculiarities
A paper heart can become a beautiful valentine or just a lovely gift for your loved one.
Sometimes these items are used to decorate postcards. Often they make large volumetric figures in which they hide another small gift.


To make such a decorative product, you should prepare the necessary materials in advance.
- Paper... It is best to purchase a double-sided colored copy so that the craft is as beautiful and bright as possible.
- Stationery: simple pencil, ruler, scissors.
- Figure schemes. You can do without them, but ready-made templates will greatly simplify and speed up the work process.


How to do it step by step?
There are many interesting ideas for creating origami hearts. Let's consider some of them in more detail.
Paper heart for beginners
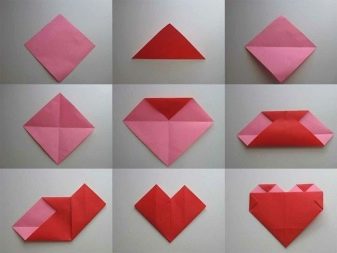
To make such a craft, perform the following steps.
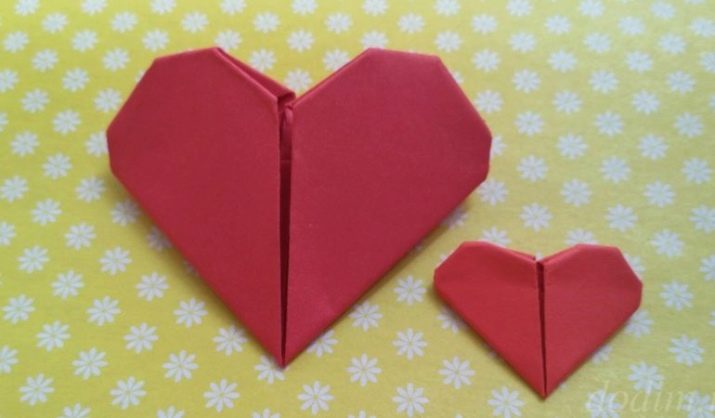
- A red square sheet of paper is being prepared (pink material will also work). Its sides should be 15 centimeters each. The figure must be positioned in such a way that the top is turned towards itself.
- The opposite corner is bent towards the center... The bottom part closes neatly in an envelope shape.
- Top, which is closer to us, should be placed on the upper inflection line.
- The right side folds towards the middle. Do the same with the left side. As a result, the shape of the heart is formed. But at the same time, it will be too angular, so it should be rounded a little.
- The workpiece is turned over to the other side. After that, all the protruding parts are slightly bent.
- Inside the finished heart you can put small note with wishes.
This option is great for kids. This craft is often made from paper napkins.


Heart with flower
Now we will analyze step by step how to make a craft in the form of a heart with a flower with our own hands.
- A rectangular sheet of paper is taken (can be of any color). It is placed with the long side facing you.
- Then both corners from the bottom are folded along the diagonal line, then the workpiece is neatly unfolded.
- Do the same with the upper corners.
- The sheet is fully opened and turned over to the other side.
- The right corner is folded to the left so that the fold line follows the crosshairs.
- The paper blank is unfolded again, the same fold is made from left to right.
- The workpiece straightens well and then flips to the back side.
- The marked lateral folds are gently wound inward from both sides at once.
- As a result, a shape with double triangles on the sides will be formed.
- The workpiece is "closed" from right to left.
- The corners below and above are bent. Along the lines marked in this way, the product is folded and opened, thus obtaining a rhombus.
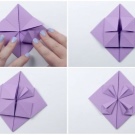
- Further work goes only with the top layer. Here you need to form a beautiful floral pattern. The upper and lower corners on the left are bent to the center line. The same steps are repeated on the right side.
- The resulting folds are opened and bent with the tops to the middle.
- The resulting squares are smoothed well. The part is folded into a basic kite shape. These manipulations are repeated on all squares.
- Further, each fold of the "kites" is unfolded and smoothed.
- The paper blank is turned over to the opposite side.
- The upper half "closes" downwards.
- The corners on the side bend down, the heart is turned over with a flower towards itself.


Volumetric modular heart
This option will be suitable for those who already have experience with origami. To begin with, prepare paper, the color can be any. A large number of identical models are made from it. The more there are, the better.
When all the modules are ready, they begin to form the composition. It will be most convenient to draw a heart on a separate sheet of paper in order to adjust to the finished image in the process.
When connecting the paper modules, your heart should form. It is recommended to start work with flat elements. As a result, you will have a beautiful heart. If desired, it is additionally decorated with various decorative details, they can also be cut from paper of different colors. You can even make a whole beautiful box out of modules.
This craft will be a great gift for March 8th.


With wings
To make such a decorative origami-style product, perform the following manipulations.
- Take a square sheet of paper of any color. The material is folded in half and then unbent. The same actions are carried out on the other hand, as a result, fold lines should appear on the paper.
- The top and bottom of the material must be carefully folded so that the edges touch the middle, then the workpiece is turned over to the opposite side.
- The strip is applied to the center line (it will become the wings). The upper part moves back a little, while the corners are straightened and ironed.
- At the end of the strip, triangular shapes are formed, then the material is turned over again.
- At the top of the finished heart, you should outline the corners.

More ideas
There are many more options for making such beautiful paper hearts. You can make an origami envelope in the shape of a heart.
- Take a square paper sheet. Its corners are folded into a triangle. All kinks are ironed well. The material is unbent, turned over, all actions are repeated on the other side. Then the workpiece is unbent again.
- One corner is taken, it is carefully led to the center line. The sheet is turned over, the lower part is folded so that the bottom is level with the top.
- The left side of the product is folded over. It is important to ensure that the edges meet the extreme point of the corner. The same manipulations are performed on the other side. As a result, an angular heart should learn.
- Further, the paper blank is neatly unfolded. The corners that are placed on the sides are slightly bent. The upper corners are also bent (no more than 1 centimeter). The material is turned over, as a result, a craft is obtained in the form of an opening envelope-heart.
You can put a small message or other small surprise there.

You can also make an origami bookmark for books from paper.
- First, a square sheet of paper is taken. It is folded in half, then the lower edge is folded. The material is carefully unfold. A strip should form in the middle of the paper, one edge of the square is applied to it. The paper turns over.
- The corners that are located at the bottom are wrapped so that they connect with the central vertical line... In this case, an angle is formed in the lower part. The material is turned over again with another part.
- The corners are pressed against the top. The extreme point of the triangle should touch the upper center of the sheet. The workpiece is turned over again.
- A strip is bent at the top, as a result, small triangles will form. After that, they are straightened, first small corners are bent, and then the two lower corners are larger.
- The resulting product is turned over the other side, the side parts are wrapped towards themselves.

There is another way to make such a bookmark for books:
- a square paper sheet with scissors is cut into two identical blanks;
- one piece is bent lengthwise;
- after that, the resulting figure is folded from right to left, all the folds are unfolded;
- then two corners, which are located below, are folded towards the middle, so that the result is a corner;
- then the product is turned over;
- the upper edge folds down a few centimeters, while the corners are wrapped;
- the product turns over again, as a result, a beautiful bright bookmark is obtained.
It is recommended to fix each corner with glue. They do this so that they do not cling to the pages of the book in the future.

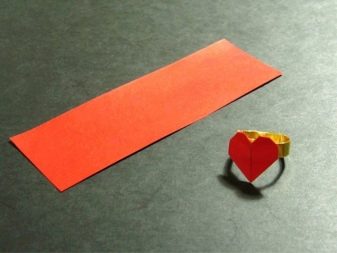
You can make a beautiful craft in the shape of a ring with a heart.
- A square sheet of paper is being prepared... With the help of a simple pencil, it is lined with four stripes. Moreover, the first two should have a width of 1/8 of the total size, the third line - 2/8, the distance from the third to the fourth line should be 1/8 of the total size.
- The sheet is folded upright. Then the material unfolds back. The first strip is folded. Then the paper is turned over again.
- A small triangle folds at the top. Then the corner is turned in the opposite direction from us.
- Further, the border is gently bent from the middle in the opposite direction. The protruding corners are lowered. In this case, small "ears" will remain at the top. Their ends should also be removed.
- Part of the material that remains is bent with an accordion or tube... The resulting product is turned over the other side.


A small box in the shape of an origami heart will look beautiful.
- First you need to prepare a template for the box you like.
- The selected template is redrawn onto a blank sheet of paper.
- After that, the made image is cut out with scissors. As a rule, zones for connection of the future product are already marked on the drawing. The material is folded along these fold lines.
- The sides are thoroughly coated with glue, and then connected together.
- The finished craft is left until it is completely dry.
When creating such a box, you can use various types of glue.If you plan to put something inside such a box in the future, it is not recommended to use a glue stick, because the product will quickly fall apart under the weight.


Such a decorative box can be made in another way.
- A pattern is drawn on the main material, consisting of two identical hearts. In this case, the inflection lines are marked with a dotted line.
- The contours of the craft are outlined with a felt-tip pen, while its color should be several tones darker than the main material.
- The product is folded along the marked dotted lines, the parts are fixed with glue.
- When the craft is completely dry, a pleasant message is written on the front side.
You can put small sweet gifts inside.


You can make a beautiful heart message. To do this, perform the following steps.
- A sheet of paper with dimensions of 20x5 centimeters is taken. The colored layer should be placed outward. The material is folded in half lengthwise.
- After that, every half fold in half again and fold back so that the white seamy side is located outside.
- Next, the paper sheet is folded in such a way that so that the colored part is outside.
- The sheet will be in four parts... The two middle ones are folded in half in turn. They will have to close with the sides.
- Later, the extreme halves of the middle rectangles are taken. Each of them is bent in half.
- The elements are unfolded, the material is placed with the seamy side up. Rectangular elements that are placed around the edges of the middle square are folded.
- The piece of paper is flipped over to the other side again. The four corners are folded to the middle.
- The corners are neatly straightened, the upper and lower parts of the middle segment are folded. Their edges are bent along the folds. The result is two hexagonal shapes that will be placed on top and bottom.
- The material turns over. The result is a product that consists of two white squares and a rectangle located between them.
- Each square is folded in half, as a result, colored rectangular shapes will be formed from them. The material is turned inside out.
- On both sides, the top corners are folded towards the center. The lower part of the rectangle on the right is folded to form the upper lobule of the heart. Do the same with the other side.
- White rectangular shape bends in the form of an accordion. A nice message is written on the white part.


For information on how to make origami a heart out of paper, see the next video.


