Folding geometric shapes using origami technique

The origami technique makes it possible to make a variety of original paper crafts with your own hands. Decorative items in the form of geometric shapes will look unusual.


How to make a cube?
To begin with, we will look at how you can create a craft in the shape of a cube step by step. This figure is considered an uncomplicated polyhedron. In it, all the faces will be square at once. The scan pattern can simply be printed using a printer. You can also draw it yourself.
In the latter case, you first need to determine the size of the faces. In this case, the width of the paper sheet must be at least three sides of such a square, and the length must be no more than five sides. 4 squares are drawn along the entire length of the paper sheet, they will later become the side parts of the cube. You need to draw everything only close and on one strip. After that, one more square figure is drawn under and above one of the squares.
Later, stripes are drawn for gluing. This will make it easy to connect the faces to each other. At the final stage of manufacturing, it will be necessary to coat the joints well with an adhesive composition.
These parts are glued to each other and briefly secured with paper clips so that the substance has time to dry. This is how all the faces of the cube are fixed.


Pyramid creation
Next, we'll look at how easy it is to make a pyramid shape. This figure is a polyhedron, in which the base is a polygon, and all other faces are in the form of triangles with one vertex.
- All sizes should be carefully selected first, as well as the number of faces of the shape.
- After that, on a piece of paper with a pencil, draw a base in the form of a polygon. Depending on the total number of edges, the base can be made in the form of a pentagonal, square or triangular blank.
- Then, from one of the sides of the resulting polygon, a triangle should be made, which will be the side part.
- Later, another triangle is drawn.... In this case, one of its sides must be common with the first figure. In total, as many as there will be parts in the pyramid are drawn.
- Next, the strips for gluing are marked. At the final stage, the drawn figure is carefully cut out and glued along the outlined lines.


Folding other shapes
Let's see how to fold other volumetric figures step by step using the origami technique.
Cylinder
It is a figure that is bounded by a cylindrical surface and planes that intersect it and are parallel... At the first stage, a rectangle is marked on the material, while its width will be the height of the product, and its length will be the diameter. Next, small triangles are drawn for gluing. After that, two circles are drawn on the material, their diameter should be equal to the diameter of the finished cylinder. These circles will become the top and bottom bases of the shape. All parts are cut with scissors, the side of the product is glued from a rectangular blank.
All elements must dry completely. Further, the lower and upper bases are also fixed to them.


Parallelepiped
This product is a polyhedron with 6 faces, each of which is a parallelogram. To make such a figure using the origami technique, you first need to carefully draw a parallelogram base on a paper sheet, and its size can be any. Further, from each part of the obtained workpiece, the sides of the same shape are marked. After that, a second base is drawn from any side part.
Places for gluing are drawn separately. Next, the resulting pattern is cut out and glued along the marked stripes.


Prism
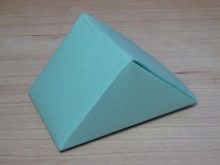
To make a triangular prism, three rectangles with the same dimensions are drawn on the material. After that, one small triangle is drawn above and below the rectangle, which is located in the central part. They must also be the same size. After that, small strips are left on all sides. The remaining strips are coated with an adhesive, then all parts are fixed to each other, thus forming a three-dimensional triangular prism.
With origami, you can also make a hexagonal prism. In this case, 6 rectangles with the same length and width are drawn on a piece of paper.
Instead of triangles, hexagonal shapes are drawn above and below. At the end, strips are also left for gluing, all this is cut and glued into one product.


For information on how to make a cube using the origami technique, see the next video.


