Making origami in the form of an elephant
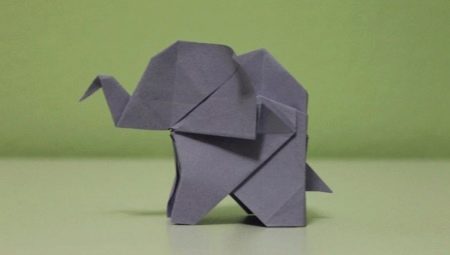
The popular origami technique makes it possible to model a wide variety of figures. For example, you can make an original and very beautiful elephant out of an ordinary sheet of paper. There are many interesting schemes for creating such figures. In this article, we will learn how to correctly make an attractive origami in the form of an elephant.

Simple options
The origami modeling technique is one of the most popular today. Based on various detailed diagrams, you can make beautiful and unusual paper figures. Making effective origami on your own requires certain knowledge and skills, so it is not recommended to start making complex and intricate things right away. It is better to start acquaintance with a well-known technique with simpler and more understandable schemes.
There are many workshops available on how to model a paper elephant figurine. You can choose a great option for novice craftsmen and even for small children, preschoolers. For example, it can be a simple and flat paper figure, for modeling which you will need to prepare 2 sheets of paper and a marker.


Let's take a look at the step-by-step instructions on how to model a simple figurine of an adorable baby elephant.
- The first step is to fold one square leaf in half. The bend must be done diagonally.

- Next, the workpiece is carefully unfolded. The side parts of the paper part are brought to the line located in the center (a kind of "kite" should be obtained).


- Now the corner, which is located in the lower half of the paper blank, will need to be folded upwards.

- The blank of the future elephant is turned over. After that, the corner that is at the top should be laid towards the bottom.

- The corners on the sides must be folded back.A fold is formed on the trunk of the future origami figurine by means of a zigzag.

- In the next step, you will need to take the second sheet of paper. It should bend its lower edge upwards by about 1 cm.

- Now the piece of paper is neatly folded in half.

- The product will need to be deployed again. The lines on the sides fold towards the middle.

- After this passed stage, the second workpiece must be inserted into the first.

Now the assembled elephant will need to glue or draw cute eyes, draw folds on the trunk, and shape the legs.


Creating a voluminous elephant
A beautiful and creative elephant can be made not only flat, but also voluminous. Modeling such original figures requires more knowledge and skills, so it is not always suitable for inexperienced craftsmen who are new to the origami technique.
Let's consider in detail the description of the step-by-step production of a neat and aesthetic volumetric elephant figurine.
- Designing an attractive paper figurine should begin by folding the sheet along and across the lines. After that, the workpiece is re-folded in half, moving from right to left, and then from bottom to top. As a result of such actions, 16 equal squares should be formed.
- At the next stage, you will need to place a sheet of paper in front of you in a rhombus type. The three corners of the workpiece must be folded along the lines directed to the center point. Then the workpiece should be opened.
- Now the corner, which is located at the bottom of the homemade product, will need to be folded upward, up to the last horizontally located fold. The element is then expanded again. This action will need to be repeated for all corners of the workpiece.
- In accordance with the next step, the paper blank is folded, as shown in the diagram. The fold will definitely need to be well ironed to the marked point.
- These steps will need to be repeated in relation to the opposite side.
- Now the blank of the future volumetric elephant needs to be turned over. The corner on the left side must be folded to the red point marked on the diagram.
- After that, the workpiece will need to be carefully straightened and turned over.
- The corners at the top and bottom must be folded towards the middle.
- The side on the right should be carefully opened in accordance with the fold line.
- On the right side, you will need to form a couple of folds, while closing the right half both above and below.
- Next, the workpiece will need to be turned over so that the folded component is directed downward.
- The top layer will need to be folded back along the dotted line.
- Now the sides of the workpiece are folded in the tail area.
- The figurine of the future elephant must be turned over again, and then folded in half.
- It is necessary to make V-like back folds to form the trunk of the paper elephant in this way.
- In the next step, you need to press on the middle diamond located on the back so that it becomes flattened.
- The back of the blank is opened and then compressed at the sides.
- The formed folds will need to be tucked into the pockets on the front of the elephant figure.
- The paper craft must be pinched at the back.
- Now the master must carefully reveal the fold that is at the bottom of the figure.
- After that, a reverse fold is formed. Thus, it will turn out to design the tail of the future elephant.
- To make the trunk of a paper animal, you need to form a back fold.


The construction of the original volumetric elephant is now complete.
If everything was done clearly, as indicated by this master class, then the figure should turn out to be beautiful and neat... To model it, you can use paper not only gray, but also any other color you like, for example, pink, blue, green, and so on.
How to make from modules?
Very original and bright crafts are obtained if they are modeled in accordance with the modular origami scheme. In making, such things turn out to be much more complicated, requiring more free time.
Let's consider step by step how an elegant circus elephant is assembled in accordance with the origami technique using modules.
- A creative craft should be assembled from 1553 triangle modules, among which 164 are yellow, 305 are red, 702 are blue, 182 are pink, 40 are light or pale yellow, 60 are blue, 60 are snow-white and 40 are green.

- First, you need to assemble a single chain of paper triangular modules, kept in scarlet color.


- The formed chain must be closed in a neat ring. The result should be a circle made up of a pair of rows of modular components with 26 elements each.


- Next, you need to lay out 5 more additional rows. In total, 7 of these components should come out together with the previous ones.

- Starting from the 8th row, it is better to alternate paper modular components by color. The order can be different, for example: 4 yellow, 3 red, 3 yellow, 3 red, 4 yellow, 3 red, 3 yellow and 3 more red.

- In the 9th row, it is necessary to use 5 yellow modules, 2 red, 4 yellow, 2 red, 4 yellow and 2 more red modules to assemble.

- The rows must be alternated further. It will take another 8 rows. The body of a funny paper elephant should be assembled from 15 rows.

- Next, you need to expand a number of modular units in white. They need to be folded, putting them on at right angles to the front. This will form the base under the collar.

- The white details are laid out next time in the usual way to make a collar.

- The next step is to design the elephant's head. To do this, you need to assemble a chain of blue elements. They are closed in a ring.
You need to get a circle made up of a pair of rows of 27 modules each.

- Then another 14 modular parts of 27 elements are laid out, while constructing a spherical shape.

- Now you should collect the elephant ears. They are also collected in several rows. For the first, you will need 12 modules, for the second - 13.

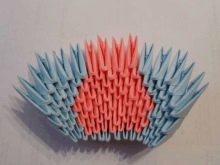

- A similar method should be used to collect the second ear.

- Now you can collect the trunk for the future paper elephant. You need to lay out 11 rows, made up of 4 and 3 modules of blue color. The extreme elements will need to be put on 3 tops.

- Next, you should alternate 3 and 2 rows of modules to lay out 5 more rows.

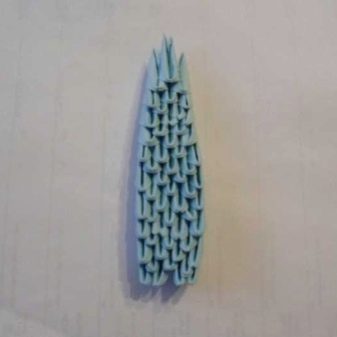
- Then the rows of 2 and 1 modules are alternated again to make an additional 5 rows. There should be 21 rows of modular "spare parts" in the elephant's trunk.


- The nose of the trunk can be made from 3 modular components.


- Then they make the lower jaw of the future figurine.


- Tusks for an elephant can be formed by fixing one module to another. Each tusk should have 4 modules.

- The front legs of the animal are formed.

- Next, a chain is assembled from 9 blue and 9 pink elements. They are closed in a ring. Lay out an additional row of blue parts.


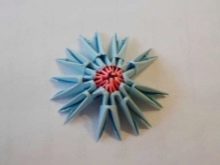
- The blue components are folded down. This will reveal the pink elements. Next add modules of yellow color. In the same way, you should collect the second leg.


- Now, according to the same principle, you can make the hind legs, only here you need chains of 10 modular components. Instead of yellow components, it is better to use red ones.


- Next, you need to take a paper strip of any color. From it, you should make a hairstyle for an elephant. To do this, the strip on one side must be cut and twisted with scissors. The finished element is glued to the head modules. After that, all the parts of the elephant must be glued to each other.


- As an addition, you can make a decorative ball from multi-colored modules and fix it on the tip of the figurine's trunk.


To learn how you can make origami in the form of an elephant with your own hands, see the next video.


