Origami "Smiley" from paper

Origami is a real art that allows you to create various decorative crafts from paper. There are many ideas for making such products. Today we will talk about how you can make an origami "Smiley".

How to make a simple emoticon?
Let's see how you can make the simplest paper craft in the form of a smiley.
- A square sheet of yellow paper is folded in half in a diagonal direction. It is best to take paper that is specially designed for creating crafts using the origami technique, but if it is not available, then you can use simple paper material.
- The side parts are folded to a right angle.
- The entire workpiece unfolds back.
- The right corner of the top layer folds towards the opposite edge.
- The corner on the right is tucked into the resulting pocket.
- Do the same with the left corner.
- Next, using a simple pencil, you should outline the circle so that the folds on the sides are intact by 2-3 centimeters.
- The circle is carefully cut with scissors.
- Felt-tip pens draw the face of a smiley, you can buy ready-made eyes and just glue them, or you can cut them out of black paper. This option will be perfect for a child.


Modular craft scheme
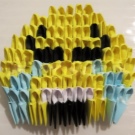
Now we will take a closer look at how you can make crafts in the form of a smiley from paper modules with your own hands.
- Prepare modules in white, yellow, blue and black colors in advance... It is better to assemble all parts with PVA glue so that they do not open and do not lose their shape. The sizes of the modules can be different, the dimensions of the assembled craft will depend on this.
- Five yellow modules are used to form the first row. They are attached to each other with the long side.
- For the manufacture of the second row, six yellow modules are taken, they are fastened with the short side.
- The third strip is made of seven parts with a long part... Two elements are added at the edges, they must be glued together with a short part.
- Fourth row are made of 10 elements.
- When creating the fifth lane, there is an alternation: 2 yellow, then 1 black, 5 yellow parts. In this case, a total of 11 modules are used.
- In the sixth row do the same alternation, but with six black details, and in the seventh row with 7.
- In the 8th lane alternating three yellow, three black, two yellow, three black and three yellow modules.
- Ninth level formed from 4 yellow, 3 black and 1 yellow modules. In this sequence, 15 elements are inserted.
- 10th row alternate with four yellow and one blue modules. The total number of blanks used should be up to 14.
- 11th row in the same way, the yellow and blue modules alternate.
- 12-19 rows also insert yellow, blue and black modules in sequence. In this case, the number of blues should gradually decrease, and the number of blacks should increase.
- Twentieth level create from 6 yellow elements, 21 - from 5. If you wish, you can make several such modular emoticons at once and form one large and bright craft out of them.


Other interesting ideas
The craft in the form of a smiley face changing will look unusual. To make it, first make the basic "catamaran" shape. A muzzle is drawn on the material, then the paper at the top is turned up, and the paper at the bottom, respectively, down. After that, another muzzle is drawn on paper.
The layers of paper are turned over again, but in the opposite directions, and another smiley is drawn. By flipping through the layers in any order, you can get different smiles.


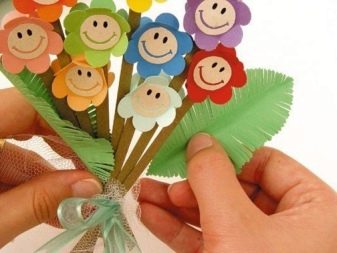
An interesting option would be a craft in the form of a bouquet of small emoticons. First you need to make the base. For this, it is best to use stencils in the form of flowers and leaves. The stem should be cut out of thick cardboard. Cocktail tubes are sometimes used.

Further, all the petals on each flower are slightly bent upward. In the middle, pre-cut paper mugs are glued. A smile and eyes should be drawn on them. This can be done with paints or felt-tip pens.
After that, all paper blanks are attached to tubes or cardboard parts. In this form, everything is better placed in a small basket or elegant packaging. If desired, it is permissible to decorate the finished product a little with small sparkles and decorative ribbons.


You can also make an unusual composition with your own hands, which will consist of different emoticons. It is better to cut out individual elements for decorating muzzles from paper of various colors. Sometimes simple and modular blanks are made, combining into one composition. The made parts can be placed on wooden or cardboard sticks.

For more information on how to make origami an emoticon out of paper, see the video below.


