Origami Shark Creation

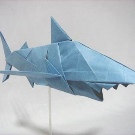
In the origami technique, you can make a huge variety of different figures. Paper sharks made in accordance with various schemes look very original and attractive. Such crafts can be both extremely simple and very complex. In today's article we will learn all the nuances of creating a shark using the origami technique.


Simple option for kids
The origami technique is available not only for adult craftsmen, but also for children of all age groups. It is better for schoolchildren and preschoolers to get acquainted with the well-known technique, starting with the simplest and most affordable craft options. Only after that it is advisable to move on to modeling more complex structures with many small details.


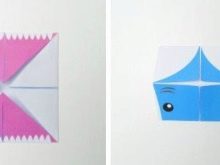
Consider the step-by-step instructions for assembling a simple paper shark figurine.
- First you need to pick up a square sheet of paper. It can be any color, but the best solution would be a blue or blue-gray tint.
- The square leaf is folded in half diagonally to mark the center fold.
- The side tops of the stock must be folded neatly so that they point directly towards the center line.
- Now the corner located on top will need to be lowered to the bottom.
- In the next step, you will need to carefully open the last formed fold. Then it is folded towards the edge of the upper layer of the workpiece.
- Next, the corner is opened again, after which it is folded towards the fold line that was formed earlier.
- Now you need to open the last fold in the paper structure. The incision must be made from left to right.This should be done obliquely from the corner on the right side of the top layer to the first fold strip.
- The paper blank of the future shark will need to be turned 180 degrees. After that, an incision is made from the corner from the bottom to the second fold line at the bottom of the product.
- The formed corners will need to be carefully spread in different directions.
- A triangular piece that was formed earlier should be bent to the left.
- Now the paper blank needs to be bent along the "valley".
- The product is turned 90 degrees. Next, you need to gently bend down the nearest part of the tail of the future shark.
- At the final stage, you will need to draw eyes and a mouth on origami.
Such a simple "Shark" craft can be modeled quickly and easily. It is better for adults to control its manufacture, since the young master will have to work with scissors with sharp blades.


Schematic by Robert Lang
The original figurine of a shark can be assembled with your own hands according to a special scheme from Robert Lang. Such a craft will not be too easy to model, but at the same time it is far from the most difficult idea of the author.
You need to prepare a square sheet of paper. After that, you can go directly to the actions.
- At the first stage, the leaf must be folded in half from left to right, and then unfold.
- Then the sheet is folded from top to bottom.
- The upper corner, located on the right side, must be folded towards the central part towards you.
- The upper corner on the left will need to be bent towards the central part, but already away from you.
- After that, the workpiece will need to be carefully opened from below.
- The figure must be folded in accordance with the fold lines, so that in the end the required double square is formed.
- The sides from the bottom of the top layer will need to be bent towards the middle.
- The triangle at the top is lowered downward.
- Now you will need to unfold the folds formed in stages 7 and 8.
- The outer layer on top will need to be gently lifted. In this case, the edges of the structure should be folded towards the axis in the center of the workpiece.
- Turn the product over.
- The sides on the sides will need to be folded towards the middle of the workpiece.
- The last folds must be uncovered. The top layer should be lifted in the same way as in step 10.
- After that, the upper part of the upper layer will need to be lowered to the lower part.
- The triangular element in the middle must be omitted.
- The paper blank of the future shark must be turned over.
- The corners at the bottom will need to be bent obliquely in different directions. This must be done symmetrically.
- The bottom corner of the second layer will need to be bent upward.
- A pair of side bottom corners should be bent towards the middle of the product.
- The corners on the sides of the paper blank will need to be bent towards the central part of the product.
- Now the workpiece will need to be carefully bent like a "valley".
- Next, the paper craft will need to be positioned so that its free edge is directed to the left.
- The upper part of the product should be folded to the left. Then it is unfolded and folded back into the internal cavity.
- Now the element will need to be turned outward.
- The corner is then bent to the side.
- The next step is to carefully shape the tip of the figure's tail.
- Further, the product will need to be opened from the inside. Set the top layer vertically. After that, the figure is folded back into the "valley".
- The ends of the pectoral fins will need to be wrapped inward.
- At the final stage, the master should draw eyes and a mouth on a paper structure. After that, the original origami craft will be ready!
In execution, such a figure is not the easiest, but it is suitable for novice origamists if you make it strictly according to the instructions.


Original ideas
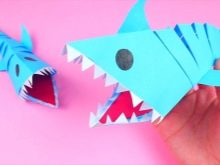
There are many other interesting ideas for creating an original shark using the origami technique. Curious is a paper craft in the form of an underwater predator that opens a toothy mouth. Even the smallest craftsmen can model such a product.


You can form an original and funny toy only by first printing out the necessary template parts. Consider a detailed master class on the step-by-step creation of such a paper craft.
- Initially, you need to print a color template for the future original homemade product. The printout should be done on plain white A4 paper.
- After printing, all structural elements will need to be very carefully cut along the contour. It is necessary to use only scissors that have sharp blades so that all cuts are even and neat.
- Next, a sheet of paper with a printed pattern will need to be folded in half. This should be done along the line of the middle angle. The front side should face inward.
- Next, the paper will need to be straightened, and then turned over.
- To the center point of the fold line, you need to very carefully, but at the same time, wrap all 4 corners of the workpiece forward and down as accurately as possible. After that, the latter will need to be turned over again.
- All to the same fold line at its center point from the seamy side, it will be necessary to wrap all 4 corners of the product forward and downward.
- The workpiece is turned over again. It is necessary to carefully place your fingers in the drop-down corners of the structure and straighten it.
- The next step is to glue the fins to the workpiece. These parts should be attached to the bottom half of the paper shark on both sides, but so that they are located symmetrically.
If there is a desire, the master can glue the head and chin of the underwater predator out of paper so that only the mouth remains open.


General recommendations
Making an original figurine of a shark using the origami technique with your own hands, it makes sense to take into account a number of useful recommendations.
- For modeling different figures, you must use the correct paper. It must have a sufficient level of density. You can also purchase special origami paper, which is sold in art and craft stores.
- When making any figures and designs, it is very important to be patient and unhurried. The master must act very carefully and calmly, otherwise the product will turn out to be sloppy and unattractive.
- If in the manufacture of origami it is envisaged to use glue to connect certain parts, then it should not be applied to them in too much. This is especially true for liquid adhesives. An overabundance of them can negatively affect the appearance of the craft.
- When making origami figurines, it is important to use only sharp scissors, not blunt scissors. The latter will not be able to make even and neat cuts that will not tear the paper.
- If the craft is modeled by a little master, it is better for adults to follow this, to provide assistance at difficult stages.
- If the origami technique is not very familiar to the master, it is not worth starting to master it from very complex and intricate crafts. It is advisable to start with simpler schemes so as not to immediately be disappointed in such creative processes.


For information on how to make a paper shark with your own hands, see the next video.


