Making bouquets using origami technique

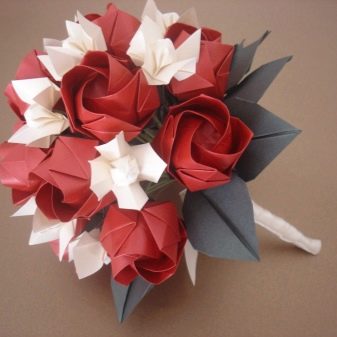
Flowers made using origami technique can become a real decoration of a room or a great gift for a loved one.


How to make a composition with roses?
An arrangement with paper roses looks no less beautiful than a living bouquet. Moreover, the instructions for creating such a craft are quite simple.
-
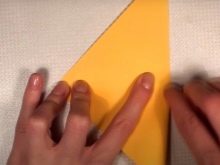
The sheet of paper should be folded in half, marking the fold lines.
-
Next, you need to fold it in half again, bending the corners inward.
-
The upper edges of the resulting rhombus must be folded towards the middle.
-
Next, the figure must be turned over, and the procedure must be repeated again.
-
The bottom corner must be carefully lifted.
-
Having outlined the lines, the figure needs to be expanded.
-
Bend it along these lines. The figure will turn out to be elongated.
-
One sharp corner must be bent to another.
-
Next, you need to turn the figure over, and repeat the previous steps with it.
-
You will get a part with three sharp edges.
-
It must be turned so that one of them is in the middle.
-
Half of the triangle must be carefully unfold and bent to the side. Then the same must be done with the second part.
-
The corners of the resulting star must be smoothly bent inward.
-
Turn the workpiece over. The part of the triangle remaining behind must be bent to the side. Next, the flower must be carefully twisted, making it more like a rose.
-
To make the edges of the petals look more natural, they are also twisted with scissors.
Having made several roses according to this scheme, you can collect a whole bunch of them. It will look beautiful in a vase made of colored modules.


Assembling a bouquet with tulips
The tulip is traditionally considered one of the symbols of spring. These spring flowers can be easily made with your own hands. A master class on their creation consists of the following stages.
-
Fold a square piece of paper in half several times, marking the fold lines.
-
Further, all the corners must be bent to the center, forming a square. The fold lines need to be ironed.
-
The figure must be folded in half.
-
Further, the triangle must also be bent to the center, and then straightened.
-
The workpiece must be turned over. The same procedure must be done with the second corner.
-
The edge of the resulting rhombus must be bent. The fold should be marked.
-
Further, the same must be done with the second half of the figure.
-
Having turned the rhombus over, its lateral edges must be bent on the second side.
-
Next, the petals must be turned over.
-
Raise the bottom edges of the shape slightly.
-
Having turned the tulip over, the procedure must be repeated.
-
The sharp corner of the bud must be cut.
-
The base of the craft should be carefully expanded. It will turn out to be voluminous and empty from the inside.
-
The edges of the petals must be twisted with a wooden stick.
-
You need to make a stem from green paper. For this, the sheet is cut in half. A piece of paper is twisted around a wooden stick. The edges of the sheet are fixed with glue.
-
The second piece of paper should be folded in half. Its lower and upper corners must be carefully bent.
-
Next, the corners are folded two more times. This helps to sharpen the leaf.
-
The resulting leaf must be connected to the stem. A bud is attached on top. So that it does not fall off at the most inopportune moment, the edges of the stem must be cut, straightened and greased with glue. This completes the work on the flower.


A bouquet of several of these tulips can be presented to your mother or grandmother on March 8.
More ideas
There are many interesting ideas for creating origami in the form of a bouquet. Colored paper can be used to make lilacs, lilies and other beautiful flowers.


A great craft option for beginners is a bouquet of snowdrops. A simple step-by-step diagram will help you create such a beautiful composition using the origami technique.
-
A small square must be bent in half.
-
The edges of the triangle must be raised to its highest point.
-
Next, each of them must be carefully bent.
-
Having outlined the fold lines, each corner must be expanded and pressed to the base, forming more voluminous petals.
-
The upper corners of these parts must be bent.
-
Further, the side parts must be bent again towards the center.
-
The petal must be rolled up and secured with glue.
-
Following the same principle, there are 4 more details to be made. They are also connected together with glue.

With this scheme, it is easy to make as many paper flowers as you like. Ready-made buds can be attached to thin stems of green paper or decorated with a vase. In any package, such a bouquet will look very beautiful.


Lovers of modular origami can try to make daffodils consisting of small triangles with their own hands.
-
First you need to cut a standard sheet of paper into identical rectangles. How large the petals of the future flower will be depends on their size.
-
Taking one piece of paper, it must be folded in half, first in length and then in width.
-
The edges of the workpiece must be lowered, and the figure itself must be turned over.
-
At the bottom there will be a strip protruding from the base of the triangle. Its edges must be folded. In this form, the strip must be lifted up.
-
The module only needs to be bent in half. The rest of the details are made according to this scheme.
-
Having prepared the required number of modules, you can start creating flowers. First of all, two others must be placed in the side pockets of one part.
-
In the same way, you need to attach the rest of the parts to the workpiece. At the end, a chain consisting of 2 rows of 8 modules must be closed in a ring.
-
After that, you can move on to creating the core. A square piece of yellow paper should be folded in half several times, marking all possible fold lines.
-
Further, the lateral parts of the figure must be bent inward. The edges of the resulting rhombus should be carefully smoothed out.
-
One petal of the figure must be bent and flattened in the middle.Further, the same must be repeated first with the third, and then with the second and fourth petals.
-
Putting the flattened figure in front of you, one of the lower petals needs to be bent towards the middle. Having straightened this corner, its edge must be bent inward. The same should be done with the petal opposite.
-
Then the edge of the bent parts must be lifted up.
-
Having turned the figure over, other petals, which are opposite each other, must be folded in the same way.
-
After ironing all the fold lines, the workpiece can be unfolded.
-
Next, the edges of the resulting square are folded over again along the outlined lines. The finished part will consist of identical beams. Its edges must be carefully leveled.
-
The finished core must be placed in the petal ring. Its ribs will fit exactly between the modules of the first row.
-
You need to make a stem from green paper. It will be attached to the flower with glue.


If desired, the figure can be additionally decorated with elongated leaves. They are made in the same way as tulip foliage. Having made several of these flowers, they can be tied with a beautiful ribbon or placed in a wrapping paper package.
In general, learning how to make beautiful paper bouquets is pretty simple. The main thing is to choose a beautiful scheme and strictly follow the instructions.


How to make a bouquet of flowers out of paper, see below.


