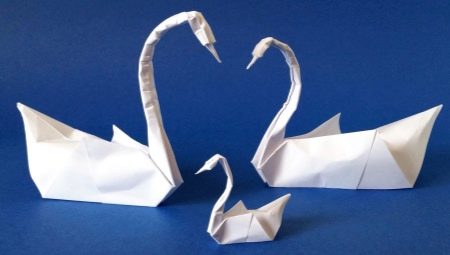
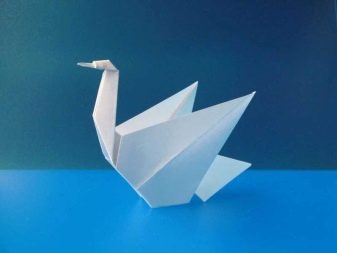
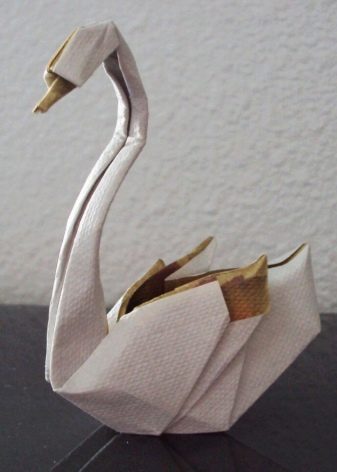
Making a swan using origami technique

Origami is one of the oldest techniques for making various small figures from paper, which in the old days was used to create talismans that protect from evil spirits. Also, paper figurines were actively used as decorations for the home and the festive table. In modern society, origami figures are no longer given such a deep meaning, and often this technique is used only in children's creativity, for the development of fine motor skills, as well as the child's imagination.
In order to attract the child's attention and at the same time develop his knowledge of the world around him, we recommend making origami figures in the form of animals and birds. For example, such majestic and graceful as swans. Let's take a closer look at the instructions for making a swan using the origami technique, and also take a closer look at the modular technique.


Simple options
Depending on the skills or age of the one who will make the paper figurine, you can choose the appropriate method of a certain level of complexity.
In addition, during the manufacture, it is also necessary to take into account such nuances as the pose of the swan, the clarity of the individual elements of the body, as well as the materials used.


According to the scheme
Making a swan out of paper is the simplest and easiest way, which is quite suitable for children 8-9 years old. In addition, for work you will need a minimum set of materials and tools:
- thick sheet of paper;
- a ruler for marking fold lines;
- pencil.

After preparing the materials and the workplace, you can start the process of creating a swan. To do this, you need to act in stages.
- First you need to cut the A4 sheet so that you get an even square.This can be done either with a ruler or in another way - by bending one of the corners in half so that the smaller edge of the sheet is adjacent to the larger one, and cutting off the remaining rectangle.
- After that, you need to divide the square in half, from one corner to the other. You can also use the resulting fold line.
- Further, each of the sides must be divided into two triangles, connecting the corner with the middle of the opposite side.
- After applying the markings, bend the edges inward, to the fold line.
- Next, at the corners of the bent parts, measure out equal triangles and bend them outward.
- At the next stage, it is necessary to fold the structure in half along the center fold line so that the bent parts are located on the outside.
- After that, you need to bend the corner part perpendicular to the entire structure - this will be the swan's neck.
- On a bent element from the corner, we make a head and a small beak using a double fold.


The origami swan is almost ready, you just need to supplement the figure with drawn or pasted eyes, and also paint the beak. A similar principle can be used to make a swan with a tilted neck.
It is enough just to bend it twice in different parts so that a graceful smooth bend is formed. Such a craft will look more sophisticated and interesting.

From a napkin
The technique of making origami from a napkin also implies working according to the scheme, but it is important to take into account some peculiarities.
- Napkin is not the most durable material, especially when it comes to using it in the creative process. Therefore, when folding a swan out of a napkin, it is necessary to act as carefully as possible, making the fold lines clear, without tearing it.
- Also, when working with a napkin, to achieve the desired result, you may have to use glue, fastening the edges, which should fit snugly together, since the density of this material may not be enough.
- In addition, it must be borne in mind that in the finished version, a napkin figure will also be more fragile than a paper product, therefore, it can only be used as a decoration, and a more durable version should be made for games.


How to make modular origami?
Creation of modular origami is a much more difficult task, even when it comes to the most uncomplicated shapes.... Such designs consist of many separate elements, they look three-dimensional and are especially impressive. To create a modular paper swan with your own hands, you will have to make a lot of effort, as well as stock up on certain knowledge about this technique. Let's take a closer look at a step-by-step guide for beginners.


Preparation
Preparation for assembling a modular swan begins with the purchase of all the necessary materials - paper, ruler, pencil and scissors.
You can take not only white paper, but also colored paper - so your craft will be more colorful and unusual. You may also need a glue stick to secure the parts more securely.

Next, you need to divide an A4 sheet into 32 equal parts by ruling or folding. Using scissors, you need to cut the paper along the lines obtained. You will end up with many small rectangles from which the modules will be created.


Next, you need to proceed as follows.
- The resulting rectangle must be folded in half twice, along the long and short edges, to get a quarter of the original part.
- Along the center fold line, fold the long edges towards the middle to form a triangle with free edges.
- Then you need to turn the part over so that the fold line is at the bottom, and the outer corners of the hanging edges need to be bent up.
- The remaining edge on the inside also needs to be folded down to form an even bottom line.
- Then it remains only to fold the triangle in half so that the folded parts are located inside it.


The whole figure of a swan will consist of such small modules, so it is necessary to act carefully so that the parts are symmetrical to each other and do not differ much in size. Also, at the preparation stage, you need to be puzzled by the calculations of the number of necessary parts. To do this, it is necessary to compare the approximate parameters of the future figure, as well as the dimensions of one finished module and, by calculations, determine how many elements will be needed for the manufacture of one or another part of the body.
Counting is especially necessary if you collect a swan using colored paper, since the ornament on the body should be symmetrical.

Assembly
Before proceeding with the assembly of the entire figure, you need to understand how the modules are attached to each other and what to do for a more reliable fixation. There are two ways to connect modules to each other, which have their own characteristic features.
- The first method is used to increase the figure.... During the manufacture of the module, a pocket is formed on the triangle, into which one of the free edges of the next part is inserted. Thus, it is necessary to act around the entire perimeter where magnification is needed.
- The second method is used if part of the shape needs to be reduced. The principle of operation remains the same, with the exception of one key nuance - the free edges of the triangle are inserted into the pockets of the same part, and not two different ones. In the same way, a long chain can be made if necessary.


The assembly process of a modular bird, as a rule, begins with the body, since this is the fragment that is the central one. Based on its parameters, the size of all other parts of the figure is determined. To correctly assemble the torso, the following procedure must be followed.
- First, you need to assemble a circle of small diameter from the modules, which will be the lower base of the figure. It must be borne in mind that it is on this circle that the whole swan will support, so it must be even and neat.
- Next, you need to act on the principle of increasing - each subsequent row must be larger than the previous one.
- When the desired torso height has been reached, we recommend make a row equal in width to the previous one, or start folding rows to decrease.


In almost all variations of the modular crafts in the form of a swan, the body smoothly passes into the wings, thanks to which the figure takes on a smooth and refined outline. To keep the wings symmetrical and neat, we recommend that you proceed in this way.
- First you need to determine at what level the wings will begin, and the sides from which they will be located.
- Then you need to fold the modules so that the rows gradually decrease. To do this, leave the outermost pocket of each triangle free.
- It is necessary to reduce the rows until one single module remains in the upper part. After that, it is necessary to lightly press the structure with your palms, giving it an oval shape.

After the body with the wings is ready, you should proceed to the assembly of the neck and beak. These elements are the simplest, so there should be no difficulties with their manufacture. The neck consists of one row of modules, which at the end of folding must be slightly bent for a more graceful look of the bird's neck. To separate the neckline from the beak, it is necessary to fix the bent black module on the upper part of the white row, and only after that add the final red triangle to the composition.
You can also use felt-tip pens or pencils to draw eyes, or purchase special volumetric plastic eyes, which are actively used in art. In order for the craft to be complete, it is necessary to fix the neck part on the body. It must be inserted into the pocket of one of the modules according to the general principle.

You can also be puzzled by adding a decorative tail to the figurine, which is made according to the principle of wings. The tail should be smaller, more symmetrical and neat in shape. When folding the modules, you should press them tightly together, and for reliability, you can fix each part with a small amount of glue.
When all the parts are folded and securely fastened together, you can be puzzled by making a stand for the figure. It can be simply cut out of thick cardboard or made according to the principle of the modular origami system.

The modular technique is universal in that it can not only be used in its pure form, but also supplement the scheme with voluminous details. For example, you can fold several modules in the form of small halves of a fan, gluing them onto the flat wings of a paper bird, you will get an interesting option for the design of plumage.

Useful Tips
Very often, beginner origami masters and just amateurs are faced with all sorts of problems that interfere with the workflow. To prevent this, we recommend that you familiarize yourself with the basic recommendations for creating beautiful paper figures.
- Regardless of the principle on which you fold the figure, it is not recommended to take too thick paper or cardboard. At first glance, this idea may seem good, because such material wrinkles less, which makes it look more neat and beautiful, but in fact it is much more difficult to work with it, since the seals in the fold lines may not give the clarity of shapes that is necessary for crafts.
- For modular origami crafts, thin paper for writing and creativity is also not suitable. since in this case the elements will be too small and flat, much more detail will need to be used to create a full-fledged shape.
- If you are just starting to master the art of origami, we recommend purchasing a ready-made set, which includes all the necessary materials. Often on the paper that comes with the kit, you can also find lines_ dividing the sheet into rectangles for modules.
- Fixing the parts with glue is not necessary if we are not talking about an exhibition craft... Since you will have to deliver the product to the tender site, you need to make sure that it will not be damaged during transportation.
- You should not start your journey with complex crafts.... For example, immediately assemble a modular swan if you have never worked with paper before. At first, you can use the sketchy origami technique, gradually increasing the complexity of the task.
- If you want to apply a certain pattern to your craft, we recommend using felt-tip pens or thick paints - gouache or acrylic. Watercolors, when applied, have a rather watery texture, which can negatively affect the quality of the paper.
- Handle the paper carefully, especially in areas where the corners need to be some significant part of the shape.... For example, you should not touch the beak unnecessarily, as the tip may fray and the bird's appearance will be spoiled.

For information on how to make a swan using the origami technique, see the following video.


