Making origami in the shape of a paper dress
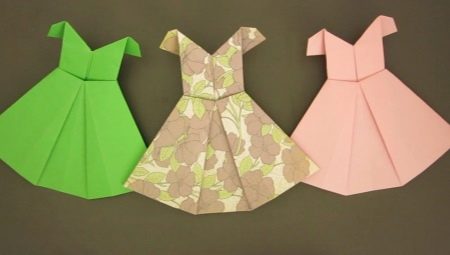
Paper products made using the origami technique are striking in their beauty and originality. Those who want to learn the basics of this art and master the technique will come in handy with the numerous videos that can be found on the Internet, as well as the recommendations of experienced masters who have comprehended the wisdom of origami. Paper is considered a great option for creating interesting crafts. The dress made using origami technique looks very unusual. Such a craft can act as a gift for mom on March 8 or become an element of decor when decorating an interior. Step-by-step instructions with a photo will allow you to make an interesting craft in the form of a woman's dress out of paper in stages.
Classic version
Products made in the origami technique can be made not only by adults, children can also successfully cope with this work. They will be able to build simple structures with their own hands, moving later on to mastering more complex models.
You can start mastering the technique with the classic version. For these purposes, it is necessary to prepare materials that will be used in the process of work. Paper is used as the main material. Its density can be different and depend on the experience of the manufacturer, model and ideas of the author of the craft. You may also need scissors, paper glue, and decorative items.

To make a classic model, you need the following.
- Take a piece of paper and cut a square out of it. Its size will correspond to the size of the future product. Colored paper can be made in accordance with ordinary women's dresses. These can be options in peas, flowers, monophonic options.

- Next, fold the sheet in half, with the colored side turning up. After the sheet is unfolded.

- After that, you need to fold the side parts so that they connect in the middle. Expand them.

- Further, the folds located on the side are folded towards the center.

- The workpiece is folded across. In this case, you need to make a small indent from the top.

- The short part is folded back. For this, it is necessary to retreat about 6-8 mm from the fold.

- The product is turned over.

- After that, they begin to form the hem of the dress. To do this, stretch the folds from the center to the sides.

- Move on to the formation of the upper part of the dress. To do this, take the corners located in the upper central part, bend them to the sides and then put them back in place.

- The product is turned over.

- Next, you need to pull the top layer, this will lead to the opening of the nine pockets obtained in the step. Spread them out.

- It remains to bend the sides towards the center, bend the upper corners to the left and right sides and turn the finished product over.


- If desired, such a product can be decorated by adding beads, sequins or even lace.


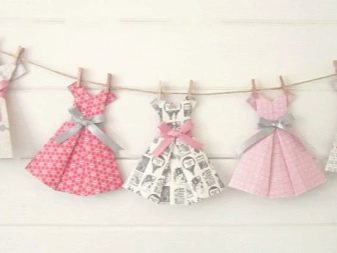
Such original crafts can be used to decorate postcards, serve as a decorative decoration for gift wrapping, or act as a decorative garland when decorating a photo zone. A good option would be to decorate a gift made from real or souvenir banknotes.


Such an uncommon gift should please the hero of the occasion. The present can be given to the boss at work or to a colleague.
How to fold the sheath dress?
A women's dress made in the form of a case will look unusual and official. Such a craft can be given to the teacher, congratulating on the holiday, or to a kindergarten teacher.
To fold the case model, you need the following.
- Take a sheet of colored paper and put it wrong side up.
- Then you need to fold the sheet in half, moving from left to right.
- Unfold the sheet and fold its sides towards the center.
- Next, you should bend the upper corners on the sides in the form of a collar for a dress.
- After that, you need to bend the side upper corners back. Turn the craft over.
- To form the waist, a zigzag is made on the workpiece just above the middle and the fold line is folded towards the center.
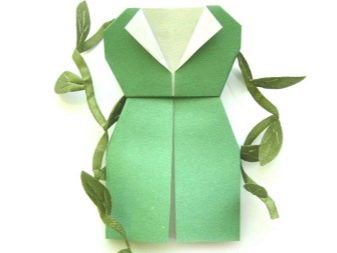
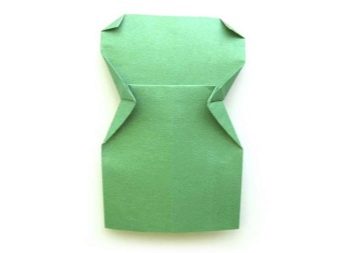


It remains to turn the resulting model over and evaluate the results of the work done.
Simple option for kids
Older children can make a classic version of a dress or a sheath product... For preschoolers aged 5-6 years, the simplest product is more suitable. Detailed instructions will allow you to perform all actions step by step.

A dress made using origami technique can be used as clothing for a paper doll. Girls will be happy to make new outfits for their dolls.
The choice of a simple scheme will help to do this kind of work without difficulty and complexity.
To make a simple dress using the origami technique, you need to take colored paper. In this case, it is better to use a one-sided square sheet. Making such a product is not difficult if you follow the detailed diagram.
Algorithm of actions.
- You need to take a square-shaped piece of paper and put it so that the wrong side is on top.
- Then fold the sides of the product at an angle so that they overlap at the top.
- The corners in the center are bent to the sides.
- The workpiece is turned over.
- Then you should slightly bend the upper part downwards.
- The lower edge, protruding in the form of a frill edging, is folded up.


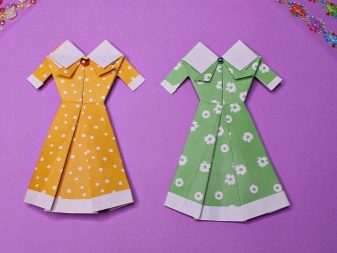
If there are any protruding corners, they must be carefully tucked inward. White circles, cut out of paper, imitating buttons are used as decoration.

Folding the wedding dress
A wedding is a very important event in the life of any person. On the eve of it, many are interested in the question of what gift to give to the newlyweds.Gift wrapping and greeting card are just as important as the gift itself. The overall impression of the gift depends on the presentation of the gift. Origami, presented as a greeting card, will be remembered no less than an expensive gift.
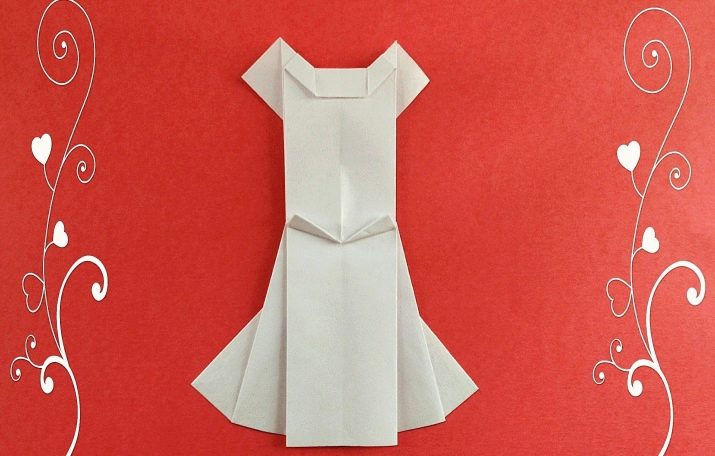
A surprise made in the form of a wedding dress - origami will make a splash.
A master class on manufacturing will allow you to quickly build a similar craft. To make the blank, you will need white paper, given that a wedding dress will be made. To make an origami outfit for a bride, you need the following.
- Take a piece of white paper and cut a square out of it.
- Bend it in half and then unbend it. Thanks to these actions, you can determine the middle of the product.
- Then you need to combine the sides with the central part.
- Spread out the sheet.
- After that, the figure is assembled with an accordion, then the model is turned over and the second fold from the edge on both sides is combined with the center.
- Then you need to turn the figure over to the front side and bend the edge to the center.
- The workpiece is folded over, this will allow you to decide on the bodice and skirt.
- Making the skirt more luxuriant will allow straightening the folds by bending the inner corners in different directions.
- The upper corners (inner) are turned to the side. Turn the product over.
- The upper cut is wrapped inward. Smooth the corners and fold them back.
- The product is bent in half. After that, the top is bent so that a fold is formed in the middle.
- The corners of the folds are folded up.

A detailed video lesson will help you to perform all the steps correctly.
Other models
An original craft using the origami technique will add sophistication to a future postcard or other handmade decor. When choosing a material for future crafts, you should take into account the style of the dress, as well as the image.
As a souvenir for a colleague, a sheet of plain paper of a dull color is suitable. Such material will emphasize the subtext of the presentation, its business style. A postcard intended for a mother or grandmother can be made in a pastel shade or have a delicate print. As a presentation to a friend, a base made in bright juicy shades is suitable.
It is important to decide in advance on the style of the dress, choosing in this capacity a classic dress, a sheath model, a sundress or an exquisite evening dress. Using several blanks, you can create whole original compositions that will decorate both a greeting card and a separate decorative zone.

A product made of dresses of different styles glued to a cardboard base and inserted into a frame will look very unusual.

To do it, you need to prepare:
- the basis for the postcard;
- colored paper (it can be patterned or plain);
- glue and scissors;
- decorative ribbon.
Algorithm of actions.
- You need to take a sheet of paper in the form of a square with sides of 8-9 cm.
- The sheet is folded twice in the middle, moving in a different direction.
- The sides then need to be bent towards the middle so that there are two vertical folds.
- To make blanks for the straps, you need to fold the sides again.
- The strips are then bent outward along their entire length, stepping back 2 or 3 mm.
- Then you need to make a tab, placing it 1/3 from the top of the smaller square.
- The product is bent diagonally so that the corners are formed.
- The blank is turned over to the front side and folds are formed on the product above the central fold.
- Finally, a belt is made and the waist is indicated. To do this, fold the base in half, turning the bodice back.

The resulting blank is leveled and attached to the postcard. It is better to take cardboard of a contrasting shade as the basis for the postcard. The shape of the product can be any. A rectangular or square postcard decorated with braid or lace will look good.
A sundress made using the origami technique is attached with glue to the title side, congratulations and wishes are written on top of the product, and decorated with rhinestones or beads.

Any craft made in a similar technique looks very original. With a certain skill, everyone can make the model they like, using it as a toy, decoration or decorative element.


