Folding origami in the form of a clock

In order for leisure with the child to bring maximum benefit and pleasure, it should be carried out correctly. For example, you can get creative by making an origami clock. The arrow will not move on the toy watch, and you can hardly put them on the street, but for fun and play within the house, they can be made. An origami paper clock can amuse a child and become an interesting toy for a while.
The components for making paper clocks can be found at home, and they are made very quickly.


How to make a wall clock?
Using the origami technique, you can create both wrist and wall clocks. Watches for children made of paper fold quite easily. The main thing is to follow the sequence.
To create a watch you will need:
- square sheet of paper;
- clockwork.


Stages of work:
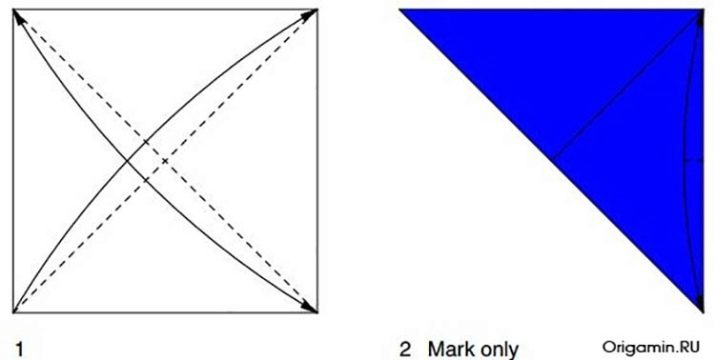
- take a square sheet (white or another color) and fold it diagonally;
- after we fold the sheet so that we get a triangle;

- now we make a sector-fold on the right side;
- we make a fold on the side, and then we collect origami along the dotted line;

- wrap the other side down, and then bend another corner;
- we expand our workpiece;

- a product with dotted lines will appear before us: we make bends along them and lay the origami back;

- make the folds as shown in the picture;

- in the center we create a hole where the clockwork is to be placed;
- finishing origami.

This is how easy you can make an origami clock. A child can hang such a watch in his bedroom. If desired, they are decorated with multi-colored paper, paints and more.
Creating a wrist model
Origami in the form of a clock on a hand is even easier to make than a wall-mounted version. Detailed descriptions will help you quickly make a craft that will keep your child busy.

For a wristwatch you will need:
- glue;
- blue paper - 1 square;
- white paper - a small white square;
- scissors;
- a pen.

The stages of work look like this:
- Fold the blue square diagonally.
- Expand it and fold the edges to the line in the middle.

- We bend the opposite corners to the line.
- Duplicate the action: tuck these sides towards the middle.

- Next, you need to fold the origami in half (look at the photo).

- We bend the corners from the fold side to the middle (those that are on the sides).

- Then, in their place, we make internal folds.

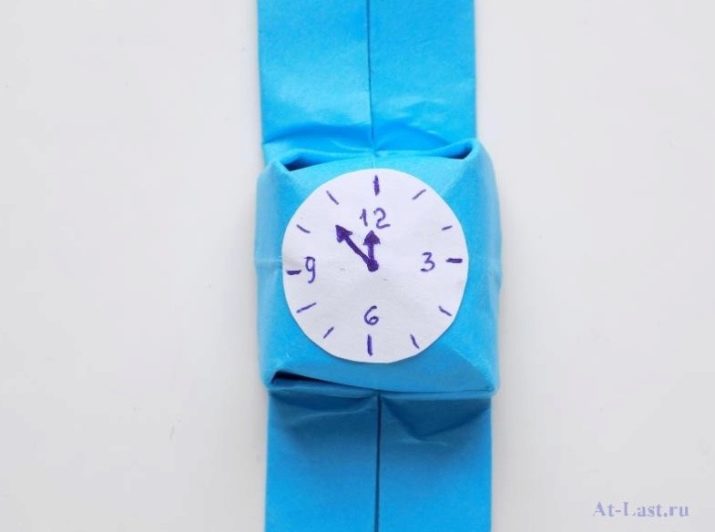
- Now let's form a watch with a bracelet. We need to create a strap. To do this, bend the edges to the midline. We do the same on the other side.


- Bend the ends of the bracelet, as shown in the photo.

- We straighten the middle of the paper, making the watch look voluminous.

- On a toy watch, you need to draw a dial. To do this, cut out a circle of white paper and draw a dial on it with a pen.
- We glue the circle to the middle of the clock.

For reference: so that the watch can be fixed on the hand, you need to connect the ends of the strap by inserting one into the other.

Useful Tips
Origami is a technique that came to us from Japan. With the help of certain manipulations, any leaf turns into the desired figure. Many people strive to master origami, which is not surprising: this lesson teaches perseverance and has a beneficial effect on the emotional state.
But folding origami is not such an easy task as it might seem, and you need to start with simple shapes.

If you have never collected origami before, you should start with the classic schemes. To do this, you only need a sheet of paper and, of course, patience. In some cases, additional office supplies are used (scissors, glue, colored pencils). Have this with you, because you may need the items in your work.

To prevent damage to the figure during folding, choose thick paper, but not so much that it is difficult to fold. White office paper or special origami sheets are fine. Professionals use kami paper: you can easily find it in the creative department.

There are many origami folding schemes on the Internet, but they may not be clear to a beginner. Before work, it is advisable to understand the type designations in advance: a dash, for example, means an inflection line, 2 arrows in a circle - a rotation of the part, and an arrow with a dotted line - a fold to the front side. After you study the notation, you can move on to creating origami.

A detailed master class on making paper watches can be found in the following video.


