How to make origami in the shape of a dove?
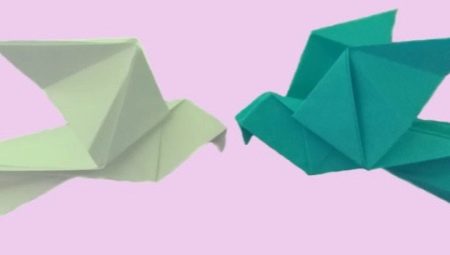
The origami technique is not only fun, but also a useful activity, which makes it possible to train fine motor skills of the hands. It allows you to create a variety of interesting and beautiful crafts with your own hands. Today we will talk about how to make an origami dove.

Creating a dove of peace
To get started, we will look at step-by-step detailed instructions for creating a dove of peace. Before you start manufacturing, you should remember some important rules for working in this technique:
-
all work must be done on a table or on another stable, smooth surface;
-
you need to prepare several sheets of paper at once in case the first one deteriorates;
-
You can use a pen or pencil to wrinkle the fabric.

A square paper sheet with sides of 20 centimeters is taken.
It can be easily cut from A4 sheet.
Along one of the diagonal lines, fold the figure in such a way that the result is a triangle. It is best to fix the resulting fold line well. After that, the figure is folded in half again, and you should get a right-angled triangle.

Further, all the corners are combined with each other, clearly highlighting all the bend lines. Then the product is carefully unfolded. The base of the large triangular figure is applied to its top point so that the base passes along the fold line of the right-angled triangle. All the same actions are carried out with the reverse side of the workpiece. The result should be a rhombus.
Later, the upper corners will need to be bent down a little, and draw a line. The part is returned to its original position. All this is repeated with the reverse side, securing the fold.The right corner must be bent to the central part, and then returned to its original place. The same is done later with the left corner. Each corner must be bent inward.
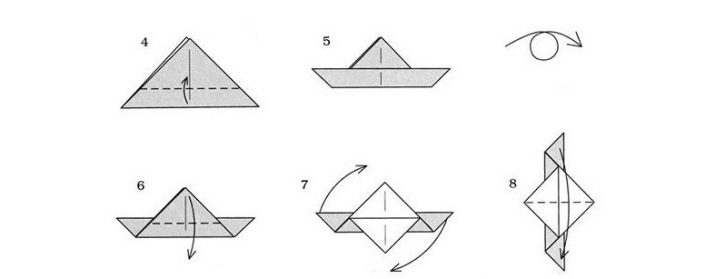
The resulting paper blank is folded in half. Her tail is folded up. After that, the product is turned over again, and all these operations are repeated. This is how the wings of the dove should form.
The craft is turned over again so that the wings are at the bottom, then the tail is bent. Further, everything is bent with the wings up. After that, you can start creating the bird's head. To do this, the tip of the workpiece should be turned to the right and left, the head is opened and slightly flattened with your fingers, making it more voluminous. If you wish, you can also create small folds on the tail.

The resulting white bird is considered a symbol of love, joy and peace. Often, such crafts are used at weddings, graduations and many other holidays as decorative decorations.


A simple method for kids
Let's analyze the simplest master class for creating such an origami bird that any child can handle. First you need to prepare a square sheet of paper. It is better to take a one-sided base, with one part white and the other colored.
It is permissible to take various colors, but most often they take material of light blue and light lilac colors. This will make the finished bird look much more interesting.
Next, fold the paper material in half, side to side, to see the fold in the middle, with the white color on the inside. The paper base is opened, the upper corners are carefully folded, trimming them along the fold line in the center.


After that, the paper is folded in half again, but with folded corners inside. For convenience, the workpiece is straightened horizontally. Then a diagonal cut is made from the lower right corner. In this case, it is necessary to cut both parts of the folded material at the same time.


The outer part of the material rises and folds slightly. Later, the back is also folded. The front corner is folded back and a fold is formed. It is necessary to bend it so that the small beak is clearly visible. At the final stage, eyes are drawn with a felt-tip pen.
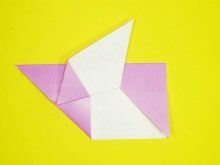


There is another easy way to create an origami pigeon for a child. To do this, you need to place a square-shaped paper sheet of any size in front of you. In this case, it is also better to use one-sided material.
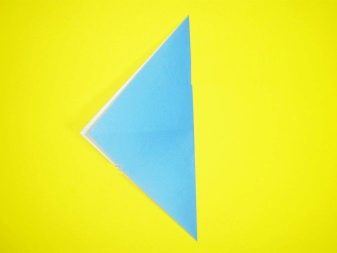
The sheet is bent in half so that the opposite corners are folded together at the same time. Make a fold line, and then fold the paper again, joining the other two corners together. As a result, cross bends should form on the material.


The workpiece is left folded, it should look like a triangle. The two corners are bent to the side, forming a small fold. After that, you need to carefully stretch one corner to the right and back.
The workpiece is bent again, while connecting the lower and upper parts. Half of the top is folded up. The same is then done with the back. The front small corner is folded down to form a neat beak. The craft is ready. You can also draw eyes with black paint or a felt-tip pen.


If desired, the resulting bird can be decorated. Sometimes they create whole large compositions consisting of several home-made birds. Often, a beautiful wall panel with voluminous origami crafts is made.
How to fold a volumetric shape?
Next, we will consider how you can make an origami craft in the form of a voluminous flying dove in stages with your own hands. First, you will need to draw a bird template approximately 20 centimeters in size on cardboard. It is cut out.
Then the cut out template is applied to the same cardboard sheet, circled and cut out. In this way, as many blanks are made as will fit on the material.


Later, they take paper, fold it like an accordion, the length of which should be at least 12 cm.

After that, an incision is made on the body of the bird using scissors or a clerical knife, and it should be equal to the width of the accordion made. All the same actions are carried out on each cardboard blank. In the future, the wings of a dove in the form of an accordion will be inserted into the cuts. Then you need to pull on its ends to get straightened and more voluminous and beautiful wings.

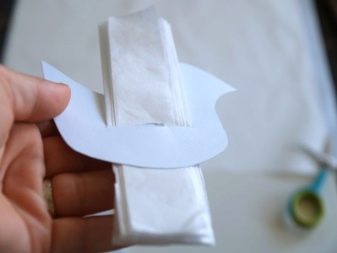
The resulting craft can become a suitable decoration for a children's room, and often such products are also used as toys for a New Year's tree. If desired, it will be possible to decorate the finished product. Sometimes, with the help of a felt-tip pen or paints, the eyes and beak are separately drawn.

Assembly diagram from a printed template
Now we will analyze a simple pigeon assembly scheme using ready-made templates. In this case, you can make your own bird stencils from white paper. But, as a rule, suitable sketches are simply printed from the Internet.
In the latter case, you will need a fairly thick and sturdy paper that you can take for printing. It is better to make separate stencils with the image of the body and tail, wings.
In this case, you should also choose such schemes so that all the necessary solid and dotted lines are marked on them, along which the product will be formed.

All blanks are carefully cut with scissors along the contour lines. Notches are formed along the solid lines on the tail. The body is bent according to the dotted marks. The tail is folded along the dotted line and folded along the lines. Then it is bent upward. After that, all the finished parts are glued together into one craft.


On the wings, you will need to make small, even cuts, like on the tail along solid marks. They are folded in dotted lines so that a small triangle remains in the middle. A small amount of PVA glue is applied to it, and then inserted into the back of the pigeon and fixed. The bird can also be additionally decorated.
This simple craft method is ideal for kids and beginners.


How to assemble from modules?
This method is considered more difficult, so it can be suitable for those who already have certain skills in creating crafts in this technique. Making such a pigeon will require a lot of time and effort. You will have to make 576 individual modules larger and 75 smaller. The result should be a medium-sized product with beautiful wings spread.

1-3 tiers will consist of 10 large blanks. So, a round base is assembled for the product. Further, 15 modules are taken to create 4-5 bands. After that, the paper blank is slightly bent to prepare an oval. Another row is produced from 15 parts.

The next three levels are made up of 22 parts. 11 and 12 strips are created using 20 paper blanks. Decrease is necessary for a smooth transition to the chest part of the bird. The chest part must be made from three rows, each with 13 elements, and from one tier of 12 parts. The last level is collected up to half. Starting from the second half, the cervical spine is created. For this, 7 modules are fixed with the short part outward.

In the next three rows, the number of parts used is reduced by 1. In the next seven tiers, it will be necessary to alternately fix 4-5 modules. The formed small protrusion should be slightly bent.
When folding the head modular section, you will need to alternate in the following order: 3, 4, 3, 4 and 4. Then they continue in a different order: 3, 4, 5, 4, 5. The resulting part is attached to the bottom of the protruding element.
The tail of a pigeon should be collected in such a way that it contains at least 8 feathers. The wings are attached separately to the body with PVA glue. Pigeon legs are collected from other small pink modules, and they are also glued to the base.

You can learn more about making a modular pigeon in the following video.


