Origami in the form of a cat

The paper-making technique called origami has long been very popular among fans of making original crafts. From an ordinary piece of paper, very cute figurines in the form of cats are obtained. They can be made by both experienced and novice origamists. In today's article, we will learn how to make paper crafts in the form of a cat with our own hands.


Description
In the origami technique, you can make figures in almost any form. So, little craftsmen are more attracted to the process of creating paper crafts in the form of animals. Some of the most popular are figurines of cats and cats that are well known to everyone. Products can be made of paper of different colors, decorated in all possible ways.


When a child makes any origami figure with his own hands, his fine motor skills are actively developed. In addition, the well-known papermaking technique develops in young craftsmen the maximum accuracy, precision, scrupulousness, and attentiveness. The creation of origami figures has an extremely positive effect on the developing organism. In addition, many children just like to make original paper designs, to observe the beautiful results obtained.
The process of creating paper figurines in the form of a cat should be gradual and step-by-step. Excessive haste in this matter will only get in the way. For hassle-free modeling of crafts, it is recommended to use special origami paper. You can find similar materials in stores that sell everything you need for creativity.Special paper has an optimal thickness indicator, so working with it is as simple and convenient as possible.

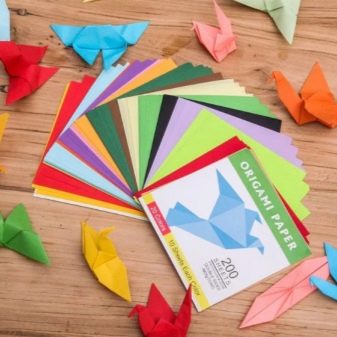
Of course, if there are no special paper sheets for origami in the arsenal of a young master, this does not mean that it is forbidden to use ordinary paper. You can get by with simple colored sheets. The main thing is that they are not too dense (like cardboard). The sheets should not be too thin either, since such materials cannot be used to model a beautiful figure that will retain the correct shape.
Even the smallest craftsmen can get acquainted with the basics of the papermaking technique under consideration. It is useful for kids to make neat paper figures with their own hands. However, many adults like these creative procedures very much.
In the origami technique, it is quite possible to create a huge number of spectacular paper products, which can later serve as interior decorations.


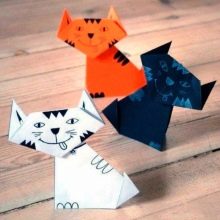
How to make a modular kitty out of paper?
The modular origami technique is complicated, so it is not recommended to get acquainted with the basics of papermaking from it. It is better to start with simpler diagrams, for which you do not need to produce a large number of paper components.
The modular technique involves the initial modeling of a sufficient number of triangular-shaped paper blanks. When the number of these components reaches the desired level, you can proceed to the direct assembly of the figure. Triangular modular components are attached to each other, forming one or another detail of the overall composition. Often, to assemble large figures, you need to prepare a lot of modules. You can do this with the whole family in order to have a good time and at the same time save it.

For children, it is best to select the simplest possible schemes for modeling three-dimensional figures of the type in question. In addition, adults should help small craftsmen, since the assembly process will be quite difficult for them. So, to create a beautiful figure of a large paper cat, you will need to prepare the following components:
- 379 modular components in white;
- 589 yellow modules.
To prepare them, you need to divide A4 sheets into 16 separate parts. From these components, blanks for the future figurine will be created.


The sheet will need to be folded in half, and then unbend back. Thus, it will turn out to outline the middle. Next, the workpiece must be turned upside down. At the same time, the edges of the leaf must be bent, directing to the middle. Then turn over again and fold the tips from 2 sides. The corners are bent over the main triangle, and then unbent again. The triangular components are folded along the already marked lines, and then folded again. The modular element must be folded in half. As a result, a small figure with a pair of triangles and a pair of pockets should come out. Thus, the required number of paper templates should be made.

The complex figurine of the modular cat should be assembled from the base. Next, the little master needs to gradually get over to the assembly of the head. The yellow modular components are first formed into a circle composed of two rows of 10 blanks each.
The fastening must be done so that the elongated part of the modules is on the outside.


In the same way, making rows from modules, you will need to gradually assemble the body, head, ears and tail of the original animal. The muzzle of the finished design can be painted on with a felt-tip pen or marker, or it can be made in the form of an applique made of colored paper.


Many other variations of paper cats can be made in a similar way. In this case, you can use paper of other colors. For example, a charming marshmallow cat can be assembled from 579 snow-white, 305 pink and 362 yellow modules. There are a great many options for performing such an interesting and relatively complex figure.


Master class on creating a simple cat for beginners
If the child is not yet familiar with all the basics of origami technique, then it is better to start acquaintance with this type of papermaking, making the simplest and easiest crafts. Having figured out the basic nuances of modeling elementary figures, the little master will be able to gradually switch to more complex designs.


Novice origamiists who do not have rich experience in modeling paper figures will be interested in making a simple craft in the shape of a kitten's head.
- First you need to put a piece of paper of any color you like on the work surface. Next, the workpiece must be folded in half along a diagonal line.
- Further, the formed triangular element will need to be re-folded in half, but only the fold will not need to be carefully smoothed. You just need to mark the line in the center.
- The next step is to bend the lower side sections of the triangle up. This will form the kitten's ears.
- The corner located on top will need to be bent downward.
- After that, the resulting product will need to be turned over and the kitten's face should be depicted on it. To do this, you can use a felt-tip pen or marker, or you can cut out all the necessary elements from colored paper.
- You can leave the craft as it is, or you can supplement it with a paper body. To do this, take a square of paper of a suitable color. First, fold it diagonally. The end result should be a triangular component.
Now one of the lower corners of the triangular piece is carefully folded up to indicate the small tail of the animal.


Other interesting ideas
There are many more interesting and attractive schemes for modeling origami figures in the form of cats and kittens. Such crafts can serve not only as entertainment for small children, but also as pretty gifts for loved ones, for example, on March 8. Havewe know what other cool cat-shaped figures can be made from ordinary sheets of paper.

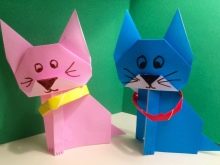

Volumetric
Paper crafts in the form of volumetric cats look interesting. They are not too difficult to make, but they turn out to be very attractive. Let's analyze the step-by-step instructions for modeling such a product.
- To make a voluminous cat, you will need to use a paper rectangular piece.
- The rectangle must be folded lengthwise and in half.

- The free sides of the paper blank will need to be bent to the fold strip so that an accordion-shaped part is formed.

- Now you need to unfold the last 2 folds.
- In the next step, you will need to bend the lower left corner towards the upper side. After that, the fold line will need to be ironed very well in order to highlight and make it more noticeable.

- Now the paper blank should be turned in such a way that the marked triangle "looks" downward.
- The upper half of the workpiece must be folded downward in the area where the triangle and vertically located lines intersect. The product will need to be ironed well, and then unfold.

- Turn the paper blank. The upper corners should be squeezed to form the cat ears. The middle of the workpiece is pressed down. This will create a triangular cat's head. Next, you need to fold the sheet to form a flat strip.

- At the next stage, the paper blank should be placed horizontally, so that the corner is directed to the right side and up. Fold the top paper layer to the top edge up to the beginning of the cat's face.

- The same steps will need to be duplicated on the second side. In this case, it is recommended to ensure that the face of the future kitty does not wrinkle too much.
- Next, the workpiece must be taken in hand. You should make the cat's neck, unfold her head.

- Form the cat ears by folding them over the forehead.
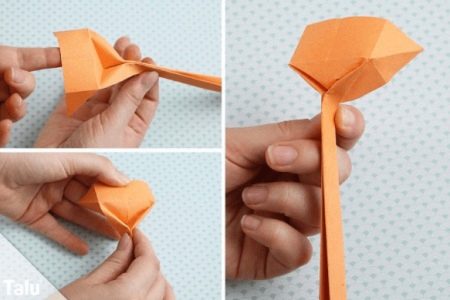
- On the back of the head, the upper edge must be carefully folded literally 0.5 cm downward. At this point, the cat's head will be done.
- Next, you need to fold the strip in the middle.

- The workpiece is now unfolded, a clearly defined fold is formed in the fold zone.
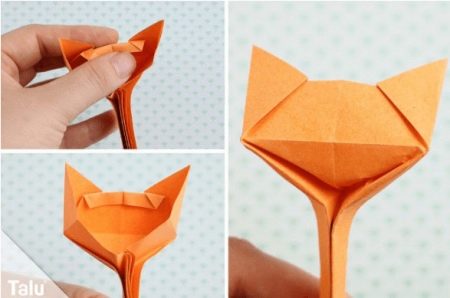
- By means of a back fold, part of the strip is folded back, forming a pair of legs.

- The cat's tail will need to be carefully twisted and then unwound.
Due to such manipulations, it will turn out to form a slightly curved tail.

You can use any color of paper to model such an attractive figure. To make a ginger animal, you should use orange sheets, and for a black one - black sheets, and so on.

Spring cat
There are many other original options for making paper figures in the form of a cat. It can be a beautiful plump or jumping animal made of paper of different colors. Also, the child will certainly be carried away by the process of making a spring cat that can jump. It can be done easily without having a lot of experience in such creative work.
- First you need to pick up a square piece of paper of your favorite color. Its size can be any, for example, 12x12 cm.
- First, the piece of paper must be folded in half. After that, the workpiece is unrolled and bent to the central part of both halves of the square base. As a result, a workpiece resembling an accordion should be formed.
- The already bent parts will need to be bent again towards the center on the right and left.
- The workpiece is unrolled. You can see that the square piece has split into 8 vertical stripes.
- Similar actions will need to be repeated in the second direction of the workpiece.
- The product is folded in half, and then opened again and folded to the center of the left and right sides.
- After that, once again you will need to bend each of the halves towards the central part.
- The formed workpiece does not need to be unfolded. It should be left in this state.
- Further, on one side of the workpiece, you will need to bend the inner corners down to the triangles. This should be done both on the right and on the left. This will highlight the cat ears.
- The fold that is next to it is folded, and then the next fold is folded. Next, you will need to form folds after one.
- Part of the workpiece will need to be bent inward to form a step.
- The part that remains on top should be fastened to the second half. For this, one edge of the strip is inserted inside the other. After that, you need to correct all the wrinkles. The original craft is ready!
At the end of all operations in front of the figure, it is worth drawing a charming muzzle.
For more information on how to make origami in the form of a spring cat, see the next video.
Bookmark
Origami crafts can be not only funny and beautiful, but also very useful. For example, a child can make a very unusual bookmark in the form of a cute cat with his own hands. Let's consider step by step how such a figure is modeled.
- First, a square piece of paper with dimensions of 15x15 cm is taken.
- Next, the workpiece is folded in half, first one by one, and then along the second diagonal.
- Now each of the corners will need to be bent towards the central part.
- The bottom cut will need to be folded towards the middle fold in the next step. Then they do the same with respect to the upper cut.
- The product is opened, turned, and then the upper and lower edges are again bent to the line in the middle.
- Open the entire paper blank, and then fold it in half and bend the cut from above in accordance with the first fold.
- Along the line closer to one corner, you will need to bend the paper product.
- After that, you will need to carefully open the formed pocket so that the upper fold "looks" strictly vertically upward. A fold is made in this area, and then the corner is lowered.
- The formed triangular element is first folded upwards, and then hidden in the inner part.
- Similar actions will need to be implemented on the other side of the workpiece.
- Now you need to grab one corner on the fold and lift. This will make the element narrower. Similar actions are needed on the corner on the other side.
- Next, the corners are folded down.
- If the top flap is folded back, a pair of pointed ears will appear. They will need to be corrected.
- The valve is moved into place, the model is turned over.
- The bottom cut on the right and left should now be folded towards the line in the center.
- Next, the large triangle is folded up, and then half down.
- Gathers are made along a diagonal fold on both sides.
- Now collect the main sides of the workpiece on the right and left.
- The upper flap should be lowered downward so that the sharp parts-ears stand out.
- The triangular component should secure the head of the cat bookmark. It is enough to put the triangle in the pocket.
- The remaining triangular elements of the craft must be made rounded by squeezing them with your fingers.
At the end of the assembly of the original and beautiful bookmark, the cat's face should be supplemented with eyes, antennae, nose and mouth. These components can be drawn with a pen, felt-tip pen, or marker.
For how to make origami in the form of a bookmark cat with your own hands, see the next video.


