Making origami in the shape of a lotus

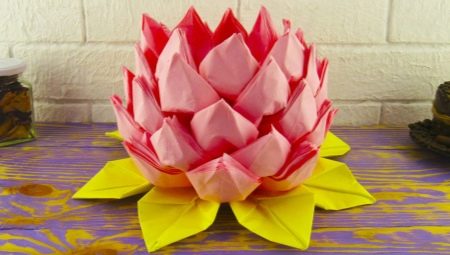
The origami technique allows you to create amazing paper crafts with your own hands. There are a large number of workshops that help to make such products without the use of scissors and glue. Today we will talk about how you can make an origami lotus.


Assembling simple flowers
To begin with, we will consider the most simple schemes for creating a lotus that can be suitable for beginners.
- A sheet of colored square paper is prepared. If you took one-sided material, then it is placed with the colored part on top.
- A sheet of paper is folded in half and then unfolds back.
- The workpiece is turned 90 degrees, and then folded in half again.
- The product unfolds again, turns over so that the white side is on top. The corners of the material are folded neatly towards the middle.
- After that, the resulting corners are again wrapped to the central part.
- Each formed triangle is folded in half, first from one corner, and then from the opposite.
- After that, you get a square shape with marked stripes.
- Next, you will need to shift the workpiece to the other side, and bend all the corners to the middle.
- The product is turned over again, while folding back only all the wrapped corners. As a result, four folds should form in the center. Each triangular shape is folded in the middle so that you can grab them with your fingers. Later, the small triangles that will protrude are folded in such a way that they stick up.
- The material is turned on the other side, the corners are bent to the middle along the folds so that the protruding triangles are ultimately at the edges of the product.
- To prevent the resulting figure from unbending, its middle must be well bent inward.
- The craft is again turned over the other side. After that, the edges of the material are folded out from the middle.
- The paper is folded in half, but the fold is not ironed.
- With the other hand, you will need to pull the corner so that he can straighten.
- The same actions are performed with the opposite angle. In order to pull out the rest of the corners, the material must be folded in such a way that they are connected to each other.
The finished flower is turned over to the front side, all the petals are straightened. The edge of the corner must be made as sharp as possible.


Let's analyze another option, how to make such a decorative flower on our own step by step.
- To begin with, prepare a square pink paper blank. Its corners are folded towards the center.
- Then the product must be turned over to the other side. All corners are bent at the same time.
- After that, the workpiece is turned over again with the other side up. The resulting bud opens neatly. To do this, you need to bend the first layer of corners.
- Next, the second paper layer is folded back.
- At the final stage, it remains only to turn the finished lotus upside down.
This easy-to-follow instruction will work even for young children.


How to make a lotus with green leaves
Now let's look at a more complex step-by-step scheme for creating a lotus from modules.
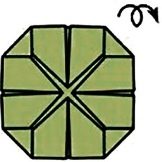
- At the initial stage, a green sheet of paper is taken, it is folded in half lengthwise. Then all the corners of the rectangular paper blank are wrapped towards the center. At the same time, it is important to ensure that they are all as accurate as possible.
- The right side of the craft is also wrapped in the middle. Do the same with the left side.
- The product folds in half with folds inward. As a result, the first module for leaves will be ready.
- To make a module for the lotus itself, you first need to fold the pink paper material in half lengthwise.
- After that, all the corners of the rectangle are wrapped to the center line.
- Next, you need to wrap the sides to the central strip.
- Now the craft is folded with bends outward. As a result, a module will be formed. Several of these parts should be made for the flower and for the leaves.
- After that, one green blank and two pink blanks are taken. Two pink parts are nested inside each other, and a green element is inserted in the middle.
- The same is done with all the other finished paper parts.
- The resulting blanks are folded into one strip, and then slightly pressed.
- The central part of the product is fixed with a thin elastic band; you can also use a wire for this.
- All details are straightened in the form of a snowflake with 8 rays.
- Next, one pink layer is taken, then you will need to stretch it towards you and fix it in the central part of the craft.
- After that, one layer is passed and the next element of the same color is pulled, it is fixed in the middle. Thus, the first row of the lotus will be formed, it will consist of four parts.
- Now, using the same algorithm, the next three rows of lotus are created.
- After all the colored modules are assembled and form a flower, leaves are made.
To do this, simply carefully turn the green parts up. The modular lotus-shaped craft is ready.


Useful Tips
To create such a bud, you can take regular paper (plain or single-sided). And also special paper for making crafts using the origami technique, corrugated and crepe material is perfect. At the same time, it is not recommended to use glossy paper, because it will begin to peel off quickly in all places where it is folded.
In any case, the material should be thin, but at the same time dense, so that the finished craft does not open and is stable. If you are just learning origami, sheets of old unnecessary newspapers and magazines will do.
Remember that all folds and folds should be done as smoothly and neatly as possible, so work best on a smooth, stable surface. You can iron all the lines with the scissor handle.


The smoother and clearer you combine the corners and sides with each other, the more beautiful and accurate your craft will end up. When performing work, you must strictly adhere to the scheme. You can not skip a single stage. And also you can not break the sequence of actions.
If you do not yet have the skills to create crafts using the origami technique, then you should start with simple basic shapes. For those who already have certain skills, master classes on creating modular decorative products will also be suitable.


For information on how to make origami in the shape of a lotus, see the next video.


