Origami in the form of a frog
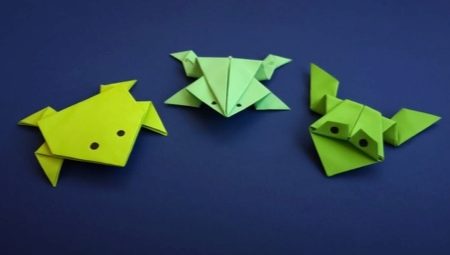
Origami is a well-known papermaking technique that even the smallest craftsmen can learn. A huge number of interesting and beautiful figures can be modeled from a single piece of paper. In today's article, we will learn how you can make your own origami in the form of a frog.
Peculiarities
Origami is an insanely popular form of arts and crafts. Due to simple folding and folding of a piece of paper, origamists get very original and beautiful figures. It can be any animals, birds, fish, and so on. Adorable paper frogs turn out to be very funny. Not only experienced, but also novice little masters can create such figures.


Familiarity with the technique in question can have a positive effect on the child.... Thanks to the creation of neat paper figures, the baby's fine motor skills will actively develop, and with it diligence and diligence. Ready-made paper crafts can be decorated in any possible way, which is very good for the imagination of the little master. In addition, the process of modeling origami crafts itself is very entertaining and interesting, therefore, most kids like it very much.
To create beautiful and neat figures using the origami technique, it is recommended to use special paper. It can be found in shops that sell art supplies. The fact is that special paper has an optimal thickness, due to which it bends easily. Thus, the process of creating figurines is convenient and hassle-free.


Of course, you can also use the simplest pieces of paper. The main thing is that they are not too dense (like cardboard) or too thin. If you choose the paper components correctly, then there will be no problems with modeling a frog and any other figurine.
There are different schemes for making an origami frog. There are both extremely simple and rather intricate options. The process of creating a beautiful craft can take a couple of minutes or take a long time. A master with any level of skill and knowledge can choose a suitable scheme for himself.


Many master classes involve the use of not only paper, but also scissors. It is recommended to use only office supplies that have sharp, clean blades.
If the latter are crooked or obtuse, then even and neat cuts will not work. This will negatively affect the attractiveness and accuracy of the finished paper figurine.
Simple frog for beginners
If an inexperienced origamist or a very small master gets down to business, then you need to start with the simplest and fastest-to-follow schemes. This is the only way to learn the basics of papermaking. Having made a few simple figures, you can gradually move on to more complex schemes that involve a large number of actions.


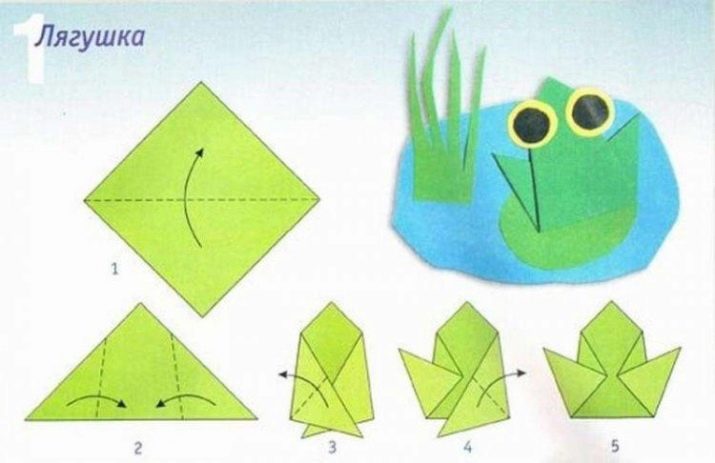
A simple figurine can be made especially for a beautiful applique. Such a task will certainly captivate little masters who are just getting acquainted with the peculiarities of the origami technique. We will learn how to make such an interesting homemade paper product correctly.
- First you need to prepare a square piece of green paper.
- The leaf is placed on the work surface, bent in half.
- After that, the corners of the workpiece will need to be carefully tucked towards the middle, so that these components slightly move away from each other.
- To model the neat frog legs, they will need to be brought to the back side.
- Now the frog figurine can be attached to a previously prepared background in the form of an applique or panel. A pond, reeds and water lilies cut from colored paper should be modeled in a similar composition.
- At the final stage, the paper frog will need to attach eyes. You can cut them out of paper or use ready-made plastic parts.
A light frog can also be modeled from a piece of A4 paper. We will learn how to make such a simple figurine.
- First, a green A4 sheet of paper should be placed on the work surface... Visually, you will need to limit the upper square, and then mark it along the diagonal line and the middle horizontal.
- The whole sheet is folded vertically, and then unbend to outline another line. It is necessary to form a triangular part from the top of the workpiece, bending the side sections inward.
- At the next stage, you will need to bend up the corners of the top layer. Due to such actions, a diamond should be formed.
- The edges of the formed "house" will need to be folded, directing to the central point of the workpiece... An elongated figure will need to be bent in half, and then bend another half of the square in the opposite direction.
- Turn the workpiece over, and then gently straighten the legs.
At the end of all operations, you should draw or glue the frog's eyes.

At the listed master classes, simple schemes for making an origami frog do not end there. There are many more elementary instructions for modeling simple shapes out of paper. Let's analyze one of them step by step.
- You need to take a square green sheet of paper, mark the middle on it, as well as diagonal lines.
- You will also need prepare a paper isosceles triangle, bending its edges inward.
- Those corners that are located at the bottom at the base of the upper paper layer will need bend up, and then bend again.
- The top of the craft will need to be folded down a triangular base. After that, the part is turned over to the other side.
- You will need to tuck the side sections of the workpiece in such a way so that they slightly overlap each other. You will also need to bend the elongated part in the opposite direction.
- You will need a figurine of an elongated structure fold in the form of an accordion back and forth.
- To give the paper frog a brighter and more voluminous look, the product turn it over again, and then depict eyes on it.


Such a scheme is a little more complicated than those discussed above, but it is also suitable for novice craftsmen and little origamists.
Modular paper toad
The modular origami technique is more complex. It is not recommended to start acquaintance with this type of papermaking, since an inexperienced origamist may have many problems and shortcomings. In addition, making modular figures usually takes a lot more free time, because a lot of paper parts also need to be made.


Modular crafts look much more interesting and attractive than standard origami crafts. Often, ready-made figures are used to decorate interior compositions. Let's figure out the main features of folding a modular toad out of paper.
- The frog model will need to be made from pieces of paper with a size of 1/32.
- In total, to assemble the figure you need to do 337 modular components. Of these, 265 are to be made of green paper, and another 72 are to be made of white. Preparing such a large number of triangular pieces alone is difficult and boring, so it can be done as a family activity.
- To make the modules correctly, you need to cut a sheet of paper into 32 parts with the same dimensions. The leaves are folded in half. Next, the blanks are folded down the center of the folded rectangular base, starting from the top and right. The same steps are repeated on the left corner.
- The workpiece is turned over, the edges are cut off. After that, raise the lower half, and then fold it down.
- Connect a pair of bottom corners. They make such a number of such elements, which is necessary to assemble the figure.
- After that you will need glue 2 blocks together, as shown in the diagram.
- When the required number of modular elements is ready, you should proceed to the assembly of the main components of the figurine in the form of the original toad.
- It is necessary in stages and in the form of crowns from modules first collect the torso, then the head and legs of this character... When all the components are assembled, they will need to be fastened into a single structure.
For additional reliability and stability, the main elements of the figure can be glued together.


After assembling the entire paper toad, made up of triangular modules, it will be necessary to complete the figure with important details - the eyes. The eyes can be made independently from white and black circles, or you can use ready-made factory elements made of plastic.


Other interesting ideas
There are many interesting diagrams that reflect the correct step-by-step assembly of origami figures in the form of a perky frog. A swamp dweller can be not only static, but also jumping or opening his mouth. In addition, voluminous origami crafts in the form of frogs look attractive and original. Consider detailed master classes on modeling these variations of paper homemade products.


Leaping
A beginner origamist may be interested in making a jumping frog on his own. Let's find out step-by-step instructions for modeling such an original craft.
- At the preparatory stage, it will be necessary cut a square blank from a piece of green paper... The size of the square can be 18x18 cm.

- The next step will require fold the square workpiece diagonally and in two directions - twice horizontally and vertically.

- Now the paper blank just needs to be folded in half. After that, the right and left upper, oppositely located corners are laid inward. The result should be a triangular detail.


- For a triangular-shaped product, the corners on the right and left sides will need a very fold neatly towards the middle... In this case, the corners should be directed downward. Then the sides of the lowered corners must be folded halfway towards the back.


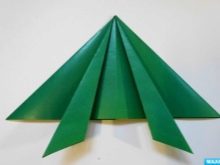
- The paper blank should be turned over so that its "wrong side" "looks" up. After that, the corners on the left and right are raised upward and sides to the middle. Next, fold the side corners towards the middle.


- The upper corners must be carefully set aside from the center of the workpiece in different directions.... The lower half of the paper product is folded up to the line of the upper lowered corners, and then laid down to form a fold.
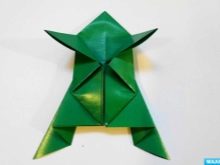


- In the next step, the product will need turn over.

- At the final stages, you will need to add the final touches to the figure.... White and black circles should be cut out of paper to form the eyes on the frog's face. The tongue can be made from red paper. The finished components are glued to the main shape.
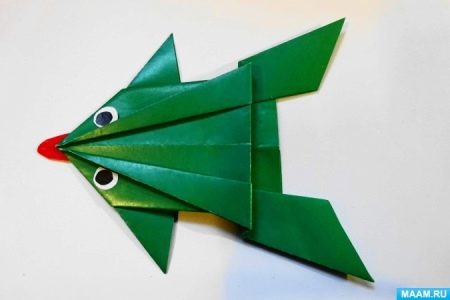
- Next, the workpiece will need to lift on the lateral parts of a triangular shape.
Such an original paper jumping craft can easily move forward in a jump. This effect can be achieved by lightly pressing on the fold located at the back in front of the frog's legs.

Volumetric
A voluminous paper frog can turn out to be no less interesting and funny. We will find out how such a homemade product is correctly modeled.
- First you need to find a suitable piece of paper... It is folded diagonally to form a right-angled triangle, consisting of several layers.
- After that, the top paper layer will need to be straightened so that it transforms into a diamond. This should be done aside. After that, the part is turned over and the same manipulations are repeated.
- The diamond should be laid out in the form of a "book" down. After that, the lateral sections of the upper layer are folded towards the middle. The same applies to the rest of the components, but at the same time it is not necessary to superimpose them on top of each other.
- At the next stage, you will need to unfold the upper elongated diamond along the fold line as accurately as possible, as shown in the diagram. The same steps will need to be repeated for the rest of the craft.
- Now they wrap, fold back and form thin corners in the upper part into the hind legs. The inner corners are tucked upward to form the frog's front legs.
- You will need to carefully fold the top corner towards the insideb so that the face of the frog is formed in this way.
- At the final stage, a figurine straighten and blow into it.
Such an interesting inflatable craft made of colored paper will look very original and unusual. It can be made together with little origamists who are just mastering the basic basic forms of the technique.


A small child can learn how to make any variation of paper crafts. It can be an original croaking and talking or jumping figurine. The main thing is to select simplified modeling schemes for kids, which will serve as an excellent start to their acquaintance with papermaking. So, you can make a simple children's handicraft of a volumetric type as follows.
- For this master class, you will not need paper, but a sheet of thick cardboard. Green will be needed to form the torso, and red to prepare the tongue.
- First, you will need to outline the contours of the parts in the form of frog legs. In this case, you should adhere to the correct proportions.
- To make the head and body of the frog, you need to cut out a pair of identical rectangular elements. Rectangular blanks will need to be wrapped to form cylinders. These parts should be glued to each other, and then the cut out legs should be glued.
- Lower frog legs, which will play the role of supporting components, can be laid out from several layers so that they turn out to be denser and thicker.
- It is necessary to prepare the eyes for a beautiful volumetric figure... They can simply be drawn with a pen, felt-tip pen or pencil. Using the same stationery tools, you should draw a mouth.
- You need to cut the tongue out of the red sheet. It should be glued to the finished face of the original voluminous frog.


This master class is ideal for the smallest craftsmen. The process of modeling such a volumetric figure should take place under the strict supervision of adults, since at certain stages it will be necessary to use sharp scissors.
For how you can make origami in the form of a frog with your own hands, see the next video.


