Making origami roses

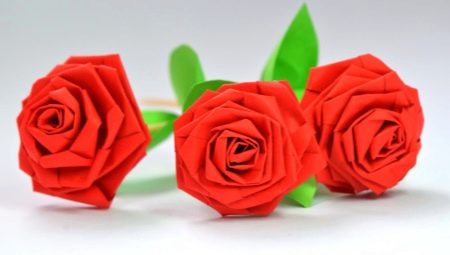
The origami technique allows you to create beautiful and original crafts yourself. There is a huge variety of options for making such products. Today we will talk about how to make an origami rose, what materials will be needed for this.


Classic roses in origami technique
To begin with, we will consider how to independently make simple crafts in the form of a rose step by step.
For beginners
Before starting work, you should prepare all the materials necessary for this:
- colored paper (red, green);
- glue (it is better to use PVA);
- pencils or knitting needles.
Particular attention should be paid to the selection of suitable paper. Often used is a simple office, corrugated, crepe material, colored paper. In any case, the base should keep its shape well. Otherwise, over time, the rose will simply begin to open and become shapeless.


First, a red paper square is taken, a longitudinal fold is marked on it, folded in half. After that, the workpiece is carefully unfold and another fold is made, only this time transverse.
Then all four corners of the blank are bent to the central part of the paper square. So, a standard "pancake" should be formed. The figure is turned 90 degrees and the material is folded again with an envelope. This technique is called "double pancake".
Next, for the third time, you will need to bend the corners of the square. It is better to iron all the folds immediately with your hands so that the figure does not start to disintegrate. As a result, a flower bud will form - you just need to carefully unfold its "petals". In this case, all the vertices of the resulting small triangles for all layers are bent one by one.


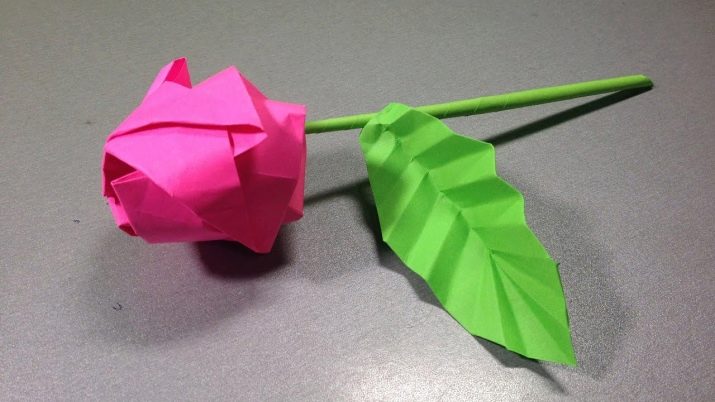
The edges of the "petals" are wound on a knitting needle or a simple pencil. They will become slightly wavy and take on their natural appearance. After that, you can start making leaves for the rose. For this, a green paper square is taken. A basic blank in the form of a kite is formed from it. The material is folded along the diagonal line twice and opened. The sides are bent to the central axis at the bottom of the workpiece, and then at the top.
The material is folded in half along the longitudinal line. One of the sharp corners is folded up and the resulting "pocket" is straightened. The same actions are carried out with the other part. At the final stage, it remains only to glue the finished bud to the leaf.
It is better to make several decorative sheet plates at once. They are attached from different sides of the flower to create a neat and beautiful composition.


Often, a whole bright bouquet is formed from several such products. You can also make tough stems out of green paper separately. For this, dense thin tubes are twisted from the material, their end is fixed with glue. The finished flower buds, along with the leaves, are attached to the resulting stems. This craft can be placed in a vase or basket. This option will be suitable for children.
You can also create a whole colorful panel. For its assembly, several roses with leaf blades are made. However, they can be of various sizes. After that, they are laid out on a flat base, forming a harmonious composition, all the details are glued to the surface.
Such a product can be additionally decorated with various details (buttons, beads, beads) and hung on the wall as an original decor.


Realistic
Such a rose can be made even without glue. To make a DIY craft, you first need to prepare a square red sheet, its sides should not be more than 10 centimeters. At the first stage, a basic blank "double triangle" is formed. The corners on the side are folded towards the top. After that, the corners are lowered downward and raised back.
The corners will need to be opened and flattened slightly so that they look like small squares. Further, the outer corners from above are lowered to the central part of the paper blank, after which the entire figure is turned over and all the actions are repeated again.
Then the upper corner is folded to the edge and folded in the opposite direction. The bottom of the blank is opened. In the center, the vertical parts must be flattened slightly to end up with two triangles with vertices in the central part.


The workpiece is turned over again. The central corner is placed vertically. The square on the right in the lower part is bent from top to bottom along a diagonal line. The resulting product is carefully turned 180 degrees, and then the lower square on the right is again bent into two equal parts.
The product is taken in the left hand. With the other hand, they gradually begin to twist its central part. Do this until a beautiful dense, voluminous bud is formed.
It will also be possible to make a beautiful panel or just a colorful decorative bouquet from such homemade roses.


Small
Now we will look at how you can make a neat miniature rose using the origami technique with your own hands. To do this, prepare a thin paper strip with a width of 1 centimeter. You can take any color.
The upper left edge of the prepared strip is folded downward along a diagonal line. On the diagonal edge, the product is folded again. From the top corner, you will need to fold back. Then, holding the tip, gradually twist a small bud. In this case, it is important to control so that the folds with the corners do not coincide.
The remaining paper end is fixed with an adhesive mixture to the back of the flower bud. If you wish, you can make a lot of roses in this way and form a beautiful miniature bouquet from them.
Making such crafts is not difficult, and a child can cope with this.


How to make from modules?
This option will be more difficult to manufacture, but at the same time the finished craft will look as beautiful and interesting as possible. In advance, you need to prepare small squares of colored paper, you will need 8 such blanks (if the rose will include two layers) or 15 (if the rose will consist of three layers).
The square must be folded in half, while the fold line is carefully smoothed with your fingers. Then the material unfolds back - upward, like a rhombus. Take the right corner and fold it inward along the line of the fold made.
The left corner is also folded in the same way. It needs to be tightened a little. To do this, you can use a pencil: paper is wound around it, giving the necessary shape. As a result, the petal module will be ready.


The first row of the flower is assembled from three bright petals. To do this, a small amount of adhesive is applied to the left corner of one finished petal and the right corner of the other petal. All parts glued together are connected in a circle. This will end up with the first row.
The second row will already consist of five petals. First, everything is glued on top, and then flipped and glued on the bottom. The workpiece is twisted into a circle. For the third row, seven petals are needed, it will be collected in the same way as the previous two. This will result in three separate blanks.
All three rows are fastened to each other in one flower bud, while starting with the smallest. All this must be fixed with glue. When making such a flower from modules, you can take two colors of colored paper at once to make the most beautiful and original craft.
A rose made in this technique will be a suitable gift for March 8th.


Another interesting option would be a rose-cube craft. To create it, you will first need to cut out three squares of the same size from A4 sheets of green and red colors. Instead of red, you can take another color (yellow, pink, blue, white).
After that, the square workpiece is folded in the center. A fold line is formed. The sheet is unfolded. The edges that are opposite each other are folded towards the middle and again form a line. Then the lower corner on the right is folded up to the fold line at the top. Do the same with the opposite corner.
The right corner is neatly folded at the bottom, and it will be necessary to combine the edge of the figure with the vertical visible fold. One fold is folded to the right. The lower part of the corner is aligned, focusing on the fold lines. The paper blank is turned over. All the same actions are repeated with the opposite angle. After that, the material is turned over again, while bending the corners of the module.
At the next stage, a square is formed, in this case it will be necessary to carefully bend the corners on both sides at once. Two more modules do the same. As a result, you get three red cube blanks.

Then you can start working with the green material. As earlier, a square sheet is folded into two equal parts. A fold line is formed. The paper unfolds. The opposite edges of the material are folded towards the center, and a line is formed again.
Later, new fold lines are made. The lower corner on the right is folded up to the upper fold. Do the same with the opposite corner of the sheet. The right corner is folded from below, while aligning the edges of the sheet with a vertical fold. One fold is bent to the right, the lower part of the corner is leveled.
The paper blank is turned over, all operations are repeated on the other side. Then the figure is turned over again and the corners of the module are folded. Next, the upper corner is bent again. The product is turned and the corners begin to bend in the same order as when creating red blanks.
In order to turn a small cube into a beautiful decorative rose, you need to pull out the small green corners and unfold them.This will create the petals of the flower.
To form a bud, a corner is pulled from the bottom of the fold on three sides. The corners from the top pushed out in the same way can add splendor to the craft.

When making this rose, it is worth using thin, but at the same time rather durable coated paper. This material will allow you to correctly form the craft, easily withstand multiple bends and at the same time will not lose its shape and appearance.
Useful Tips
When making a variety of origami crafts, it is worth remembering some important recommendations. So, do not forget that for this kind of work, it is best to purchase special origami paper. But in the absence of it, plain colored paper can also do. If you want to make a product using the wet folding technique, then you should choose a denser material processed with an adhesive mixture. Sometimes corrugated paper is also used: it holds its shape perfectly, is suitable for the formation of small details.
To make your craft more interesting and beautiful, it is better to use several colors at once when making. But remember that they must be in harmony with each other. It will also be possible to additionally decorate finished homemade products using various elements (rhinestones, pearls).


For children, it is recommended to select simple step-by-step instructions for making products using the origami technique. In this case, you can select a ready-made scheme in advance. A modular style can suit those who already have certain skills.
For information on how to make origami in the shape of a rose, see the next video.


