Making origami in the form of fish

Origami is a whole art with a rich history that came to popular culture from the countries of the East. Now many people practice this direction in creativity, as it helps to while away their free time, to relax after a hard day's work. Origami is not only a wonderful hobby, but also a great way to bring the whole family together at one table.

For preschoolers, it will be a great pleasure and magic - to get a real miracle out of an ordinary and unremarkable sheet of paper.
Simple options
Using this technique, a huge variety of shapes can be folded out of paper, but the image of a fish is one of the most popular. This is not surprising, because it is this sea or river animal that people most often associate with Japan, which is considered the birthplace of origami. Initially, it was more religious in nature, and later moved to the rank of folk art.


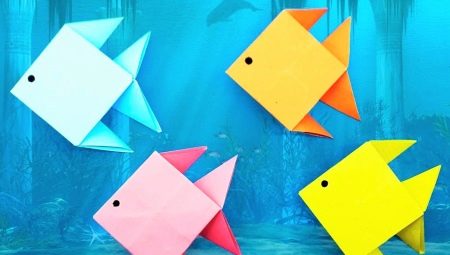
Origami "Fish" made of paper is a fairly simple figure that children 4-5 years old can handle. The scheme of such a craft will not make the parent puzzle and waste his nerves, and the step-by-step instructions will help to make more than one copy for decorating the nursery. This fish can even be used as a decoration in an aquarium. It will be enough to attach it to the outer glass. To complete the picture, it will be possible to make several models.


Here's what you need.
-
Square sheets of paper, which will act as the basis of the figurine (for their manufacture, you can cut the standard A4 format, or take ready-made ones - they can be purchased at the stationery store).
-
Scissors, but it is worth remembering that they can only be used under the supervision of parents, in order to avoid all sorts of injuries.
-
Pencil or felt-tip pen. With their help, you can draw eyes, if you deem it necessary.


And also you need a good mood to create the most comfortable atmosphere for children.
We offer step-by-step instructions that should simplify the origami assembly process.

Place a square of paper in front of you. The color and size can be matched to your taste. It all depends on the idea you want to implement.
The next step is to outline the fold lines of the future fish, they can be quite light. To do this, connect the opposite ends of the sheet, and make a fold. As a result, you should end up with an isosceles triangle. Make sure that the part is bent as flat as possible.
Next, unfold the resulting figure, and bend the opposite ends, unfold again. This will give you a square with two diagonals in the middle.
Then fold the paper in half so that the square becomes a rectangle. This basic shape is often found in the art of origami.
Wrap the outer corners of your rectangle inward. Press down the resulting shape well so that it does not turn around later.
On the hypotenuse of the triangle, sketch out a sketch of the future tail. It can be absolutely anything. It all depends on your imagination.
Once you've mapped out the tail, cut it out. Do not leave children alone with scissors. Do not forget about safety precautions.
Your fish is almost ready. To make her creative and original, add eyes, paint scales or fins to her. Let the child show his imagination and paint your fish. So he will feel more independent, this is very important for kids.

It was one of the simplest forms of fish origami. There are a great many of them. The most popular craft is origami "Goldfish". It is a little more complicated than the previous version, but it will be easy for children 6-7 years old.

gold fish
Any child will be happy with such a pet. The goldfish is the perfect addition to any aquarium, and in many fairy tales it fulfills the most cherished desires. Such a miracle does not have to be purchased at a pet store, you can safely make it yourself. It will become an excellent and original toy, the assembly process of which will bring a lot of pleasure not only to a child, but also to an adult.
Place a piece of paper in front of you, and connect opposite corners. Draw a fold line, make it clearer. This should create a classic triangle.
Rotate the resulting shape so that its base is on top.
Bend the upper corners of the triangle and connect to the lower corner. This will give you a square again, but only a smaller one. Now it has become multi-layered, and the top layer consists of two paper "wings". Try to bend the corners as straight as possible so as not to lose shape.
Bend the resulting wings in half so that their ends meet with the opposite corner of the square. The fold line should be clearly centered.

Bend their tips to the sides.
You can take an arbitrary angle of inclination, but remember to keep an eye on the symmetry.
Next, lift up one of the lower triangles, but do not forget that the fold line should not pass in the center of the square, but slightly below.
Tuck the resulting part into the pocket, and bend the protruding part to the center of the craft.

Point the triangle that you bent to the middle with the tip down, and then point it up again. Thus, you will get the semblance of a kind of accordion. Remember to iron all fold lines carefully. This is necessary in order for the fish to keep its shape.
Flip your blank, and fold the back of it so that you have a triangle envelope.

Open this envelope so that it turns into a square again. This structure will serve as the head and body of our fish.
At the end of the square, where you have a fold in the form of a triangle, we bend the corner inward.

Make slits at the bottom of this triangle, and twist the resulting ponytail.
Origami "Goldfish" is ready. Now you can, if you wish, add some details to your taste.

Koi carp
The koi carp is one of the most common symbols in Japan. The image of this fish can be found on various ancient frescoes and other historical monuments of the Land of the Rising Sun. This fish has become the personification of happiness, love and courage.

Rumor has it that she attracts wealth and good luck to the house. Therefore, collecting such a talisman for yourself would be a very good idea.
We make a blank square, it is customary to call it a double square, and this is one of the basic techniques in the art of origami.
Bend the top layer to make a triangle.
Bend the outer corners closer to the center of the workpiece. Then we do this procedure one more time.
Turn the model over to the other side, fold the sides to the fold line, and fold back again.
Grasp the bottom corner firmly and stretch the figurine. As a result, you should have an elongated rhombus. To secure all bends, press down firmly on the workpiece.
Bend the corners of the rhombus towards the center, and turn it with the back side up.
Divide the longer part of the rhombus in two and spread it to the sides. This element will serve as fins.
Insert your finger into the recess of the part and pull the long corner. Turn the resulting figurine inside out.
To make the carp image more voluminous, spread the shape with your finger.

Now you have learned how to create a symbol of good luck and happiness with your own hands. But such a fish can also be used for decorative purposes. The voluminous body of the fish will look advantageous on a flat surface.
Rainbow panel
This panel, made of a variety of colorful fish, will be an excellent accessory and addition to your home interior. And most importantly, it is not at all difficult to make it.
To do this, make the required number of fish of various colors (you choose the color, size and other parameters as you wish).

Using glue, attach the models to wire frames or invisible frames. You can try to achieve a multidimensional effect, and anchor them at different levels.
Next, attach the fish to the base (for example, to the canvas). And hang the resulting painting on the wall.
Such an original and beautiful panel will not go unnoticed and will impress any guest in your home. You can even solemnly present it, everyone will be happy with such a gift.

How to make modular origami?
Modular origami is a more complex and painstaking technique, but it is suitable even for beginners. Its peculiarity lies in the fact that the figurine is assembled not from one part, but from modules. Assembling one figure can take more than one hour. Making such work is very time consuming, but at the same time a very interesting and exciting process. A craft made of triangles will become an excellent souvenir; such beautiful products leave few people indifferent.


To fold a simple figurine of a fish called a scalar using the modular origami technique, you will need about 87 modules (it doesn't hurt to make a couple of spare ones). They are made by hand, and colored paper plays the role of the base.

It will not be difficult to make this model in stages, since the assembly method is quite simple.

Take the two modules that will act as your mouth, and place them with the corners up.
For the second row, you will need three pieces of the main color. Paste them into the previous row, but try not to tear anything.
For the third row, you will need four, and for the fourth row, five modules of the same color, but one of them should be different, since it will act as an eye.
Continue building gradually, you can start alternating modules in the order in which you want.
Having reached the eleventh row, you need to slow down, since it consists of only three modules. Now we have started to shape the tail of the scalar. It must be large enough for the figurine to support the weight. Therefore, try to keep it small, 6-7 rows should be enough.
Next, you need to go back and make the fins. For them, you only need 5 modules for each.
The aquarium scalar is one of the simplest models in this technique. The step-by-step assembly process will not take you much free time, but you will have a great time with your child for a common hobby.


Such hobbies have a positive effect on the development of fine motor skills of the hands, not only in children, but also in adults.
Useful Tips
If you yourself decide to make a base for origami, then make sure that it is as even as possible. Poor quality material can negatively affect the work itself.

During the work process, try not to rush anywhere. Haste has a strong impact on the result, as the lines are sloppy and uneven.

Do not use adhesives. In origami, it is not customary to use glue or tape; the figure should be held exclusively with the help of folds of paper.
If something does not work out for you, then start the assembly from the very beginning. Think over your every action, and try to understand what you are doing wrong. Origami requires tremendous patience and perseverance, so you will need to develop these qualities in yourself.

For more on how to make origami in the form of fish, see the video below.


