Making origami paper balls

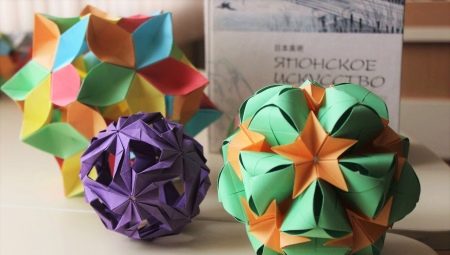
Using the origami technique, you can create paper balls of incredible beauty. Very original and spectacular decorations and decorations come out of such crafts. Many of them are assembled very easily and quickly. In today's article, we will learn about all the features of creating origami in the form of paper balls.


Air option
Balloons made using the origami technique are very beautiful and original. Such crafts can be made not only by adults, but also by children.


They are quite easy to model and do not require a lot of free time.
To make an original paper balloon with your own hands, you only need to prepare a square-shaped sheet of paper. It can have absolutely any color.

Let's analyze a detailed master class on modeling such a craft.
- In the first step, a square sheet of paper will need to be folded diagonally in two directions. After that, you need to expand it.
- Next, the workpiece must be folded in half horizontally.
- You will need to form a basic "double square" shape.
- Now the corners located on the sides of the top layer will need to be folded up towards the center.
- Similar actions are carried out on the back of the paper blank.
- The corners on the sides will need to be folded towards the middle of the product. The same should be done on the reverse side.
- Further, the corners from the bottom will need to be bent up.
- The formed elements at the next stage will need to be tucked into the resulting pockets. The same actions are carried out on the other side of the paper blank.
- Now the workpiece will need to be straightened very carefully.There should be a hole in the middle of the structure through which the craftsman will need to inflate the craft.
- The original origami craft is ready!


You can insert a thread into the resulting paper ball, and then hang it on the Christmas tree. You can make several similar figures at once in different colors, and then form a mobile out of them.

How to make a ball out of flowers?
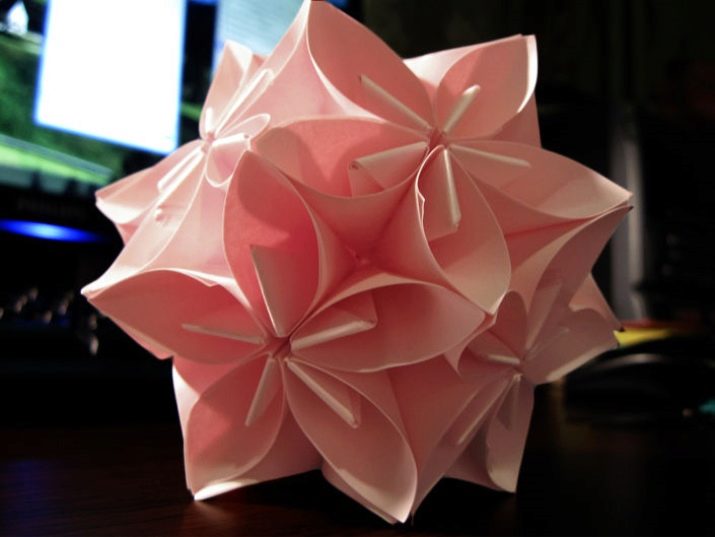
In the popular origami technique, you can make an even more original craft with your own hands - a spectacular ball of flowers. Such a voluminous craft is not as difficult to assemble as it might seem at first glance. To make it, you need to prepare square paper sheets with a side of 7 cm. In addition, you should prepare glue and ordinary paper clips.

Let's analyze the step-by-step instructions for modeling a beautiful flower ball out of paper.
- The first step is to fold the paper square in half and diagonally.

- The corners on the sides will need to be neatly folded towards the center and up.

- After that, the product will need to be carefully opened and the corners properly straightened. As a result, you should get two identical parts-quadrangles on the sides.

- The tops of the formed quadrangles will need to be folded down.

- In the next step, the paper elements will need to be carefully folded in half away from the central part.

- Next, the master will have to glue the formed elements together. It is not recommended to use too much glue, as this can negatively affect the accuracy and attractiveness of the craft.

- It will be necessary to make 5 more of the same paper blanks.

- The made elements should be glued together using a moderate amount of glue. The result is an unusual and very beautiful flower. In total, 12 blanks will be needed to assemble the ball.

- Now it will be necessary to neatly and reliably connect together 2 halves of the future structure, each of which will contain 6 paper flowers. It is best to secure these components with paper clips.


They will be installed without unnecessary difficulties, but at the same time will allow the structure to hold tight and securely before the adhesive is used to fix it.
- When connecting the two halves of the original flower ball, it is very important to ensure that absolutely all the elements lie perfectly even and neat. At this point, you can make some adjustments, if necessary.

- The paper components of the structure must be glued together, alternately removing the previously installed paper clips. At this point, the original flower ball is ready!

If you strictly adhere to the specified instructions, you can make an elegant ball out of paper flowers. It can combine details of different shades. A chic decor will come out of the finished product.
Origami ball in the form of a diamond
An unusual craft is a ball in the shape of a diamond, made using the origami technique. To make such a spectacular design, you need to prepare 6 sheets of A4 double-sided colored paper, as well as PVA glue and sharp scissors.


We will learn step by step how to model such non-trivial origami crafts.
- Squares should be made from sheets of colored paper.
- They are bent along a diagonal line on both sides.
- Next, each of the corners is bent towards the center point of the square. Then the details are unbend.
- Fold the sides of the squares towards the center.
- In the next step, fold the sides from above and below to the center.
- It is necessary to carefully get out the edge of the paper on the left. In this case, the palm must support the central part of the workpiece.
- Further, part of the paper blank is laid out in accordance with the diagram.
- Now you need to put 1 finger in the top center, and place 2 other fingers under the paper both above and below.
- Then you can remove the finger from the central part, and with the two extreme ones, it is necessary to bring and press the sides of the paper blank together. Similar actions will be needed on the left side of the product.
- You should pry and open every corner of the craft with your finger.
- Now the corners must be brought to the center of the workpiece so that the required square is formed on top. You will need to bend all 4 corners according to the same principle.
- To the center, you will need to carefully lay the sides on the sides of each of the squares of the paper blank.
- Each of the formed sides must be lifted and straightened.
- Then you will need to tuck 4 protruding corners under the bottom, so that as a result of this you get an octagonal figure.
- By the same principle, it is necessary to model 6 paper blanks.
- When all the blanks are ready, you will need to glue 4 side components by the corners, and then glue the bottom and the lid to the structure.


Other Kusudama Ball Ideas
There are many other options for making the original origami kusudama balls. A diamond-shaped craft is far from the only attractive piece that can be modeled in this style.


A magic or star ball looks very interesting, as well as a modular version of such a product.
Let's find out how you can make a kusudama ball from individual paper modules.
- To make such a craft, you need to cut squares out of paper. From one A4 sheet you will get from 6 to 9 squares. Only 6 parts are enough to assemble a classic craft.
- It is necessary to fold each of the cut out squares diagonally on both sides. At this point, you should outline the central part of the paper. As a result, you should get 4 triangles forming a paper square.
- The corners of the square should be tightened towards the central part obtained after the formation of the diagonals. As a result, the "envelope" will be released.
- The module will need to return to its original shape. Only the marked lines will remain.
- Now the square needs to be folded in half. At the top, you will notice two formed rhombuses.
- The resulting rectangle will need to be re-nested in half. This should be done inward, so that the top and bottom of the modular component "meet" each other.
- Next, from the paper module, you need to pull out the formed pocket on the right, located in the middle. It is necessary to hold the left side of the modular element so that this pocket can go out without problems. Then you need to unfold the right half of the trapezoid, resembling a small boat.
- Following the marked lines, you will need to carefully form a pair of triangles from the trapezoid with pockets in the inside. To do this, the master will need to put a finger in the middle of the workpiece, and bend both parts from above and below towards the central point of the structure.
- After that, you will need to repeat the steps that were performed in steps 7 and 8 in relation to the left side of the module.
- Using your finger, the pockets are further opened and squares are obtained from paper. This must be done for all 4 pockets.
- Each of the small squares has a pair of sides that will need to be folded towards the center. As a result, 2 triangles will come out. If you do this with all the squares, then 8 triangles will be formed.
- Each of them should be raised, straightened, and another small triangle should be formed on top. The corners extending beyond the body are also straightened, and then folded. As a result, an octagon will be formed.
- One of the craft modules will be ready. It is necessary to make 5 more of the same, and then glue them into a single structure using glue or pieces of double-sided tape. The result will be a chic modular ball that looks very unusual and spectacular.

A similar scheme is suitable not only for experienced, but also for novice craftsmen. The main thing is to act in stages, strictly adhering to all the points specified in the instructions.
A similar scheme is suitable not only for experienced, but also for novice craftsmen. The main thing is to act in stages, strictly adhering to all the points specified in the instructions.

For more on creating origami in the form of paper balls, see the video below.


