Origami helicopter folding options

This origami helicopter craft is one of the most interesting homemade items for boys. Its creation will take a lot of time and accuracy. Today we will talk about how you can make such a craft with your own hands.

Simple option
To begin with, we will consider the simplest option that can be suitable for children, as well as for beginners. The process of creating a helicopter consists of several stages.
-
A square blank is cut from an A4 sheet.
-
A standard "double triangle" shape is formed from a square product.
-
After that, the corners on the side are bent to the center. The resulting lateral angle is also bent towards the middle.
-
The upper part on the right folds to the right so that the fold line is clearly visible.
-
The corner is straightened, folded down.
-
The folded corner is folded to the right.
-
The corner is tucked into the resulting pocket.

-
All the steps taken are repeated with the left side of the workpiece.
-
And also it will be necessary to turn the product over, and again repeat all the steps.
-
The workpiece is slightly inflated. The cube is straightened.
-
The top is gently pressed inward with a ruler.
-
The edges of the cube are connected from above.
-
The rectangular blank is folded in half. Next, the blades are formed.
-
The corners of the main workpiece are gently folded back. A screw is inserted at the end.

We will analyze another detailed step-by-step master class for making such a craft with our own hands.
-
A square paper sheet is folded obliquely and then unfolded. It is best to use special origami paper. She has the right level of density. Crafts made from such material will be stable and will not open after manufacturing.
-
After that, the corners on the side are bent to the center and unfold.
-
Then the paper product is turned over, all actions are repeated again.
-
The corners from the bottom of the square are folded into the inner part of the workpiece, after which the upper corners are folded inward with an overlap.
-
Then fold the rhombus in half.
-
Figure pockets open on both sides at once.
-
The triangular shape at the top bends down.
-
Side triangles unfold to the sides.
-
The workpiece is turned sideways, a sharp triangle is turned inside out from the inside, and the edge is also opened, and it is carefully folded up.
-
The corners in the front are put inward. The blades are spread to the sides.

Complicated craft
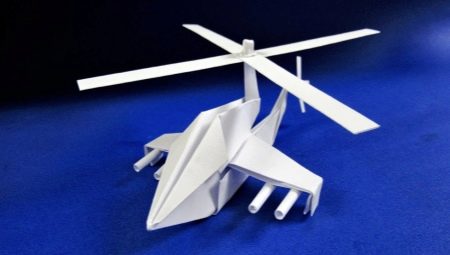
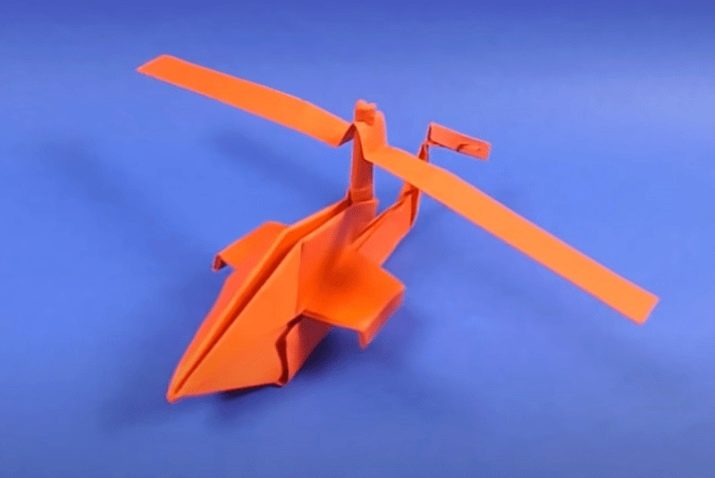
A more complex option for making paper crafts in the form of an origami military helicopter should be considered.
-
In this case, you also need to first prepare a square-shaped paper blank.
-
After that, a standard "double square" shape is formed from it. Then the basic "bird" shape is made, the upper parts of the product are folded down.


- Next, the top layer is folded along the diagonal line from left to right, and then from right to left.

- Along the formed lines of bends, the triangle is folded upward, at the same time it is also folded in half and wrapped in the inner part. The same steps are repeated with the reverse side.


- The side pieces are folded towards the center.


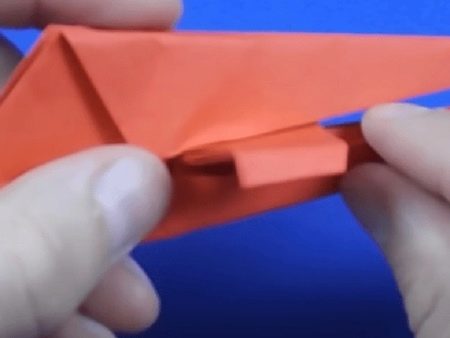
- The movable sharp corner is folded in half and brought into the fold that has formed. The same actions are repeated on the other side.

- The lower part of the upper layer is turned upwards.

- The top corner folds down. The part that was previously flipped is folded back in the opposite direction.

- Then the product is turned over. The bottom of the top paper layer rises to the top.

- The top corner of the part folds down neatly.

- The top of the element folds down about 1 centimeter. The same is done with the lower part of the workpiece.

- Both parts are put together. Elements sticking out on the sides are straightened, they will need to be bent vertically down.

- The top layer on the right is folded upward with a reverse fold. The detail is revealed, the sides are bent into the central part of the product. The corner from the top turns down.

- The part folds in half along the direction. The tail of the helicopter will need to be tucked up and then folded back.

- The tip is bent to the side.

- Separately, you need to cut a thin strip of paper. It folds in half and then across. A small triangle is cut out at the fold.

-
Further, the long parts are folded to the sides.
-
The resulting part is carefully put on the finished paper helicopter.

- You will need to make the same strip, just a little shorter. It is fixed at the bent end of the tail.

How to make modular origami?
Let's analyze a more complex instruction for making a paper helicopter from individual paper modules.
The process will be quite laborious and long. A total of 1600 modules are needed.
-
From 1 to 3 rows are formed from six paper blanks, while they are closed in a ring.
-
Levels 4-5 are made of 12 elements. After that, the product is turned inside out.


- From 6 to 10, tiers are formed from 24 modules. To make the 11th row, you will need 14 parts, which are inserted with their short side, and 10 parts, they will be inserted with the long side.


- From tiers 12 to 13, 24 ready-made modules are used.
-
Level 14 is made from 32 elements.
-
From 15 to 31 tiers are formed from 32 blanks.
-
Starting from row 33, the product narrows. The upper part of the helicopter is made of 20 elements, the lower part is made of 8.
-
Up to level 39, they are narrowed down to 22 parts.

- After that, they begin to create the tail of the helicopter. It will include 20 levels. In this case, first, 9 and 10 modules alternate, and then 8, 7. The last tiers are made of 5, 4 and 3 modules.

- To make the runners, it will be necessary to alternately connect 2 and 3 modules. The length of this part of the helicopter can be arbitrary.

- Next, start creating the screw.To do this, you will need to connect four parts together, each with 18 paper modules. At the same time, a snake-shaped figure is formed from them. After that, all the elements made are glued to each other.
In order for the finished helicopter to be stable, you can coat all weak points with an adhesive.

Modular origami looks as beautiful and interesting as possible. But this scheme for making crafts can only be suitable for those who already have certain skills in working with this technique.

The origami helicopter glider also looks original. To make such a craft, you should follow these steps.
-
A sheet of paper is taken. Its corners are bent from above to the middle. After that, a small strip is cut off from the bottom.
-
Then the sharp corner from the top is bent down and neatly folded to the left.

-
Further, all the previously done actions are repeated with the other side.
-
The upper part is folded twice from the top. After that, the glider-helicopter folds in half.
-
A small tip is folded inside. The workpiece is folded in half and smoothed.

-
Later, the cut strip is folded in half, the ends are pushed apart in different directions. This part will act as the propeller of the helicopter glider.
-
Two small holes are made in the strip, after which it is fixed on the main paper blank. The craft is ready.

When assembling such a helicopter, you can pick up special origami paper, corrugated material. And also an excellent option would be packaging with camouflage colors, so that the finished product turns out to be more natural.
But if there are no such materials, then you can take plain paper.

Detailed instructions on how to create an origami helicopter can be found in the following video.


