Making postcards for veterans with our own hands

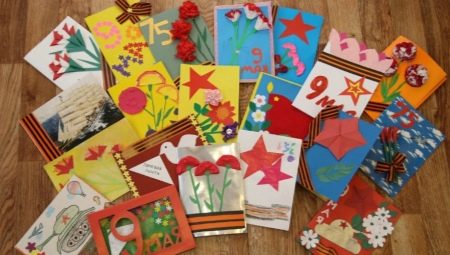
On the eve of May 9, many schoolchildren and preschool children will be interested in learning how to make postcards for WWII veterans with their own hands from paper. In our article, we will look at step-by-step workshops for children on making greeting cards from napkins and other materials.

Paper options
Simple
The day of May 9 is extremely emotional, bitter and joyful at the same time. There are still those who have saved, in fact, the whole world from the worst that could happen in the twentieth century. And therefore, a do-it-yourself card to a veteran is just a modest gratitude to such people.

The easiest way to make a postcard involves drawing with a pencil and paints. The number "9" and the addition of flowers would be quite appropriate.

To make the composition more relevant and accurate, you can also use:
-
drawing a simple symbolic tape;
-
a printout of the banner of victory;
-
An eternal flame surrounded by carnations.


From corrugated
It is also quite possible to make a postcard made of corrugated paper for the Victory Day in the Second World War. The most logical way is to create simple red carnations. In addition to respect for veterans and war heroes who have already passed away, such a card will allow you to work out:
-
technique for manipulating corrugated paper;
-
the art of self-development of compositions;
-
imagination;
-
aesthetic sense;
-
eye gauge;
-
general motor skills.


To work you will need:
-
red and white corrugated paper;
-
cardboard (used for the base);
-
green paper, which is used to make shoots, stalks and leaves;
-
scissors (not necessarily curly);
-
glue (pencil or PVA);
-
cardboard sheet A3.
To make a postcard, you must:
-
cut out a round blank;

- fold it in two and cut it;

- circle a round area on corrugated paper;

- cut (in this case, curly scissors are easier than usual);

- fold twice, getting as many blanks as needed;

- prepare pedicels from green paper;

- glue the blanks onto cardboard;


- touch up them.

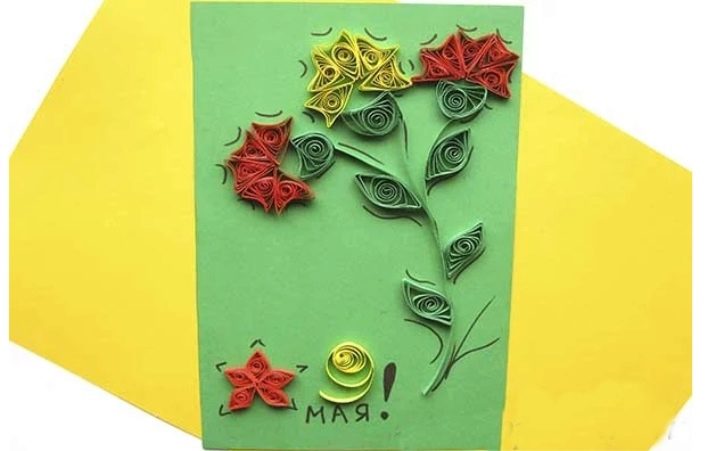
In quilling technique
This technique also allows you to create a beautiful holiday card with minimal effort.

For work, you need double-sided stripes in bright colors. Important: as in other cases, glue and scissors will come in handy.

Sequence of work:
-
prepare 5 red stripes. One is introduced into a special tool for curling strips (but in its absence, you can use a wooden stick split from one end) and wind it tightly;

- pull out the strip and create a spiral. Then they attach one of the edges of the spiral with glue and repeat the same manipulations with other strips;

- the resulting roll is pressed down from 2 edges to form a rhombus and these rhombuses are folded into a five-pointed star;

- after its creation, take 5 yellow stripes, 10 red stripes and twist all the blanks on a quilling device. And after removing them from there, put them on a flat surface;

- allow the workpieces to unwind and glue the spirals at the ends. All rolls are given a configuration like an arrowhead and 5 pieces are glued together to get 1 nail. Then, make another 1 red and 1 yellow carnation;

- prepare leaves and bases for each of the flowers (you need 7 strips, which are turned into spirals) and by applying glue to the tip of the spiral, create a closed roll. Next, the rolls are transformed into 3 different forms (simple sheets, complex foliage and "heavenly month", that is, the base);

- glue this base to the bottom of each flower, after which they glue the finished flowers on top of the card with glue and supplement them with stems, and also attach the leaves;

- a red star is attached to the lower part of the composition, the yellow stripe is converted into the number "9" and the word "May" is attributed to it. A solemn dedication is also added at the discretion.

With aged
Such a greeting card will require the use of a printer and the preparation of old texts, photographs... In addition to aged paper, non-thick cardboard is often used. To age the paper, you can simply treat it with black tea. Curiously, the cheapest brands of tea dye cellulose fibers most effectively. You will also need an old unnecessary towel for work.
You need to brew tea in boiling water. No need to regret the tea leaves. You need to insist the drink until maximum darkening; since you don't have to drink it, you can safely warm it up.
Then you need to pour the infusion into a baking sheet, making sure that the tea leaf does not get there. The tea leaves are spread over the entire sheet.

Then you need:
-
create mugs on the sheet by placing the mug or cup upside down;
-
keep them exactly 1/3 hour;
-
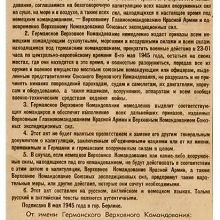
print out old cards, Act of surrender;
-
prepare stars and make them voluminous, bending exactly along the dotted line;
-
glue the card onto a cardboard base with double-sided tape (with folded edges);
-
lightly burn the edge of the Act with a lighter;
-
add the Act itself to the front of the postcard;
-
lay out on top of it a small card, stars, a twine bow.


While all this is happening, the paper just has time to "age". It is imperative to shake off the tea leaves from it. Then the workpiece is laid out on a towel or other fabric; a hair dryer is used to speed up drying. It is not necessary to burn the sheet. You just have to cut it off, stick it inside the postcard and add your own congratulations.

Making from napkins
Children's master classes with napkin cards are also in great demand. Making such compositions is also not too difficult. You can take napkin balls as a basis. The sequence of work is as follows:
-
fold A4 sheet in two;
-
draw a star and the number "9";
-
add the inscription "May";
-
complement the composition with wishes at their discretion;
-
roll out balls from red napkins;
-
paste these balls around the perimeter;
-
make 20 circles, bend them in two;
-
attach the petals to glue;
-
3 spools of a different color are attached to each flower.

More ideas
Of course, the possible ideas do not end there. An excellent option can be a vytynanka (in other words, a postcard cut out in an openwork way). Usually they just cut out the nine according to the template. Not bad and technique "isoth". Such a postcard is created by embroidering with threads on cardboard or other solid base.
A branch of laurel - an ancient symbol of victory - is made using the quilling technique.

A symbolic star can be decorated with many lines inside. Black balls on the tops increase its attractiveness. Another option is an inverted star placed on the ground. The flame of the Eternal Flame bursts out of it. On different sides of it, the inscriptions "9" and "May" are made.

And even this does not exhaust the whole variety of available ideas. On the postcard dedicated to Victory Day, iconic wartime photographs look quite organically. For example, the legendary "Combat" is solemn, inspirational and tragic at the same time. Or traffic control in Berlin being cleaned up. Or a photograph that needs no comment.


You can also use less well-known photographs, visual materials:
-
taking a prisoner in battle;
-
a solemn parade in Belgrade;
-
meeting at the Belorussky railway station;


You can also focus on the weapons of the war period:
- submachine guns;
- rifles;
- IL-2;
- T-34;
- KV-2;
- IS-2;
- ZIS-3 and other types of weapons, military equipment and equipment of your choice.


There are also simpler solutions:
-
arrange attributes and decorate the postcard with cereals, plasticine or balls;
-
use images in the cutting technique;
-
add pictures with volumetric combat equipment.

The following video presents a master class on making a postcard for a veteran.


