Do-it-yourself card for grandmother

Many children love to make a variety of postcards on their own as gifts for loved ones. Such crafts are only good for them, because they contribute to the development of fine motor skills and imagination. In this article, we will consider different master classes on creating postcards for a grandmother for a particular holiday.


Simple options
Drawn
A self-drawn postcard is the simplest gift for a grandmother from a granddaughter or grandson. Such a present can be given on any occasion, be it a birthday, anniversary or the Eighth of March.


To draw a postcard, you can use both markers and colored pencils or paints. In addition, you will need paper, and preferably watercolor: it is denser, which will make the card more attractive in appearance.
Before starting work, we recommend making a sketch of the future drawing, which will allow you to determine the composition, position of the sheet, and also the color scheme. Anything can be present on the drawing itself - it all depends on your imagination, as well as on the holiday itself. For example, birthday cards are often painted with balloons and cute animals. On March 8, as a rule, beautiful flowers are depicted.


After completing the drawing process, the postcard will need to be signed. If necessary, you can supplement it with various decorative elements, for example, bows, sequins, which will make the drawing more interesting to look at.


From colored paper
Postcards made of colored paper also look beautiful. Even a child aged 3, 4 or 5 can make such a gift. Let's figure out how to make a card with flowers for your beloved grandmother.


For work, you will need the following materials: compasses, colored paper, thick cardboard, glue, scissors and a simple pencil.

The workflow is pretty straightforward. With the help of a compass, it is necessary to draw the required number of circles. Please note that the details for the flower petals are recommended to be made in the same size. Cut several circles of the same color in half - these will be the petals of future flowers. Do the same with the green paper to form the flower leaves.

Cut the flower bowl in the same way. Separately make a flower core out of yellow paper using a pair of compasses and scissors.
When finished with cutting out the parts, do not rush to attach them to the cardboard with glue.
First, estimate their location on the sheet so that the homemade postcard looks beautiful and harmonious. Only then can the parts be attached to the cardboard.
The craft is ready! Do not forget to add a congratulatory inscription with warm words to it.

Bulk crafts
With flowers
But it will be interesting to perform voluminous crafts in the form of flowers for children of the older group, primary and secondary school students at the age of 10-12 years. Such unusual postcards, despite the apparent complexity, are very easy to make - you just need to carefully read the master class and proceed in stages.


First you need to prepare all the necessary materials, namely: colored paper, any yellow cereal, compasses, cardboard, scissors and glue.

After that, you can start working. The first thing to do is cut 5 circles: 2 large, 2 slightly smaller and 1 small. The resulting parts need to be folded in half three times, after which you need to start cutting the petals along the edges of the circle as shown in the figure.
Next, you need to unfold each part, and form petals, slightly squeezing each of them with your fingers.
Now we put the circles one on top of the other. The first should be the large circles, followed by the smaller parts. We glue all this and straighten it with our fingers, giving the flower bud the necessary shape.


We make the core of the flower separately. To do this, you can use yellow paper or cereal.
If you decide to use cereal, then it is better to attach it to the paper with a hot glue gun - this will hold it better.
You can make a few more flowers in the same way, then move on to creating the stem and leaves by cutting them out of green paper. Now it remains to decorate the greeting card at your discretion. A gift for your grandmother is ready!

With animals
Postcards with animals also look very original and interesting. Such a gift can either be drawn or made with your own hands using paper and other accessories, namely: cardboard, scissors, pencils, double-sided tape and any decorative elements that are required to decorate the gift.
The workflow is pretty straightforward. You need to make a base for a postcard from cardboard or thick paper, folding them in half for this. We make a separate background for the presentation. It depends solely on your idea: for example, flowers or grass can be cut out of colored paper, in which the animal will be located. It is also allowed to use a variety of decorative elements - for example, colored mugs or sequins.


Next, you need to make a figurine of an animal. You can draw it yourself or cut it according to a template, after downloading and printing it. You will need two identical parts in the form of an animal. One of them needs to be attached to the background, this will be the basis of the animal. The second is attached from above with double-sided tape. Moreover, this must be done carefully, making sure that the upper part completely coincides along the contour with the lower one.
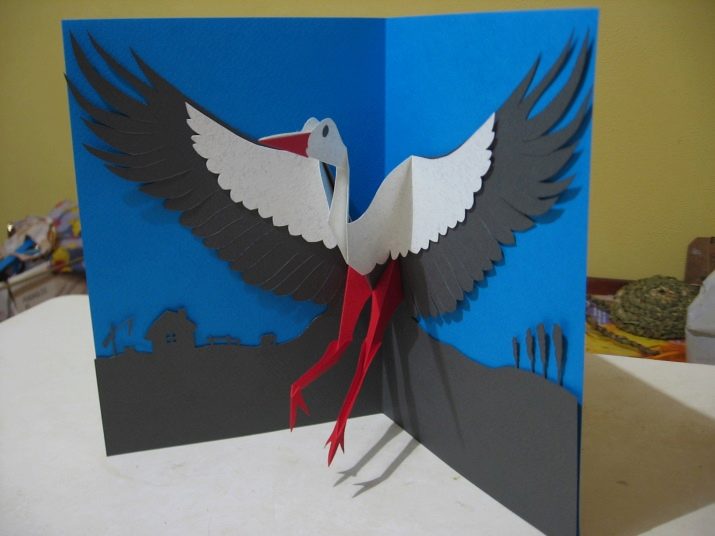
However, it is not necessary to make two parts for the volume.For example, if you want to make a postcard with a bird, then you can make its wings voluminous by attaching them with double-sided tape.
The craft is ready! If desired, add a congratulatory inscription and decorative elements of your choice to it.

Scrapbooking postcards
Scrapbooking postcards are very popular now. They look very unusual and beautiful, which is their main feature.


To work on such a present, you will need special cardboard for postcards, beads, bows, special stickers, sequins, ribbons - everything that will be needed to implement your idea.
All of these materials can be purchased from the dedicated art store.
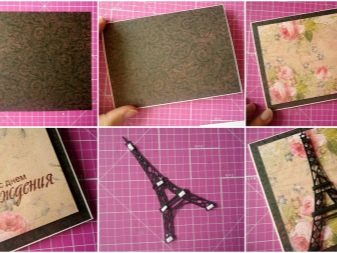
Having prepared all the necessary materials, you can start doing the work. To get started, fold the cardboard base in half to create a card blank. Next, place all the elements as you intended. Note that you should not do too many details on the postcard, otherwise it may turn out to be somewhat cumbersome.
Having decided on the location of the elements, glue them with PVA glue or a hot glue gun. The latter is usually required to secure elements such as bows or buttons. It must be used carefully, otherwise there is a risk of simply breaking the device or hurting yourself.


When you're done securing all the elements, add a greeting lettering by placing it inside the card. Ready!

Quilling postcard
Quilling postcards are also very popular now. The work on such a present is generally easy, and therefore even a first grader can cope with it.

To create a craft, you will need colored paper, scissors, cardboard, a toothpick, and glue. If you wish, you can purchase a special quilling tool and ready-made stripes, in which case you can do without a toothpick and colored paper.
We begin work on the open one by cutting out thin strips of the same thickness and length. You can skip this step if you purchased a special quilling kit. Next, we twist the stripes with a toothpick or a special device. Lubricate them with glue at the very tips so that they do not disintegrate. Thus, we make the required number of curls.

Having finished with the creation of the details, we fold the cardboard base in half, and place the curls on it in the desired sequence, thus creating a picture, for example, in the form of flowers, a butterfly or some kind of animal.

If necessary, flatten the parts to make them more elongated.
Now we attach the elements to the cardboard using PVA glue. After that, we decorate the card, if necessary, with beads or ribbons. Completed work!


Other original ideas
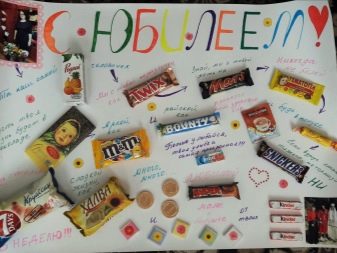
There are other options for creating a birthday card for your grandma. For example, you can make a present using chocolates. Such a gift will be not only pleasant, but also delicious.
The progress of work on such a present is not complicated. It is enough just to take a Whatman paper, the necessary sweets, felt-tip pens, scotch tape and scissors. With the help of felt-tip pens, we write congratulations, and with tape we fix the sweets. By the way, you can use not only chocolate, but also, for example, juices or yoghurts - it is worth choosing sweets depending on the preferences of the recipient of the gift. If you wish, you can diversify such an unusual postcard by adding photos with your grandmother to it. Ready!


Another option is a craft made from autumn leaves. For example, you can take a portrait of your grandmother. It will not be difficult even for a child to create such a card. First, clean the leaves from dirt and dry them. Draw the face separately, coloring all the necessary elements, in particular the lips and eyes, with watercolors or crayons. After that, glue the foliage: with its help, as a rule, hair is made.If you wish, you can decorate such a card with dry flowers, which will make the gift even more beautiful. Make sure all natural elements are firmly attached with glue. Ready!


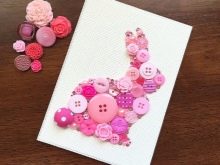
Postcards made of buttons look no less interesting. For such work, you will need ribbons, threads, any other decorative elements, cardboard, a glue gun and the buttons themselves.
To begin with, we lay out buttons and other necessary material on a cardboard base, thus forming a conceived image - for example, a heart, balloons, a butterfly or flowers. We attach all this to the cardboard with a glue gun, not forgetting to observe safety precautions. If necessary, we supplement the postcard, adding some elements with felt-tip pens or colored pencils, adding glitter or stickers. The craft is ready!


For more on how to make a twist for a grandmother with your own hands, see the video below.


