DIY birthday cards for grandfather

Any grandfather will be very pleased to receive a postcard from his beloved grandchildren for his personal holiday. You can put your soul into a congratulatory craft and write warm words to a dear person. There are many workshops on making artful creations from a variety of materials available that even a child can handle.


Create a postcard with balloons
Children often make greeting cards for the holidays, which consist of a drawing on the outside and congratulations on the inside. Before you start making crafts for your beloved grandfather, it is important to remember his hobbies or dreams. The postcard should evoke nostalgia and give pleasant emotions. It is preferable that the present is personalized. So, the lover of fishing will like the applique with fish, the car enthusiast - with cars, the hunter - with birds.
When preparing congratulatory words, you should not completely take the finished text as a basis and rewrite it. It is better to write congratulations yourself, putting sincerity into your creative work.
You should not use clichéd language and impersonal verses.

A card with wishes for grandfather, decorated with a beautiful balloon, will be an unexpected surprise. To do this, you need to use ready-made templates, colorful paper, paints, rope, glue, cardboard and scissors.
The process of making a postcard consists of sequential steps.
- Print the template in the form of a balloon and transfer its outline to paper. If you want to get a multidimensional ball, it is recommended to divide it into segments and cut out separate parts.So, a circle can be used as a base, which will be glued to the background first.
- On top it is worth sticking an oval of a different color. Pre-attach to it thin ropes that act as rafters. Attach a thin oval with the top layer, which will become the center of the ball.
- Glue a pre-prepared small basket to the ends of the strings.
- Hearts of different colors can be cut as decoration. They can be attached to a ribbon, stretched over the surface of the ball, and wrapped around the ends.
- To make the composition look harmonious and complete, you need to decorate the background with additional decorations. For example, cut out clouds, stick on buttons, beads or sequins, sign a homemade card, and decorate with a festive ribbon.


How to make a birthday card with a cake?
The volumetric postcards presented for the 60th anniversary look very impressive. To make such an original postcard decorated with a cake, you need to prepare the following materials: a cardboard sheet of the desired color, a set of markers, multi-colored paper, templates, and other decorative elements. From the tools you need to take scissors and glue.


The step-by-step instruction consists of the following points:
- first you need to find and print the templates you like;
- then transfer the images to a thick sheet of paper;
- using a clerical knife, cut the vertical lines of the cake;
- cut out tiers in stages from wide paper strips, starting from the bottom, - accordingly, the shortest strip will be needed for the top layer;
- circle the horizontal lines of the cake in the same way;
- after the completion of cutting, fold the workpiece in half;
- using felt-tip pens, paint the cake in bright colors;
- draw waves on the side and cut them out, write birthday wishes on the bottom of the cake;
- put the finished product in the form of a cake inside a multi-colored cardboard, the structure must be glued to the base along the edges, the rest must remain free;
- on top of the assembled cake, you can place candles or numbers indicating the age of the birthday man, cut out of bright cardboard;
to make candles, you need to cut out beige rectangles and yellow lights, use a red circle to simulate a flame, glue the resulting elements together.


More ideas
Before making a craft and choosing a design style, you need to think about what will delight him the most. An unusual craft is a postcard in the form of a cake. Such a gift from a granddaughter of 12 years old will certainly please a sweet-tooth grandfather. To implement the idea, you will need embossed cream-colored cardboard and ornamental cardboard with patterns, as well as satin ribbon and glue.
To make a sweet from cardboard, you need to follow the directions in the instructions.
- Draw a cake mold on a white background and cut along the contour.
- The embossed cardboard will act as the top of the craft, so you need to cut out the shape according to the prepared template.
- Ornamental cardboard decorated with a pattern will serve as the bottom part of the postcard.
- After gluing the cardboard base, you can tie a ribbon around the cake and tie a bow. You can use brads or a beautiful button to decorate it.
- Cut an element in the form of a cloud out of white cardboard and glue it to the base of the top.
- On the reverse side, write words for congratulations.
- Optionally, you can decorate the finished craft with sugar powder.


As you know, grandfathers love to remember their youth and look at archival family photos. Therefore, the hero of the day will like a collage of photographs of family members pasted on a Whatman paper. To make the craft look more impressive and be remembered for a long time, you can come up with a whole plot and make a composition. For example, to portray grandfather as the captain of the ship, and the rest as passengers. The main thing is that the hero of the occasion is in the spotlight.
You can not resort to the help of ready-made master classes, but show your imagination and use your imagination. The most important thing is to have patience and perseverance. It all depends on the level of skill and the development of creative thinking. The postcard does not have to be rectangular. The craft can be made in the shape of a heart, an asterisk and another shape.


A postcard with a picture of a boat can be made using such a technique as a vytynanka. You will need to take a dummy knife, a blue sheet of cardboard, plain paper for the base and an adhesive composition.
Draw a model of the ship, you will need to cut through its parts with a knife, and carefully remove the remnants.


In the form of a jacket
Such an elegant postcard will please your grandfather. Such a product can be presented for a 50th anniversary. To make crafts in the form of a jacket with a tie, you need to stock up on cardboard base, scissors, cloth, glue, pencil, ruler, tape, buttons and a lighter.
The manufacturing process consists of 8 steps.
- Draw with your own hand or print a pattern for a jacket, then cut it out.
- Fold the sides and corners of the collar along the dotted lines on the template.
- Sketch a collar stencil, cut out a shape to a suitable size and bend along the lines in the right places.
- Tie a ribbon like a tie, fasten in the middle of the craft and cut off the excess at the bottom. To get rid of loose threads, it is recommended to use a lighter to process the ends of the fabric.
- Glue the made tie inside the collar. The finished structure should consist of a collar and a tie glued to the jacket.
- To make the pockets, you need to cut them out and stick them on both sides of the jacket. The top pocket can hold a piece of fabric from which the tie was made.
- Glue a few buttons to a paper jacket to make it look even more like a real one.
- Glue a leaflet with wishes inside an impromptu jacket, and the product can be considered complete.


Drawn
On their birthdays, seniors are eagerly awaiting signs of attention from loving grandchildren. In this case, the most important thing is the love and soul invested in congratulations. A self-designed greeting card from a grandson of 3 years old will come in handy for his grandfather's birthday. Parents can help the baby prepare a gift.
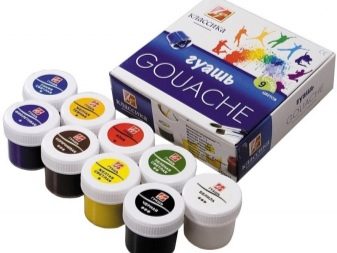
To make the children's card colorful and festive, it is preferable to use watercolors or gouache paints. It is better to take a thick sheet of paper or cardboard as a basis.


The child himself will show imagination by drawing a greeting card. You can create a regular pattern, draw balls or a cake. If grandpa served in the army, then it is recommended to draw military equipment: a tank, an airplane or a ship. But the plot drawing will look best. It's also a good idea to portray your grandfather himself on a postcard.
Adults can write greetings with colored pens. It is important that the labels are large and legible. Multi-colored handprints smeared in paint are also a great idea.
The finished drawing can be supplemented with decorative elements (beads, buttons) at your discretion.


With flowers
There is a huge variety of options for how you can create a handmade postcard decorated with flowers for a dear grandfather. For this, various manufacturing techniques can be applied. In particular, postcards are made in the form of applications, origami or volumetric models.
Little grandchildren can make a simple craft, and older children can resort to more complex techniques. A flower bouquet in the quilling style will look beautiful and creative. In other words, it is paper twisting.


The resulting bouquet should look laconic and consist of a matching color scheme. For grandfather, you should choose cold paper tones: blue and light blue. So, starting to make crafts from a granddaughter of 11 years old, you will need:
- cut colored paper into thin strips of the same size;
- then twist the blanks to give them the required shape;
- fix the tip with glue to get a finished petal;
- now you can start harvesting green leaves, made in a similar way;
- after that, make a round flower core of a different color;
- the background can be blue or purple, white paper in the form of a cloud should be glued to it, you can write on it: "Happy birthday, grandfather!";
- then it is worthwhile to do the gluing of flowers on the base, and the gift is ready.


With a mustache
Do-it-yourself "mustache" birthday card for grandfather is an interesting gift idea from a 9-year-old granddaughter. The main element of the craft will be a curvy mustache with curled ends. They can be made from various materials at hand, for example: from unnecessary brushes, dark scraps of fabric, as well as painted with black paint or cut out of colored paper.
In addition to the mustache, you can use a black hat and yellow glasses to create a complete picture, as well as make a polka dot butterfly. All elements must be glued to the base, decorated with stripes. You can also glue clippings from old newspapers onto cardboard to create a stylish background. Attach dark cardboard strips of the appropriate length and width as a frame.
At the end of the work, you need to write a congratulation in beautiful letters.


With hearts
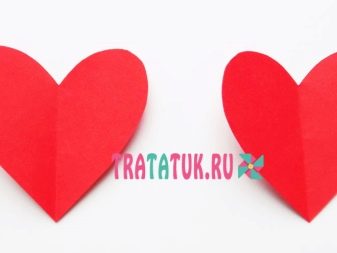
The applique technique is suitable for small children. You can always find cardboard, paints and glue in the kid's arsenal. Grandfather on his holiday will be happy to receive a postcard from his 5-year-old grandson. The child can be invited to do curly cutting. To do this, use a thick sheet folded in half. It is better to choose bright paper to make paired elements of the same color.
To create a heart shape, you need to make a fold in the middle and draw a half, and then cut along the outlined contour. From hearts you can add plot compositions. For example, depict them as balls on a string.


This requires:
- take bright green cardboard for the base and fold it in half;
- in a chaotic manner, spreading over the entire surface of the sheet, glue the resulting blanks in the form of paired hearts;
- now you need to glue on the second copy: the glue is applied along the fold line of the hearts, so that the composition looks voluminous;
- draw lines with a felt-tip pen, thus collecting hearts in a single bouquet;
- cut out smaller blanks and stick them on the connecting lines;
- take a red ribbon and tie it in a bow, and then attach it to the bottom of the composition.


With buttons
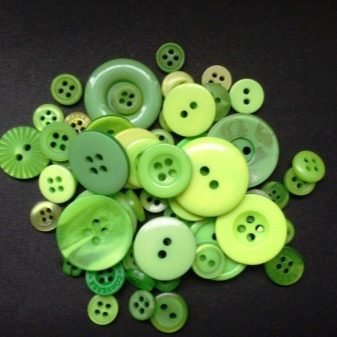
Using buttons as the main material, you can make a card in the form of a tree for your grandfather. The main thing when doing a craft is to find as many buttons in green, brown and black colors as possible.
The green crown is a symbol of health and longevity, so such a present can be presented for the 70th anniversary. Getting started, you need to do the following steps:
- draw a sketch of a tree with a lush crown;
- spread the buttons on top to visualize the future composition;
- removing the buttons one by one, start gluing them one by one;
- remove excess glue if necessary;
- write solemn words on the back of the sheet.


Another example of a simple craft is the use of buttons that mimic balls on strings. Taking multi-colored copies, you can stick them on cardboard, and draw lines from below.


For information on how to make a card for grandfather's birthday with your own hands, see the next video.


