DIY birthday cards for dad

Parents are always pleased to receive home-made gifts from their children, and this applies to any holiday, be it a birthday, February 23, March 8 or some kind of anniversary. In this article, we will consider cards for dad that both young children and children aged 9-13 can make.
Simple options
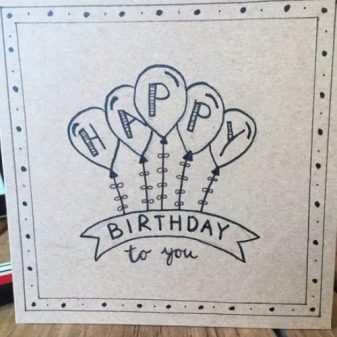
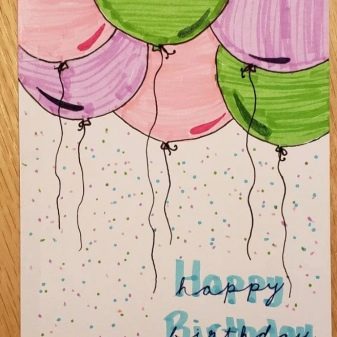
The simplest option for a greeting card to a father from a child aged 3, 4, 5, 6 or 7 is a drawing. For the craft, you will need colored pencils, markers or watercolors, and to make the card look more beautiful, we recommend taking thick drawing paper.
It's worth starting work with a small sketch. This will help create at least a rough idea of what you want to see in your drawing, determine its composition, position, color scheme.
It is not necessary to draw a sketch to the smallest detail, a schematic drawing will be enough. If we talk about the content of a drawn postcard, then it may contain funny animals, balloons, a gift box or a birthday cake - however, whatever you deem necessary will do, because the main thing in a homemade gift is your imagination.


After drawing a quick sketch, you can start creating the postcard itself. Note that if you do not know how to draw at all, then this is not a problem. In this case, you can resort to using a printer by printing a ready-made drawing, which will then need to be attached to a dense base. Color the postcard. After that, it can be decorated with additional elements, for example, glitter or decorative stickers, which will make your gift more beautiful and original.Don't forget to add congratulatory words!


A children's greeting card can be made in another way, using colored paper and cardboard for this. Yes, we are talking about an ordinary application. The essence of this work is simple: you need to cut out all the details and glue them in the correct sequence to get a beautiful image. For a present for dad, it is better to choose applications on the theme of cars, airplanes or, for example, ships. Applications with animals, for example, with a cute cat or mouse, will also be appropriate. By the way, they can be made as easy as shelling pears: just cut out a few circles, cut them in half and lay them out in the required sequence.


Crafts in the style of scrapbooking
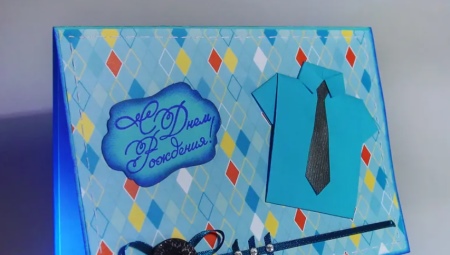
Scrapbooking has become very popular nowadays. A small child is unlikely to be able to do a craft in this style on his own without resorting to the help of his elders, but children aged 10, 11, 12 or 14 years old will be able to do it.
In order to start creating a presentation, first of all, you need to purchase all the necessary accessories: decorative items like beads and ribbons, special cardboard, hot glue gun, stickers and other details that will help you realize your idea.
Please note that when buying special cardboard for a card for a holiday for dad, it is better to give preference to colors such as blue, green or orange - they will be more appropriate than, for example, the same pink.


After collecting all the necessary supplies, you can get to work. First you need to make a cardboard base for the postcard. This requires folding the cardboard in half. Now we need to arrange all the elements on it so that they look harmonious. However, it is not worth piling up the postcard with a lot of details, otherwise the result will hardly please you.
Having arranged everything the way you want, you can start working with the glue gun. Proceed carefully, wait until the device warms up completely, do not try to squeeze out the glue ahead of time. Otherwise, you will simply break the device.
Having finished with the fasteners of all the elements, it remains only to add a small congratulation. You can write a couple of warm words from yourself, or you can download a small rhyme from the Internet. The first option, of course, will be more emotional. Greeting card for dad is ready!


Other stylish ideas
From daughter
There are many options for postcards to dad from daughter that you can make. The process of creating them is quite easy, it does not take much time, and the craft itself looks very stylish.
So, you can make an original volumetric craft from buttons. For such work, you will need buttons, preferably in different colors, but of the same shape and approximately the same size, threads, ribbons, colored pencils and everything that will help you bring your idea to life.
To begin with, take a cardboard base and place it as you like, vertically or horizontally. After that, you need to start laying out the buttons to form the pattern: it can be birds, balloons, heart or something else, it all depends on your imagination.


By the way, such cards look very interesting and cute in combination with a drawing: for example, you can draw an animal or a man holding a bunch of balloons in his hand. In this case, the balls are laid out from the buttons.
Having decided on the ideas and having drawn, if necessary, individual elements, you can proceed to fastening the buttons, using a hot glue gun for this.
Add a small and cute greeting. Postcard completed!


There is another option for a gift from a daughter. So, you can make a voluminous craft in the form of a cake. It is not so difficult, nevertheless, the process of creating a craft itself is very entertaining. To do this, you will need cardboard, scissors, PVA glue, pencils and colored paper.
We act as follows: to begin with, we cut out four thick strips - one long, another smaller, the third even smaller, and so on. These will be the cakes for the future cake. We bend the edges of the cut blanks, coat the bent part with glue, without touching the rest, and attach it to the paper: the largest cake should be at the bottom, and the smallest at the top.
After that, we cut out additional parts from paper, in particular, candles. We also glue them to the paper. If you wish, you can cut out butterflies or hearts for decoration, but this is optional. After that we add congratulations. Ready!


From son
A postcard from a son to dad can be made using the quilling technique. To do this, you can purchase ready-made strips and a device for twisting them: they are sold in the art store. If this is not possible, then thin strips of approximately the same length can be cut out of paper, and it would be best to use an ordinary toothpick to twist them. In addition, you will need cardboard, glue and various decorative elements.
To begin with, we twist the required number of curls, smearing each of them with glue in the area of the tip itself, so that they do not subsequently disintegrate. The required number of such curls depends solely on your idea: the larger it is, the longer it will take to twist.
Having prepared the required number of parts, arrange them on the sheet in the desired sequence, thus forming a drawing. Some of the curls can be flattened with your fingers to slightly reshape. After that, attach all the details to the cardboard, add a small congratulation to the card. Ready!


A postcard made of salted dough will also look very interesting. Of course, you will have to tinker with it, but the process of its creation will be interesting for both the child and the adult.
First, you will need to prepare the basis for your future postcard. It is best to choose a frame with a ready-made base for this.
Prepare the dough separately. To do this, you need to take 200 milliliters of water, 300 grams of salt and the same amount of flour. Salt must be dissolved in water, then sifted flour is added to the solution. All this needs to be mixed so that you end up with a lump.
The resulting mass must be kneaded, adding water or flour if necessary. After that, the dough must be wrapped in a bag and put in the refrigerator for a couple of hours.

After waiting for the required amount of time, you can start sculpting. You can dazzle literally anything in this way, you just need to show a little imagination.
The finished parts are sent for drying in an oven heated to 130 degrees. You don't need to wait long: about half an hour.
The cooled parts should be painted with gouache or acrylic paints. And to get a beautiful shine, you need to cover them with a special varnish.
Almost ready! It remains only to finish the background if necessary and attach all the elements to the cardboard base with a glue gun.
You can safely give a gift!


For a detailed master class, see below.


