Do-it-yourself wedding cards

An original card is an important part of a wedding gift. It is especially pleasant for newlyweds to receive this decorative card if it is created with their own hands.


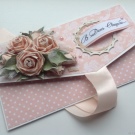
How to make an envelope for money?
Most of the spouses prefer to receive a monetary present for the wedding, and this, in turn, requires a decent frame. It is quite possible to make such a greeting card-envelope with your own hands.
The creative process requires thick, snow-white A4 paper (for the base), a sheet of double-sided scrapbooking material, any adhesive, scissors or a cutter, a pencil, a ruler, a figured hole punch, acrylic paints, and ink. It is suggested to use whatever decor you like: beads, ribbons, lace, feathers, artificial flowers or stickers.


First of all, the inner and outer sides of a double-sided sheet are determined, after which it is bent diagonally - three neat corners should come out. The fold line is lightly pressed with the palm, and then the workpiece is cut right along it, as a result of which two right-angled triangles should form, one of which is temporarily set aside. The rest is bent in half so that the middle of the line is indicated on the wide side. Then it unbends back, after which only sharp corners are bent towards each other.
If done correctly, they should converge in the middle of the wider side. The right angle also connects to the other two corners.


At this stage, you will have to use the second triangle, from which the substrate is cut a couple of millimeters smaller than the base of the craft. In the future, you will need to attach it to the envelope with double-sided tape or glue, and glue the sides of the structure. Decorating a paper product begins with creating small borders using a figured hole punch. They are usually fixed with glue to a backing.
The front side can be decorated with a volumetric composition of artificial flowers and twigs. Pleasant wishes are written in ink, and the necessary elements are drawn with acrylic paints. Finally, a ribbon of such length is glued to the work, which will allow you to tie a bow and thereby close the envelope.


A rather light but attractive composition is obtained if you take a ready-made colored envelope as a basis and design it in the scrapbooking style. First, a strip of thin lace is placed in the center of the workpiece, and then fabric buds with petals are glued in the corners. You can place a strip of suitable fabric over the lace, and already on top of it - a slightly crumpled sheet of music. To complete the composition, it remains to add a fabric heart with buttons, a paper strip folded with an accordion, rhinestones and beads.
By the way, You can also make an envelope for scrapbooking yourself. In this case, a rectangular sheet of thin cardboard of pastel shades will need to be placed vertically and bent three times, thereby dividing into three equal parts. After that, the lower one is bent inward, and a triangle with equal sides is cut from the upper one.


Crafts using scrapbooking technique
The original homemade postcard using the scrapbooking technique will surely please the heroes of the occasion. To obtain it, you will have to use a thick cardboard of landscape format, a couple of sheets of paper for scrapbooking matching colors, a cutter and scissors, a ruler, adhesive composition and scotch tape with two adhesive sides. It will be possible to decorate the finished product with lace, a snow-white satin ribbon, a composition of artificial buds, a beautifully written wish "Happy wedding day!" and half pearl beads.
First of all, the white sheet is bent in half and, by the action of a clerical knife and a ruler, is freed from excess until a folding blank with sides of 10 and 15 centimeters is formed. A sheet of scrap paper is also cut to the same size, after which it is glued onto the blank using the tape indicated above.


Having visually determined the middle horizontally, it will be necessary to place a pair of thin satin ribbons or one wide one just below. The protruding parts of the material are carefully trimmed, and the edges are processed with a lighter. A piece of lace is fixed on the glue above the ribbons, which is then decorated with half pearl beads. Further, from a piece of cardboard and a piece of scrap paper of a different color, blanks are cut out for the inscription with the same shape of the edges, but slightly different dimensions.
Snow-white paper is attached on top of colored paper with scotch tape or an adhesive pad, and it is on it that the words "Happy wedding!" Are applied. Scrap paper in a shade different from the background color is used to decorate the top border of the postcard. It will be correct to choose the shape of the edges of this part the same as that of the blank for the inscription. Finally, a decorative bouquet and a few more pearl halves are attached to the postcard.


It will also be possible to design wedding invitations using the scrapbooking technique. The work begins with the fact that the invitation text is typed in a beautiful font in any graphic editor. If you have calligraphy skills, it is best to write it by hand. Cards are cut out of special scrap paper with curly scissors, in the upper part of which you can make a hole for the tape with a hole punch.
Further, there is a direct decoration of either the invitation itself, or an envelope for it with the help of rhinestones, ribbons, pieces of lace, volumetric figures, beads and other elements.


Quilling ideas
You can congratulate the newlyweds on the most important day by presenting them with a simple but beautiful postcard made in the quilling style. As a basis for it, cardboard is used, which is decorated in a certain way with curled and folded strips of paper. A simple master class will require one sheet of light thick paper and several sheets of thin paper, which are useful for curling curls. Instead of the latter, by the way, it is much more convenient to purchase a ready-made quilling set, which includes the required material, already divided into strips. In addition, you will have to prepare scrap paper, fabric ribbons, half beads, a pencil, scissors and a ruler, a cutter and a paper-rolling tool: a match or a thin stick. The base of the postcard is obtained from a rectangle with sides of 20 and 15 centimeters, bent in half.
Next, a rectangle measuring 9.5 by 14.5 centimeters is cut out of scrap paper. If necessary, the material for quilling is cut into strips in the amount of 14-16 pieces. Each of them, using a tool, will need to be twisted with a "roll", securing the free end with glue. It is important that the workpieces are moderately dense and do not fall apart. On the basis of the future postcard, a rectangle of scrap paper is glued exactly in the middle. Round "rolls" are flattened on both sides to form petals. Then they will have to be used to place flowers on the front side of the product. The core of every 5 petals will be formed by a half of a bead. The composition should be supplemented with several spirals of untwisted "rolls", rhinestones, small beads and a satin bow.


With a heart of flowers
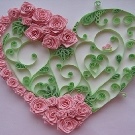
You can decorate a card with congratulations and wishes with a delicate composition in the form of a heart of flowers. The basis for a gift item is performed in the same way as in the previous master class. Roll paper strips are prepared from red, pink and green double-sided paper. Each is twisted with a spiral and used to fill the contour in the form of a heart, applied to the base. As an experiment, some "rolls" are made tighter, and some more loose.
Also, if desired, the strips are cut to different widths. Some red blanks are supplemented with green blanks compressed on both sides, resembling sharp leaves. The buds themselves can be left abstract, or they can be assembled from several "rolls" with one compressed corner.
As stems, you can use green strips, glued to the leaf with an edge, and the cores of the flowers - small spirals, sequins or beads.


With birds
It is a great idea to decorate your wedding gift with the image of a couple of doves - birds symbolizing peace and love. For work, you will need quilling strips of white, brown, black and orange shades, a special tool, scissors, PVA glue, a template, a ballpoint pen, sewing pins and a base. It all starts with the creation of 10 large teardrop-shaped blanks: a 44 cm long white strip curls into a tight circle, which then expands to a diameter of 3 cm. The edge of the piece is glued, after which it is squeezed on one side with your fingers to get a drop. In addition, you will need 100-120 small droplets. They are formed from strips 14 centimeters long, twisted and unfolded to a diameter of 1.5 centimeters. After gluing the tips, they also transform into droplets.
On the basis of the template, an image of two doves is drawn. The outline of the pattern is processed with glue, after which a sewing pin is pinned at the base of the upper part of the beak. The glued end of the quilling strip is pushed over a pin.The outline of the bird is cut off with pins, and a strip of paper is attached to them.


A beak piece is formed from a brown stripe 21 centimeters long. After twisting a tight disk, its edge is glued, and the figure is bent into a crescent. The part is glued to the upper part of the beak, and then a similar one is attached to the lower one.
Having connected together a black strip of 17 centimeters long and a white strip of 5 centimeters, you will need to spin a tight disk, starting with the black strip, to indicate the eye. Further, the entire body of the bird is coated with glue and filled with small droplets. Those that will be near the contour will need to be additionally squeezed with a crescent. The tail of a pigeon is formed in large drops. Having made two large crescents and four small ones from orange stripes, it will be possible to arrange the bird's legs. The second pigeon is made in a similar manner.
By the way, doves should be placed on a blue background decorated with a bright red heart.


Simple options for kids
In fact, the only gift a child can present to relatives at a wedding is just a postcard. For the little guest, it is recommended to choose the simplest possible master class and be sure to provide him with parental help. For example, it will be possible to prepare a base of thick craft paper for it, which will only have to be decorated with a thematic decor: a round lace napkin, a pair of birds with beady eyes and a printed inscription.
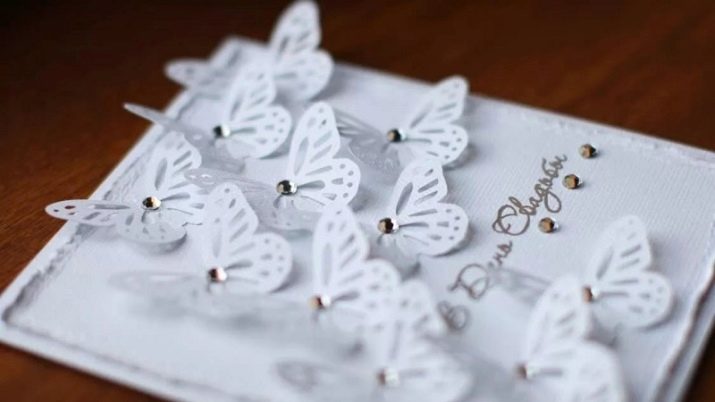
It will also be possible to design a postcard with a pair of voluminous white butterflies sitting on satin ribbons, or with hearts painted to match the suits of the bride and groom.


For information on how to make a cute do-it-yourself wedding card, see the next video.


