Overlock of the 51st class: characteristics, setting and operation
Sewing is one of the most common hobbies for women. With a simple sewing machine and a small amount of skills, each hostess can make unique designer outfits. For to sew high-quality and durable clothes, it is not enough just to sew the seams, you need to process their edges with an overlock... Manufacturers produce a wide range of this sewing equipment, which can be either as a separate device or built into a sewing machine.
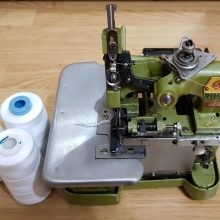
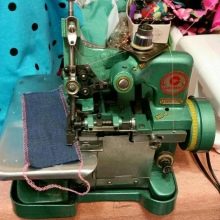
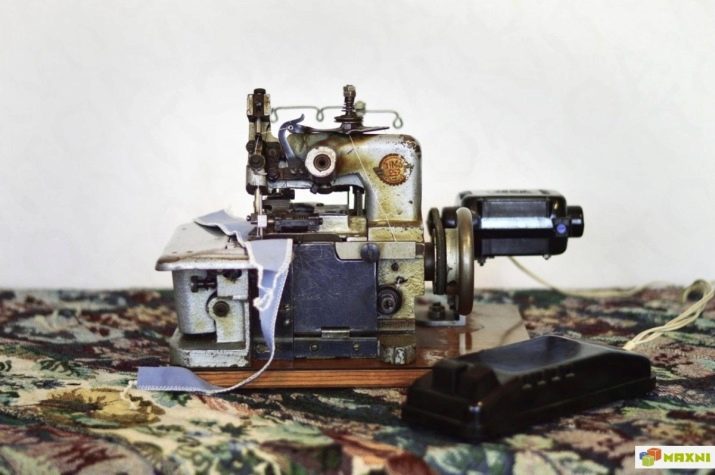
Despite the availability of new overlocks, many seamstresses will continue to use the old proven equipment, which is easy to use, unpretentious and reliable. It is this technique that class 51 overlock belongs to.


Specifications
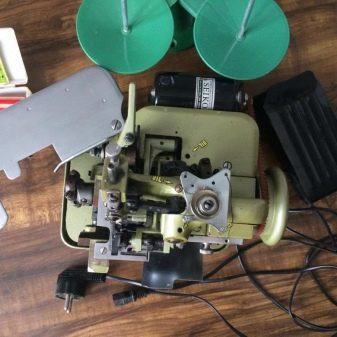
The 51st class overlock is a professional sewing equipment that can be used both for personal needs and in small sewing workshops. For many years, this device has remained in demand in the processing of products. The primitive design does not make it possible to overcast modern types of fabrics, but the equipment is indispensable when sewing products from rough and durable types. This sewing device is more reliable and durable than its Chinese counterpart. For high-quality performance of work, manufacturers have provided the following functions in this device:
- adjustment of the thread tension;
- changing the pressure of the presser foot on the fabric;
- correction of the distance between the needle punctures.
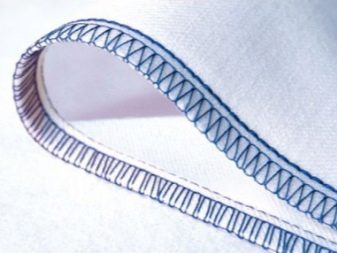
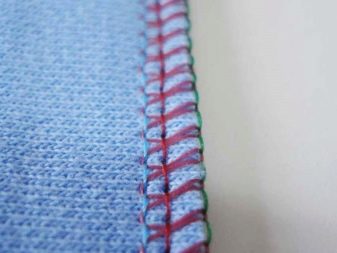
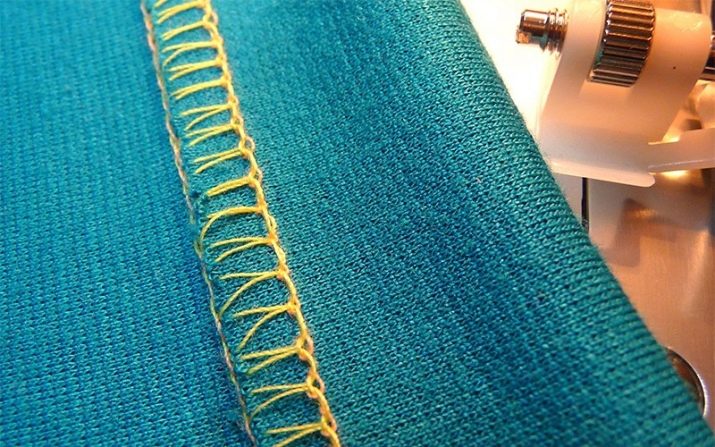
Functional tasks of class 51 and 51-A class overlockers - processing of edges of knitwear, underwear and garments with a 2 and 3 thread chain stitch. The stitch length ranges from 0.3 cm to 0.6 cm. The maximum thickness of the fabric to be sewn is 3 mm. The optimal needle brand is 0029, number 60-70.
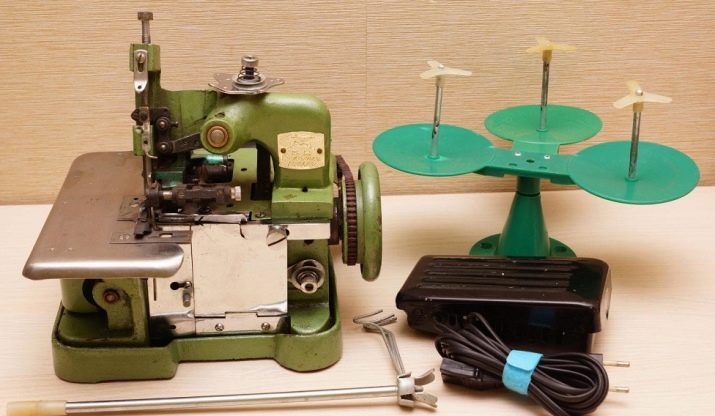
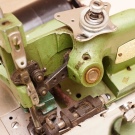
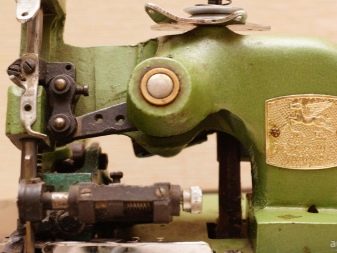
This appliance is equipped with a needle mechanism and two loopers. If you replace the right looper with a spreader, only two threads can be used. For overcasting knitwear, it is better to give preference to a 51-A class overlock, which has a differentiated mechanism for moving the web. Thanks to the greater movement of the front scarf, the effect of stretching the material is achieved, which makes the seams more elastic and stretchy.
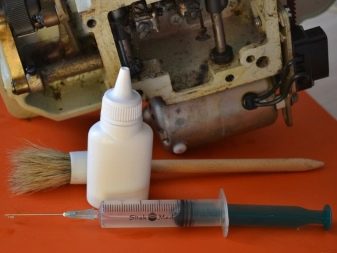
A distinctive feature is the presence of a centralized wick lubrication of the moving parts, which are located under the platform of the sewing equipment. For trouble-free lubrication of all elements, it is necessary to regularly check the presence of a lubricating solution in the crankcase. A container with a long nose must be used to lubricate all other elements. In the case of constant use of the device, experts recommend that this event be carried out at least once every 30 days. For smooth operation of the device, it is necessary to lubricate all contacting parts, and during operation, they must be constantly turned.
For the convenience of the work, the masters recommend using a graduated cylinder in the form of an injection cone instead of a lubricant container.
Advantages and disadvantages
Like any household sewing device, the 51 class overlock has both positive and negative sides.
Advantages:
- affordable price range;
- reliability;
- ease of use;
- universal purpose;
- long period of operation;
- the presence of manual adjustment;
- the ability to use all types of threads.
Disadvantages:
- impossibility of processing modern types of fabric;
- lack of originals of instructions;
- the complexity of customization and repair;
- the impossibility of the simultaneous use of different types of threads;
- lack of spare parts.
Despite the presence of shortcomings, this device has remained in demand and widely used in the sewing industry for many years.
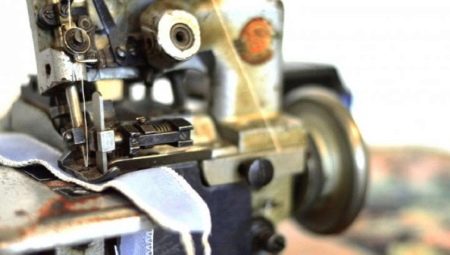
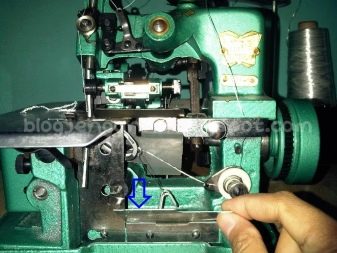
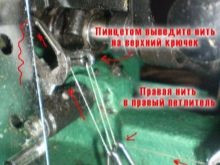
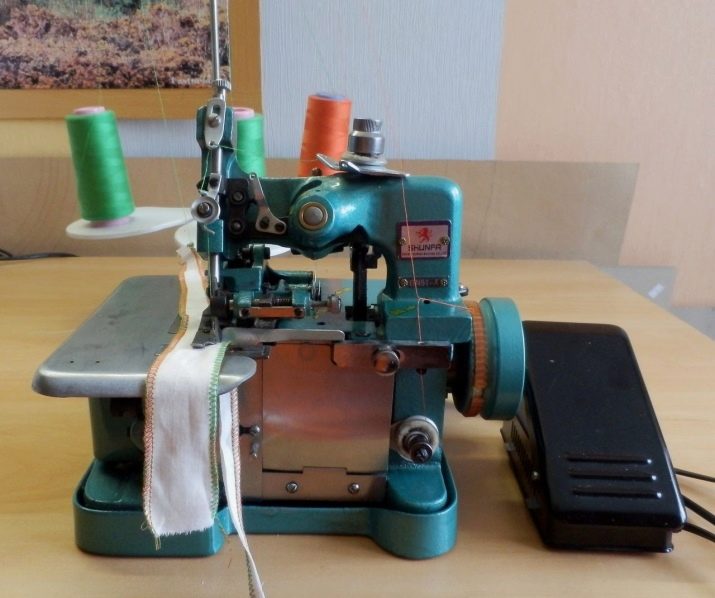
Threading diagram
In order for the device to function smoothly, the threads must be properly threaded. This process consists of the following manipulations:
- threading the needle thread;
- threading the left and right loopers.
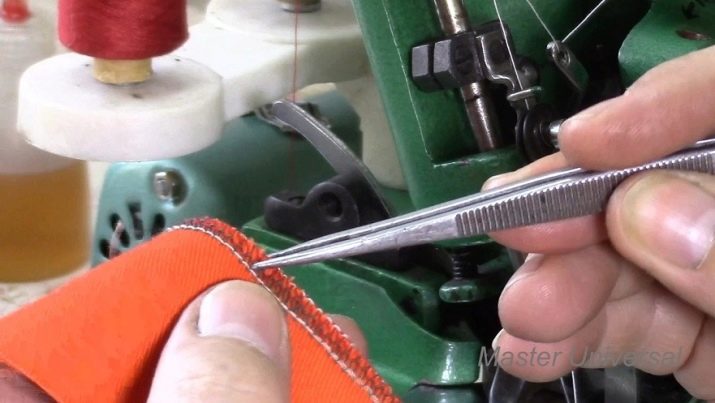
The main steps for threading the needle thread for three-thread overcasting:
- passing the bobbin thread through two holes located on the thread guide plate;
- moving the thread to its side under the tension regulator disc;
- threading through the eyelet of the inner horn on the thread guide plate;
- direction of the thread to the second eyelet, which is located on the left;
- threading the thread into the needle bar from left to right;
- passing the thread into the eye of the needle;
- threading under the foot.
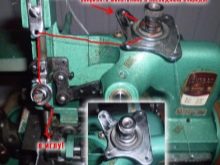
For the first stitches, experts recommend leaving the thread at least 5 cm long.
When threading the left and right loopers, follow these guidelines:
- leading the thread from bottom to top;
- removing threads from the sleeve of the body;
- compulsory passage of all nodes;
- passing the thread through the knots in strict accordance with the diagram;
- removing the thread from the back of the looper.
Threading the left looper is much more difficult as access to the looper and thread guide is limited. It is strictly forbidden to pull out old threads and pull several threads at once.
The correct threading depends not only on the position of the threads, but also on the correct position of the cam. Displacement of the location of this part by several degrees can lead to a violation of the placement of all loopers at once.
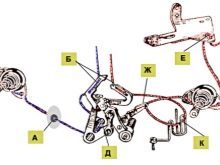
Therefore, before threading, special attention should be paid to the location of this element.
Setup Instructions
Due to the lack of specialists for the repair and adjustment of this type of overlock, as well as the high cost of work, the price of which often exceeds the cost of the equipment itself, the owners of these devices are forced to carry out its full service with their own hands. It is necessary to carry out these types of work only in strict accordance with the instructions of the manufacturers.
Breakdown of this type of equipment is very rare. All units and mechanisms have increased strength and are not able to fail on their own. Most of the breakdowns are associated with incorrect handling of the overlock during sewing or adjustment work.
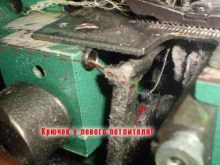
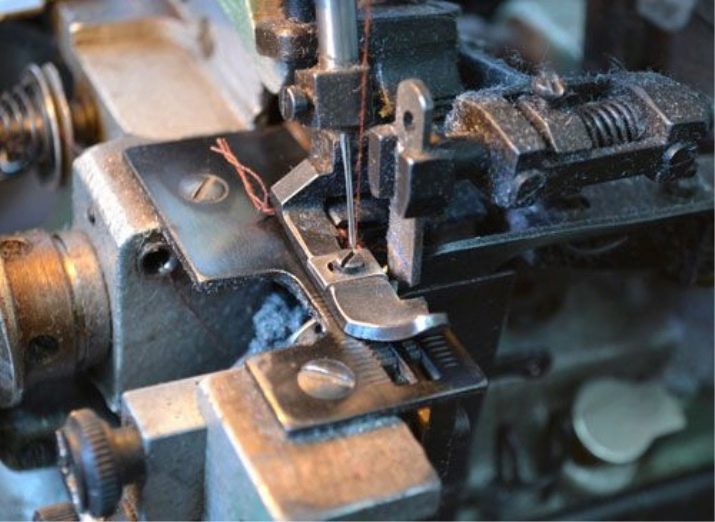
The most important vector when adjusting the device is the location of the left metal hook. In the process of deepening the needle point to the maximum lower level, it should be in the extreme left position, and the end of the metal hook should be removed from the needle shaft at a distance of 0.5 cm. By raising the needle 0.3 cm higher from the level of the ear, a bend should form. The distance between the left looper and the needle should not exceed 0.05 cm. To adjust the gap, use the screw of the left looper fastener, in the process of twisting which it is necessary to turn it over at the moment of approaching the pointed needle. Do not overtighten the fasteners or leave them in a relaxed position. After finishing the adjustment, you need to fix the result.
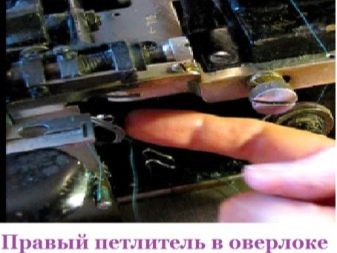
After grabbing the needle loop, the hook on the left pulls it along its razor, and the hook on the right is directed towards it in order to penetrate the loop from the hook on the left.
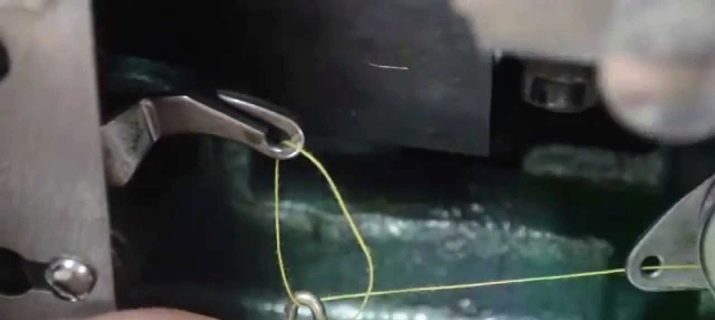
The end of the hook on the right runs along the groove from the inner edge of the hook on the left, tightly positioned near its hole and the razor at the same time. You can check the correct location of the parts using the drawn virtual longitudinal strip. The end of the hook on the right should be lower than the hole on the left of the hook and the gap between the blades of both loopers should be no more than 0.16 cm. The final stage of setting is to remove the loop from the right looper with the needle.
When the needle passes through the loop of the right looper, the distance between the needle and the looper blade should not exceed 0.16 cm, and the gap between the eye of the right looper and the needle point should be 0.6 cm.
A distinctive feature of the right looper is the absence of an adjusting screw, with the help of which it would be possible to correct its location. The adjustment process consists in mechanically folding the device to the required position.
How to change the needle correctly?
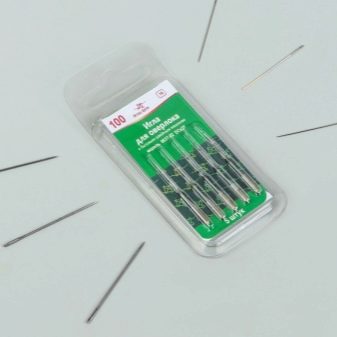
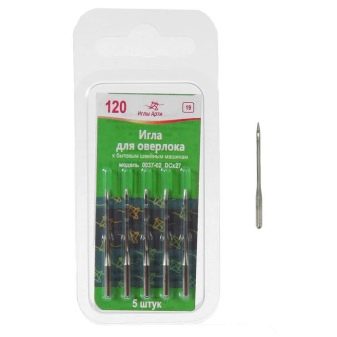
Timely rotation of the needles is the key to obtaining a high-quality stitch. Experienced seamstresses recommend changing the needle not only when it deforms and breaks, but after a certain period of time, the duration of which depends on the level of intensity of equipment operation. Due to the fact that this equipment has a long production period, the needles used must also be special, a distinctive feature of which will be a small length and a thickened bulb.
The use of modern sewing needles that do not correspond to the technical characteristics of the equipment can lead not only to an ugly and incorrect stitching, but also to the breakdown of the device.
For the processing of dense fabrics, experts recommend using needles numbered 100 and 120.
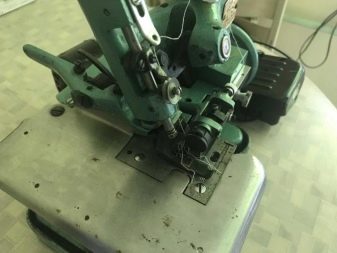
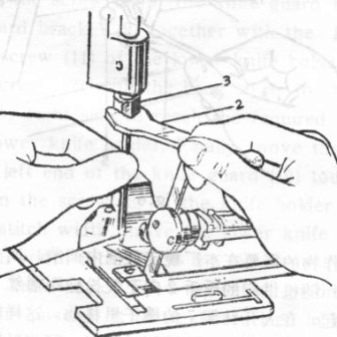
Replacing the needle on the overlock machine is a simple, but very important process, which must be carried out in strict sequence.
The main stages of work:
- removing the container for scrap;
- the location of the panel at the lowest level, where the tray with tailor's needles and special working screwdrivers are located;
- lifting the pressure plate lever;
- pulling a tail of yarn from the needle hole;
- lowering the presser foot lever;
- loosen the holes of the mounting bolts by turning the screwdriver counterclockwise.
Before inserting a new needle, carefully remove the old sewing element. To mount a new needle, take the needle with two fingers so that the blunt part of the bulb is at the back, and place it in the cavity under the screw. After carrying out all the above manipulations, it is necessary to securely tighten the fixing screw using a clockwise movement. All manipulations must be carried out as carefully as possible so as not to disrupt the threads on the screws. When installing the needle, you must hold it as securely as possible with your fingers and do not let it fall down.
Failure to comply with the rules for installing the needle can lead not only to the impossibility of performing work, but also to the complete breakdown of the device. Experts identify the main causes of breakdowns:
- incomplete insertion of the needle into the needle bar;
- processing with a thin needle of dense fabric;
- strong tension of the material during operation;
- the presence of defects on the surface of the presser foot or its incorrect installation;
- the location of the groove of the needle in the wrong position;
- using a needle of the wrong brand and size;
- carrying out work with a deformed needle;
- poor fixation of the needle bar.
How to use an overlock?
In order for the purchased device to serve for more than a dozen years, experienced seamstresses recommend carefully studying the manufacturer's instructions before starting to use it and strictly follow all the rules.
Basic recommendations for using the sewing machine.
- regular cleaning of the looper and the entire device;
- timely replacement of the tailoring needle.
The most common cause of breakage for a Class 51 overlock is incorrect yarn tension and different thread diameters. Despite its unpretentiousness to consumables, experts recommend using threads from special industrial bobbins for overcasting. To set up the device, you must first loosen all the knots, and only then pull each thread separately.
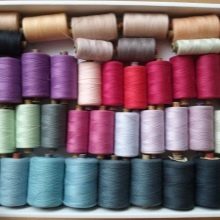
Experienced seamstresses use multi-colored threads to customize.
The appearance of an uncharacteristic knock in the process of work indicates the processing of a very thick piece of fabric, when overcasting, the right hook collides with the foot. Ignoring this problem can lead to failure of the metal looper. Failure to follow the threading scheme can provoke deviations in the functioning of the entire device. To fix the problem, you need to pull the threads out of the machine and thread them again.
To prevent the thread from pulling out after finishing work with one piece, experts recommend not cutting the threads, but carefully placing a new thing and continuing to work. This trick will not only save consumables and working time, but also prevent breakdowns.
If in the process of work on the seams to be laid, gaps begin to appear, then the cause of the problem is a shift in the position of the needle bar. You can eliminate the nuisance by shifting the part down a few millimeters.
Making clothes yourself is not only a popular activity, but also very exciting. To obtain a high-quality result, one must have not only basic practical and theoretical knowledge, but also high-quality raw materials, as well as good equipment. One of the main technical devices involved in the sewing process is the overlock, which can be used to make the product more elegant and durable.
For home use, it is not necessary to purchase expensive equipment, but you can opt for proven models, such as a 51 class overlock.
How to thread a 51 class overlock, see below.


