DIY papier-mache for beginners

Even small children can master the papier-mâché technique, but the finished results can please even the most fastidious adults. The availability of materials and the simplicity of master classes explain the popularity of this type of creativity among many craftsmen.


Technique
To create papier-mâché, it is customary to use two basic techniques: layer-by-layer gluing and sculpting.


Layer gluing
The layering technique, also known as waving, is most often used to create masks, tableware, doll heads, three-dimensional figures, or caskets. The whole process can be divided into three stages. On the first, thin paper - newspaper, napkins or toilet paper is crushed into small fragments. The dimensions of the pieces are determined based on how large the conceived creation will be: for small squares 1 by 1 centimeter will be enough, and for large - about 4 by 4 centimeters or even 4 by 1 centimeters.
It is better to tear the fragments than to cut them - this will make the surface of the finished shape smoother.
In addition, at this stage, a blank is prepared, which is to be pasted over: it can be a plate, a deep bowl, an inflated balloon or any other object.


In the next stage, the paper is glued to the blank. The more layers there are, the more reliable the product will be. Their minimum number is 4-5 pieces, and the maximum is not limited by anything, but it should be remembered that 15 layers already correspond to a wall thickness of 0.5 to 0.7 centimeters. Every 3-4 layers must be followed by drying. In order to evenly cover the shape, it is recommended to use different shades for individual layers. After the final 24-hour drying, the product is removed from the workpiece.When the need arises for a cut, it is created with a sharp paper knife. After gluing back on top, it makes sense to glue another layer of papier-mâché, ideally of white paper.


Molding
The second technique of papier-mâché is based on modeling from paper pulp, plain or on a frame.
The "dough" itself can be made according to different recipes, but it is usually based on pieces of toilet paper, newspaper, cardboard from boxes or egg trays.
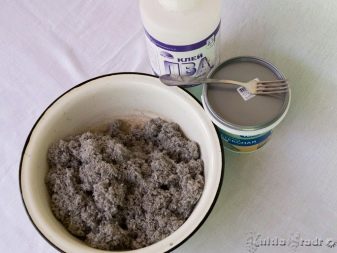
The paper material is first soaked in warm water, and then squeezed and crushed using a blender, meat grinder or even a sieve. Next, an adhesive component is introduced into the composition, and the substance is mixed until homogeneous. After modeling, which is carried out similarly to working with plasticine or clay, the finished product is dried for 2-3 days, sanded and covered with paint.


Recipes
The most popular recipe for making papier-mâché dough requires adding newspapers. The sheets are torn into small particles and filled with freshly boiled water in a ratio of 1 to 10. As soon as the mass increases in size, which can take several hours, it will need to be put on fire. By the way, while the workpiece is soaking, it is recommended to periodically gently stir it with a long object. The substance heats up until the cellulose is completely destroyed, after which it moves into a sieve and squeezes out. The slightly dried mass will need to be ground with a mixer until smooth, then added with glue and mixed well. A mixture of PVA with water in a 2: 1 ratio is also suitable as an adhesive.


Instead of newspapers, thin napkins or toilet paper are suitable, which, by the way, will get wet much faster. Toilet paper also tears into pieces, and tissues can even be used whole. In the absence of a mixer, it will be possible to grind the substance both with its construction variety and with a blender, and ordinary gauze will also allow it to be squeezed out well. It is also allowed to use wallpaper paste instead of glue.
To make the products have a more attractive appearance, putty, a small amount of gypsum or liquid soap can be added to the finished composition.
Sunflower oil will relieve the mass of sticking to the hands, and starch and flour will provide it with the necessary viscosity. Adding lemon juice will extend the shelf life.


It is important to remember that the mass of papier-mâché cannot be frozen, but it will still be usable for several days. It is best to leave it in the refrigerator under cellophane. If the substance begins to release liquid, then it can be squeezed out and then added with glue.
What to make the base from?
The base on which the paper impregnated with an adhesive is glued can be a finished object or a figurine made of plasticine or clay.
In fact, it can be absolutely any container, piece of wood or twisted foil - it all depends on the imagination of the master and his ultimate goal.
When using a ready-made item, it should be understood that the papier-mâché will have to be cut into two halves, which means that the possibility of damage to the base is likely.


Therefore, if something spherical is planned, then it is better to take an ordinary balloon, which at the end of the work can be burst and removed through a specially left hole. To make it easier to separate the finished product from the mold, it will be correct to first coat the surface of the latter with petroleum jelly or wrap it very tightly with cling film. In addition to the volumetric base, you can only use a frame twisted from wire, or any similar material that is not subject to rapid deterioration.


Crafts making
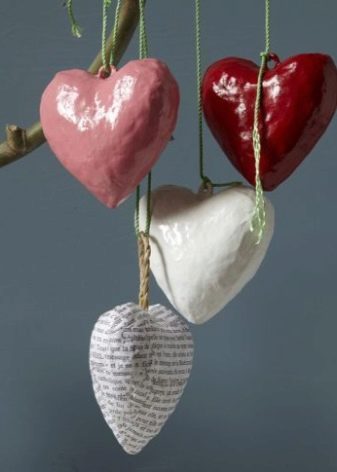
It is better for beginners to make papier-mâché with their own hands in master classes, following the instructions step by step. For example, a decorative heart is quite simply created using this technique, which can become a good interior decoration. For work, you will need a roll of toilet paper, ideally a thin one of 2-3 layers, cold water, a couple of tablespoons of flour, PVA glue, wire and transparent nail polish. You also can't do without a small towel, deep bowl and saucepan. The work begins by tearing the paper into small pieces and placing it in a bowl.

Having filled the base material with water, it must be allowed to swell, after which you can proceed to grinding the substance. Then the mass is wrung out with a towel. At this time, the glue is prepared from a couple of tablespoons of flour and water. The combined components are heated on the stove and boiled until a jelly consistency is reached. The resulting paste is poured into toilet paper and supplemented with half a glass of PVA glue.


Everything is mixed well, and the resulting dough is used to sculpt the heart. At the same stage, a wire should be placed in the toy, which will allow the decoration to hang. The figurine will have to dry for the next few hours. It would be nice to turn it over several times during this period. The finished product is decorated and varnished after final drying.


It is no more difficult to create a decorative plate. The process of its creation will require, in addition to a sample plate and cling film, newspapers, PVA glue, a bowl of water and a brush. To decorate the work, you will also need gouache and nail polish. The newspaper is torn into small pieces with sides equal to 2 centimeters. The prepared dishes are wrapped with cling film and turned upside down.

Each piece of newspaper is dipped in water, and then applied to the base from the outside. The edges of the pieces of paper should never be folded. The first layer is coated with glue, after which another 3-4 layers are formed in the same way. If bubbles appear on the surface, it is easy to smooth them out with your fingers. For the best quality of the product, it is recommended to dry each 3-4 layers separately - the more material is used, the more reliable the plate will turn out. After the last layer has dried, the edges are cut off and the base is removed. The finished product should first be covered with white paint, and then any drawing should be applied. The dried work must also be varnished.


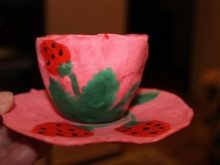
To create a cup using the papier-mâché technique, you will need toilet paper, paste and dishes - either made of cardboard or plastic of the desired shape, or already unnecessary. The main material, torn into small pieces, is soaked in water.


At this time, it is better to lubricate the base, for example, with hand cream. The cup is covered with damp paper, and each layer is impregnated with paste. On average, you will need to make 8 layers, each of which will be treated with an adhesive substance. The craft will need to dry for 24 hours, after which you can start decorating it.


Useful Tips
The mass of papier-mâché for the first 5 days can be stored simply in a plastic bag. Over the next week and a half, it is better to put the substance in the refrigerator. It is important to pay considerable attention to drying the finished product. Since the figurine is made on the basis of paper, that is, a combustible material, it is a bad idea to keep it near an open flame. In principle, there are instructions for drying in the oven, but this method is still intended for experienced craftsmen.
Papier-mâché will dry well in the open air near the battery, in the sun, near an electric heater, as well as in an extinguished heated stove.
If the product is formed from several layers, it is recommended to dry it several times - approximately every 3-4 layers.


The easiest way is to decorate the finished work by waving it with a paint layer - variegated packaging or ordinary colored paper. A more difficult, but also more attractive way is the primer. The figurine is first polished to become smoother, and then covered with soil.When this layer is dry, it can be painted over. A thick paper product can be painted with a marker or felt-tip pen, and then decorated with sparkles and rhinestones. You can also decorate it with fabric pieces, braid or netting. By the way, during the whole process it is preferable to work on a table covered with oilcloth. Since interaction with adhesives will be carried out with bare hands, you will need to prepare a piece of dry cloth for wiping.
A master class on working with papier-mâché is presented in the video.


