Papier-mâché made from toilet paper

One of the main advantages of working in the papier-mâché technique is the availability and low cost of the materials used: it is possible to create a product from PVA glue and toilet paper. The relative simplicity of the technology allows you to engage in this type of creativity, even with children.


What kind of paper are you using?
I must say that it is customary to use different paper materials as the basis for papier-mâché: old newspapers, cardboard, napkins or toilet paper. The latter option is used quite often, as it is always at hand. Most masters agree that the most budgetary type of toilet paper is also suitable for creativity, which then has to be crushed into small pieces. Others, however, prefer a thin and high-quality base, consisting of 2-3 layers. The key characteristic of this material is that it dissolves in water without seals.

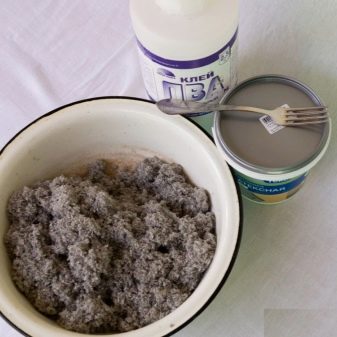
By the way, it is believed that white paper breaks down better into fibers in a liquid, forming a pleasantly colored composition, while gray paper products turn out to be much stronger.


Recipes
The doughy mass of papier-mâché from toilet paper is created in several ways.
- For example, you can make a mixture based on PVA glue with your own hands. The work begins with the fact that one package of the main material is crushed into small pieces and filled with a glass of freshly boiled water. To speed up the process, the canvases are allowed to be folded in several layers. After soaking, which can last from 2 to 8 hours, the mass is kneaded until smooth using a blender, mixer or ordinary fork. At the next stage, you have to squeeze out the water: for this, the mass is laid out in gauze or a thin cloth, rolled up and squeezed out.


The substance is ground again with a blender, after which it is thoroughly mixed with PVA glue or putty in the amount of about 2 tablespoons. This method is simple and cheap, which makes it suitable for beginners, but takes a significant amount of time to infuse the mass. In addition, lumps can be observed in the finished product due to the inhomogeneity of the material.

It should be mentioned that this recipe can be slightly modified. After the mixture of water and paper is infused, it is put on fire and warms up a little. Further, the mass is chopped with a blender, which allows you to quickly isolate individual fibers. The finished substance is slightly dried, being laid out on a napkin or paper, and then sent back to the stove. The contents of the saucepan will need to be brought to a boil, after which a couple of tablespoons of PVA glue is immediately added to it, and everything is thoroughly mixed until a pasty structure is obtained. You can use the mass after cooling.


- Another version of toilet paper-based paste involves the use of several types of glue. About 3-4 rolls of cheap toilet paper are filled with plain tap water. The substance will need to be soaked for 5 to 8 hours, after which it will have to be kneaded with your hands. To remove the remaining liquid, the mass will need to be wrapped in gauze and squeezed well. In the next step, a tablespoon of wallpaper glue is mixed with a glass of water. The mixture is poured into paper, after which half a glass of PVA glue is added there. All components are mixed until a homogeneous pasty mass is obtained.

- An interesting recipe for paper clay, which involves the use of starch and flour. For work, you will need 200 grams of starch, PVA glue in the amount of 250 grams, 4 tablespoons of sunflower oil, a roll of toilet paper and wheat flour. The main material is crushed into pieces and soaked in water. After a couple of hours, the substance should be squeezed out well.


The drier the mass is, the less the shrinkage of the finished product will be.
Oil is added to the pulp, which makes the material flexible and prevents sticking to the hands. Next, PVA glue is added to the mixture and starch is added to reduce shrinkage. Gradually, flour interferes with the mixture, the amount of which is determined by the situation - it will depend on how well the paper is squeezed out, as well as what is the moisture and stickiness of the flour itself. The finished dough should stretch slightly, but not tear, and also not stick to your hands and keep its shape.


- A high-quality composition is obtained by using gypsum putty in an amount of 300-350 grams. In addition to it, the composition contains 300 milliliters of PVA glue, a tablespoon of vegetable oil and the same amount of detergent, from 200 to 300 grams of starch, 100 grams of flour and a roll of white toilet paper. The amount of dry components can vary depending on the resulting consistency - it should be thick and dense, but not stick to your hands. It all starts with the fact that toilet paper is gradually soaked in 250 milliliters of glue. It cannot be thrown in lumps - it is important to lower one leaf at a time, washing it with your fingers with high quality. Next, kneading the mixture begins until it thickens.


In the next step, oil and detergent are added to the ingredients. After mixing the dough, it is necessary to pour 100-150 grams of starch into it, and then 100 grams of flour. After adding 100 grams of fine gypsum putty and high-quality mixing, the composition is removed in the refrigerator for a couple of hours. At this time, you can start cooking a paste from 1.5 tablespoons of flour and 0.5 glasses of water. The substance should correspond to PVA in its consistency.

3 tablespoons of glue and flour paste are added to the cooled paste. It is important to carefully measure the proportions, otherwise the mixture will turn out to be liquid, it will need to be thickened, and this will negatively affect the characteristics of the composition. The mass is ground with an immersion blender until smooth. The substance must be free of lumps and large particles. After that, you can mix in from 100 to 150 grams of starch, as well as 200 grams of gypsum putty. At the last stage, a tablespoon of Moment PVA glue is added to the mass, which contains a plasticizer. Everything is kneaded again and stored.

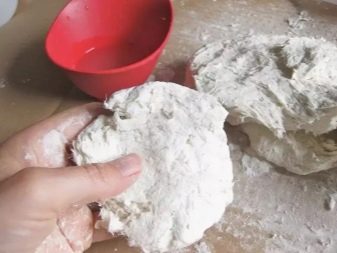
For the first 5 days, the finished mass can be stored simply in a plastic bag, but for the next week and a half it should be put into the refrigerator.
Sometimes for making an object using the papier-mâché technique, sometimes it is not necessary to create a mass at all. In this case, toilet paper is crushed into small pieces by hand, and then applied to the prepared base and coated with glue. It is extremely important not to use scissors for this purpose, otherwise the dense borders of the fragments will stand out brightly in the finished product. The pieces should overlap each other with torn edges. It is worth mentioning that the glue substance either covers the layers, or separate fragments are immersed in it. By the way, toilet paper in such workshops is used only for the base, and the top layer is formed from white paper.

Crafts making
Toilet paper-based mass allows you to make a variety of crafts. For example, taking a master class on making flowers as a basis and replacing the main material, it will be possible to get a very beautiful decoration for the interior. For work, in addition to paper, you will need balloons, PVA glue or wallpaper, a bowl in which the mass will be soaked, scissors with threads, a plate and a glue gun. To create a complete composition, you also cannot do without paints and brushes, newspapers, cardboard, a template and a plastic cup.


First of all, the paper is torn into small pieces, and the glue is diluted with water. The balloon must be inflated to the size that the flower should be.
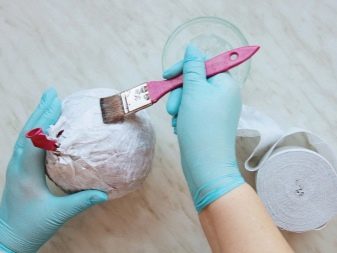
Each piece of paper is dipped in glue and then glued onto a ball. Thus, it is necessary to create at least 4 layers. It is better to keep the ball in a plate at this time so that the liquid does not drip onto the table. When the workpiece is dry, which may take 2 to 4 days, it can be cut in half - this will create two petals, which will remain to be painted in the chosen shade. If desired, you can also slightly modify their shape. In a similar way, several petals are created, which are then glued to a cardboard circle with a glue gun.


The middle is formed from a wad of newspaper, wrapped in napkins, rewound crosswise with threads and painted with gouache. The sheets are simply cut out according to a cardboard template, which is then painted in a bright green color.

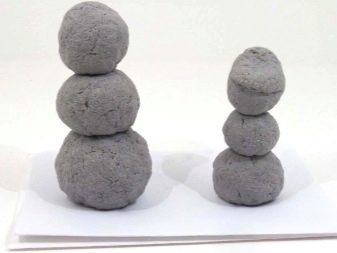
Quite quickly and easily, you can make a snowman using the papier-mâché technique. This option is ideal for beginners. For work, a mass of papier-mâché is used, created from a couple of packages of toilet paper and PVA glue, a couple of small cotton balls, PVA glue, cardboard, a "barbecue" wooden stick, as well as brushes and acrylic paints. Three balls of different sizes are formed from paper dough, which are immediately put on a skewer. The pens are either also formed from papier-mâché, or are made from ordinary branches. The parts dried out for two days are glued to a cardboard base along with cotton balls, which will act as the legs of the creature.

The base of three balls is painted in a snow-white color, the hands - in black, and the "carrot" - in orange. Having drawn the face of the snowman, it is necessary to fasten all the remaining parts to the body, that is, the nose and hands. A fabric scarf is tied around the toy's neck, which is also fixed with glue for reliability.

In a similar way, Baba Yaga is created from papier-mâché. The work will require a mass of 2-3 rolls of toilet paper, as well as wallpaper glue, fragments of fabric and thread, PVA glue, beads and a wooden skewer. From the paper dough, a cylindrical base is formed, on which an elongated nose is immediately formed.

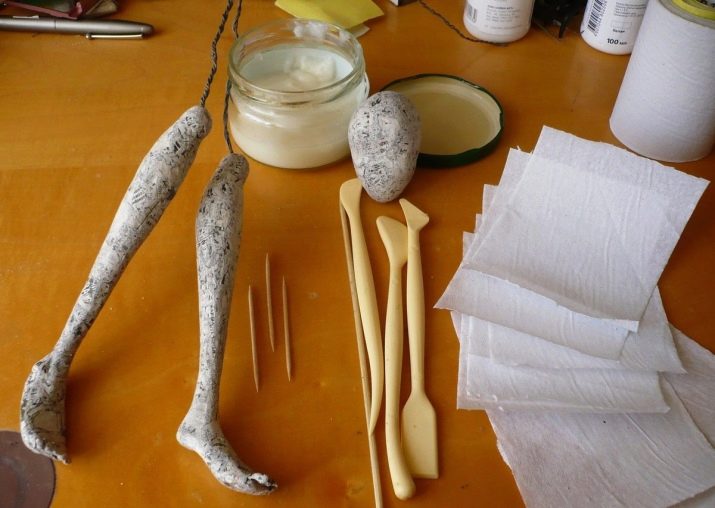
With the help of a papier-mâché skewer, the mouth and eyes are molded, and hands and fingers are also formed separately.
When all the details are solidified, it remains to glue them to the base, paint the craft, make a wig from threads and fabric clothes for it.

The subtleties of creating papier-mâché from toilet paper in the video below.


