How to make a papier-mâché mask?

The name of the papier-mâché technique is French, but it originated in China. Helmets and armor were made from numerous layers of paper, to say nothing of products that would have had a slightly lower strength. The old technique is still alive today, and today what is not made of it: toys, jewelry, and also, for example, masks. For the carnival, for the New Year, they will be an exclusive tool for creating a festive, mysterious image.

How to choose a base?
Papier-mâché, as you might guess, is paper pulp. And in order for the mass to keep its shape, PVA glue or another paste-binder is added to it. Paper, old newspapers, napkins, paper towels will also be suitable raw materials. But for the base, without which you cannot make a mask, you can choose one of two options: either any old mask, ideal for fit on the face, or an inflated balloon.


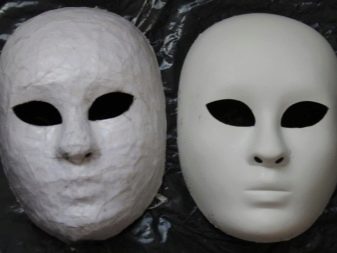
If the first option is chosen, the blank will be just a standard mask, without decor and irregularities, without noticeable defects on the plane. It is recommended to wrap it with cling film. This is done so that the paper pulp, which will stick around the workpiece, does not stick to it.


The balloon is also quite convenient to use: it can be easily removed afterwards, it breaks itself when the material dries.
Also, the base for the mask can be made of foil. The foil should be folded in several layers and applied to the face, and then with your fingers make indentations in the shape of the face so that the foil follows its contours. We can say that it will be almost a cast. True, this is not the only way to make a base right in the face.


How to use a face instead of a foundation?
If there is no carnival mask, or the one that is, does not fit well enough to the face, you can create decorative products right on the person's face. Of course, not a "clean" option, but blanks for future masks. To do this, you need to mix the base and attach it to the face. The mass must be provided with an oval shape with a thickness of about a couple of centimeters. Before applying the mass, the skin must be lubricated with a fat cream.


The ready-made plastic mass is applied neatly, giving it the opportunity to take the outlines of the model's face. And they are subsequently removed as carefully as possible so as not to damage the frozen layer. Of course, for such a delicate matter, you will need not just paper pulp, but sculptural plasticine.

And since not everyone can cope with this material (indeed, skill is needed), making a mask using foil seems to be a more affordable idea. The foil already removed from the face is examined for irregularities, corrected, and slits for the eyes and nose are made.


If in some places there is not enough volume, plasticine is added.
Step-by-step instructions for creating
It's smarter to start by creating a sketch. And let it be before your eyes, preventing the master from deviating to the side and changing the original plan. Perhaps, in the process of drawing, the idea will be replaced by a more perfect one, because the drawing really shows the projection of the future product more realistically. If the sketch is close to the real dimensions of the mask, it will help the master even more.


List of materials and tools for work:
- old newspapers and everything that can pass for them in density;
- thick paper - not the hardest cardboard soaked in water, craft paper, as well as magazine sheets will do;
- a fragment of old cotton fabric or gauze;
- stationery scissors;
- petrolatum;
- paste or PVA, glue brush;
- sculptural plasticine or clay;
- everything for decoration (rhinestones, buttons, feathers, satin, lace, braid, beads, velvet);
- acrylic paints and varnish.

Before the start of the main stages of work, PVA will have to be diluted with water, if this glue is used. If the glue is made by hand, you need to stir 3 tablespoons of starch in a liter of water. This mixture is cooked over low heat with regular stirring. A small cup of paste will be enough for one mask.


The form is prepared according to the above methods: on the basis of an old mask, a balloon, or using a model and using sculptural plasticine. The foil version is fine too.
Creating a mask in stages.
- When the form is completely ready, it must be allowed to dry. After that, the base is covered with a layer of petroleum jelly. So it becomes ready for pasting with paper.
- First, you need to tear paper, and of two types - it can be magazine and newsprint, writing and newsprint, cardboard and magazine. The paper is torn into small fragments. It is better to tear in layers: the first layer is torn from the paper more tightly - this is necessary to harden the mask. This layer does not need to be glued, it is simply laid on a base greased with petroleum jelly.
- The second layer of paper is placed on an adhesive base - this is a thin, newspaper layer. Each fixed piece is well smoothed, air bubbles must not be allowed to form. If they appear, the mask will be loose.
- The third layer is thick paper, and it is glued onto a thicker paste. Each piece must be carefully glued, it clings to the previous layer. The fourth layer is newsprint again.
- After that, the mask should be pasted over with gauze or cotton cloth. The fabric must be cut into small pieces, which are soaked with high quality in an adhesive composition. This work, it is worth noting, requires special attention, otherwise wrinkles will arise. A solid object will help in leveling the fabric.
- And again the paper layers - first newspaper, then more dense. If the mask has raised spots (and, as a rule, they are), more paper is glued to these areas.
- The finishing layer will be soaked thick white paper or fabric - also white, natural.
- When everything is almost ready in terms of increasing the volume, the stage of adjustments follows. The joints of the papers will have to be gently ironed with a damp cloth, but only after the accumulated mass has dried. Craftsmen, to make the mask stronger, coat it with a gelatin solution.
- This is followed by a drying stage, which takes 3-4 days. You cannot remove the mask from the mold at this time - this is fraught with deformation of the product.


The subsequent stages are to decorate the mask, it is they who make the thing original, give it what is called its own face. But the basis from which both New Year's and Venetian masks can be obtained may be exactly what is described in the algorithm.
How to decorate?
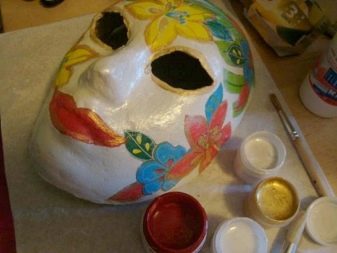
The decoration depends on the purpose of use. The easiest way is to give the mask color with spray paint or gouache, acrylic paint. You can cover it with a fabric - velvet or satin. To make the mask look original, interesting, rhinestones and feathers, various decorative tricks are used.


For halloween
A mask that is gloomy, mysterious, plunging into scary thoughts is enough to look convincing at this holiday. It is proposed to make the formed base black; acrylic matt paint is suitable for this. The color is applied in 2 or even 3 layers. By the way, black perfectly masks irregularities. A bright red accent is made on the lips; glossy acrylic is suitable for this.


Next, a silver marker will go into action, as well as a large rhinestone or a piece of foil or a plastic mirror. This will be the "third eye", which is glued to the forehead, which is more convenient to do with a glue gun. And now an ornament is already beginning to be created from him. It looks impressive, but it's easy to draw, the main thing is to maintain harmony and symmetry.


To make a cunning cat or fox mask in the style of horror cartoons, you will have to enlarge your ears. This is done at the time the base is formed. To make the mask look more impressive, artificial wool or other textured fabric is used, which will convey the fur of the animal. Eyes stand out brightly, fantastically. And you can repeat the Anbu mask, which is not very difficult to do - the main thing is to clearly form the contours. A Halloween mask should be full of mystery.


Carnival
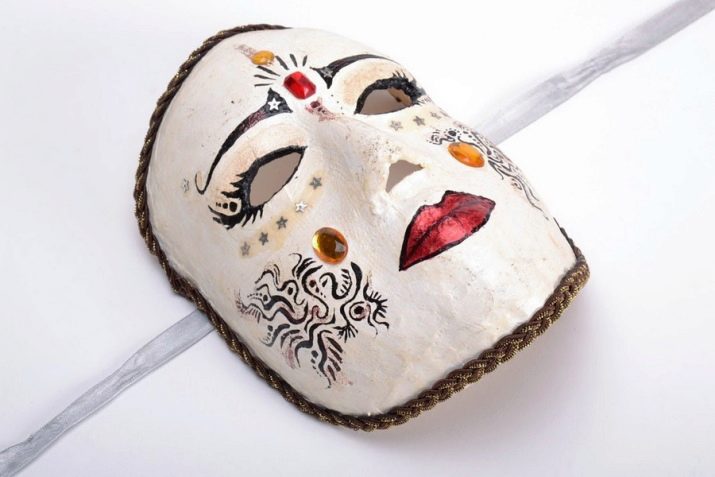
Carnival masks hide the faces of the heroes, and the more riddles there are, the better.
How to decorate such a mask:
- lace;
- decorative braid;
- beads;
- artificial pearls;
- sequins;
- beads.


More precisely, painting is difficult to come up with something. If you choose from the most versatile paints, it will probably be acrylic. It can help to create subtle accents, although sometimes pastels are used for this (to form the desired shade of blush, for example). If necessary, spray is used, including for hair. Glitter varnish perfectly forms the finishing layer of the carnival mask.


For the new year
You can play up the good old story, where on the New Year's holiday all the boys are bunnies, and the girls are squirrels. And if these are adults, the more interesting it is. You can plunge into Victorian motives, be inspired by the aesthetics of "Alice in Wonderland". The layer of paint should be thick enough so that the paper does not appear in the base of the mask. Features that require expressiveness should be complete (nose, eyebrows, mustache - if necessary). Fragments of faux fur can be stuck on the cheeks of these heroes.

Sometimes a mask requires not just a nondescript elastic band, which will hold it tightly on the head, but a beautiful design and this detail, for example, in the form of a velvet ribbon. The masks are covered with lace fabric or a veil, they are edged along the contour with a relief braid - there are a lot of options.

But most of them require artistic skills from the master, because such masks attract more attention and look like an art object created at home, which is especially nice.
For information on how to make papier-mâché masks with your own hands, see the next video.


