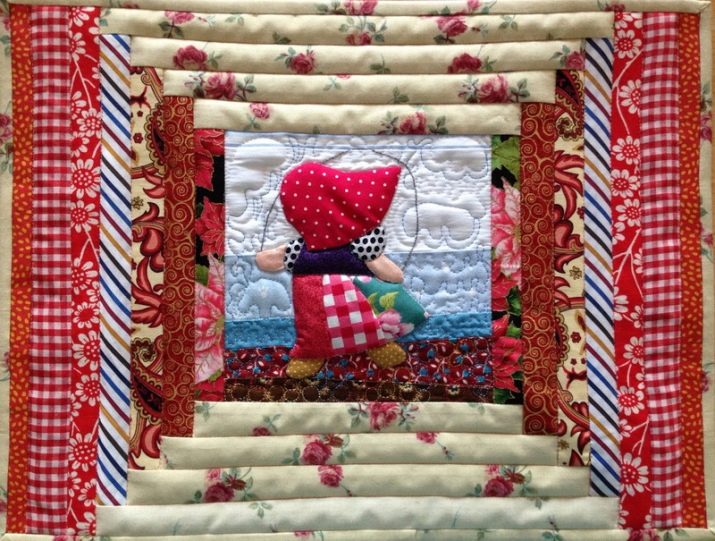
Patchwork for beginners: simple sewing techniques and ideas
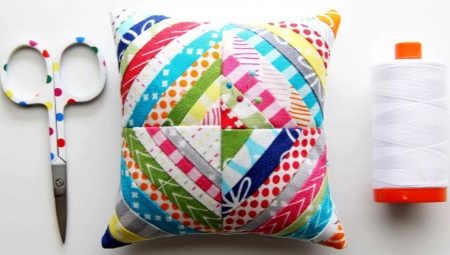
In historical times, when there was no abundance of fabrics, thrifty housewives sewed canvases from scraps and used them to create blankets, bedspreads, pillows, and carpets. Over time, patchwork (patchwork) was overgrown with execution techniques and acquired an individual focus in the art of needlework. In the article, we will talk about various techniques for sewing fabric fragments and hold several master classes for beginners.
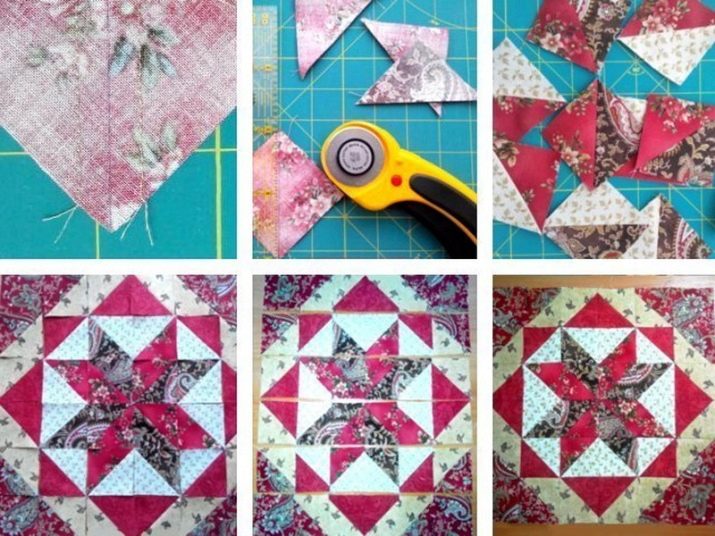
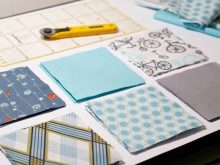
Basic cutting rules
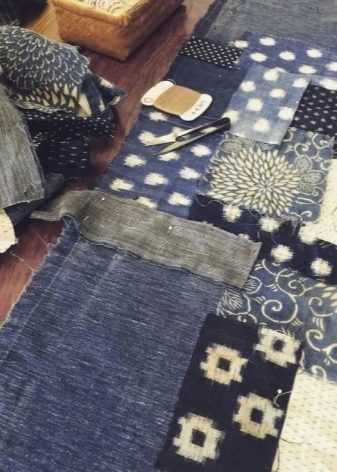
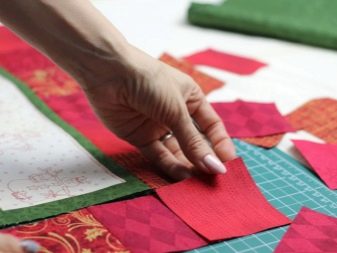
Patchwork fabrics may seem chaotic, but in fact, they have a clear cut technique and a special color selection. Each flap is cut to size according to a template. The geometric precision of the fragments allows you to create a beautiful and harmonious canvas. In order to combine every detail, certain rules are followed during cutting and sewing:
- To cut out fragments of the future canvas, use a template and a piece of chalk. Chalk can be replaced with a small, sharpened remnant, which many housewives keep in their sewing supplies.
- It is more convenient to use two templates, one of which is slightly larger than the other. This makes it possible to cut out parts with allowances.
- During the cut, the direction of the share thread is taken into account. The synchronous directionality of all the flaps will help prevent deformation of the product after washing. For the same purpose, flaps of the same density are selected for stitching. For example, such a combination as linen and knitwear, in the future, can lead to distortion of the geometric proportions of the canvas.
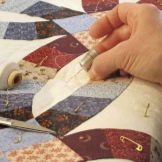
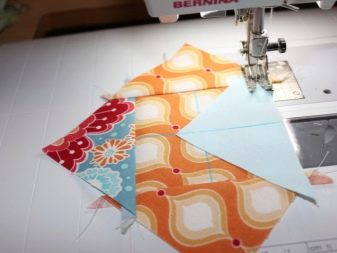
- During cutting or sewing, pins are used to fix the piece and prevent it from moving.
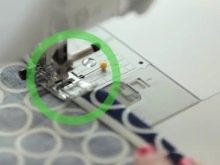
- When working on a sewing machine, you need to make sure that the foot runs along the edge of the fabric, creating an even 6 mm allowance, this will make it possible to obtain clear and even seams.
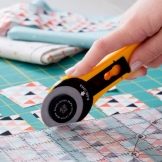
- The fabric is cut with sharp scissors, a roller knife and a special cutter.
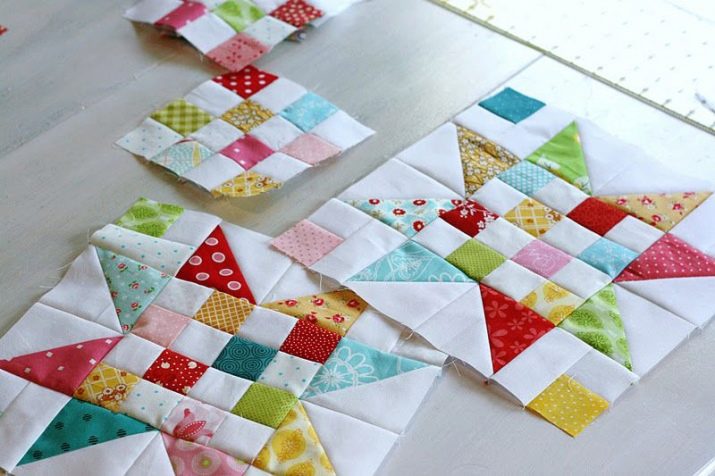
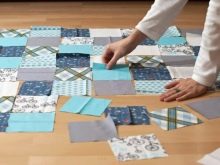
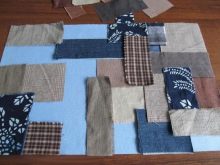
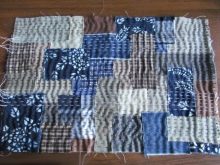
In the modern art of patchwork sewing, the block method of making a product is popular. The blocks are cut and sewn in advance from triangles, squares, stripes, and then connected into a single canvas.
Choosing a fabric
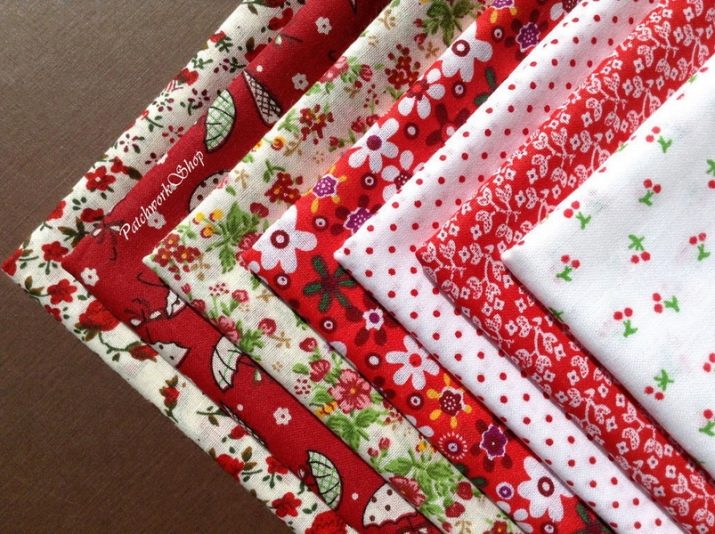
When choosing fabrics, one should not forget about their compatibility: one can shrink during washing or stretch, the other remains unchanged. Problems arise when colored fading material with light patches is stitched together.
In the selection of fabrics, the purpose of the patchwork item is also taken into account. Any rags are suitable for a wall panel, and only natural ones containing safe dyes for baby blankets.
Certain types of fabric can be used for patchwork.
Cotton
Cotton remains the most popular and demanded at all times. This is a strong durable natural fabric. It is easy to work with it even for a beginner, since cotton has a moderate density, does not creep or crumble, easily stitches and retains its original shape. A large number of modern materials are created on the basis of cotton.
Linen
Durable natural fabric with high absorbency. The ability to breathe is especially convenient for patchwork clothing designed for the heat of summer. If linen is not combined with synthetic thread, linen products will often have to be ironed.
Flannel
Incredibly soft and tactilely pleasant fabric based on cotton threads. It is often used for newborns. That's why, flannel flaps can be safely used to create patchwork for children.
Silk
If the fabric is natural, its cost is highly estimated, even the flaps are expensive. Silk is thin, light, exquisite and showy. But beginners will not like working with it, as it slips and crumbles.
Some styles cannot do without silk and satin; these include the oriental version and many historical trends.
Wool
Natural warm fabric, looks solid and comfortable. It is elastic, repels dirt, does not wrinkle, and can remain unchanged for many years.
Chintz
The fabric is created on the basis of cotton, has medium density, bright colors, attractive and inexpensive.
Fleece
Soft synthetic material, very pleasant to the touch, lightweight, washable and does not require ironing. Fleece flaps behave well in the product, do not deform or fade.
Kulirka
The thinnest jersey that contains cotton threads. Patchwork items from the cooler are very popular with children for their softness and tactile sensations.

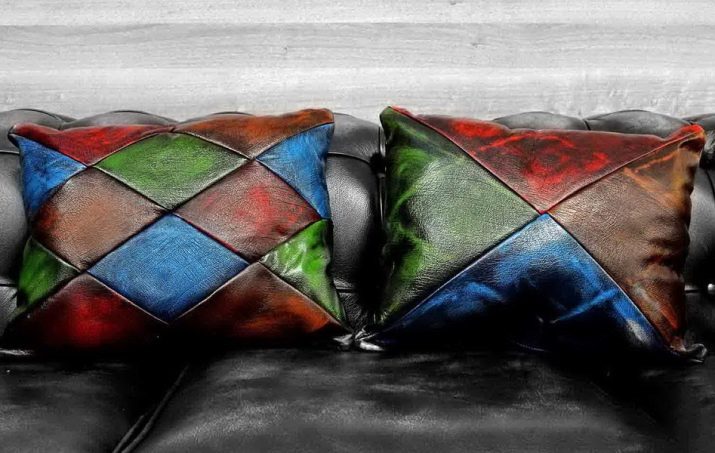
Leather
Pieces of artificial and natural leather are used for patchwork sewing. Beautiful products are obtained both from fragments, painted in different colors, and selected in monochrome.
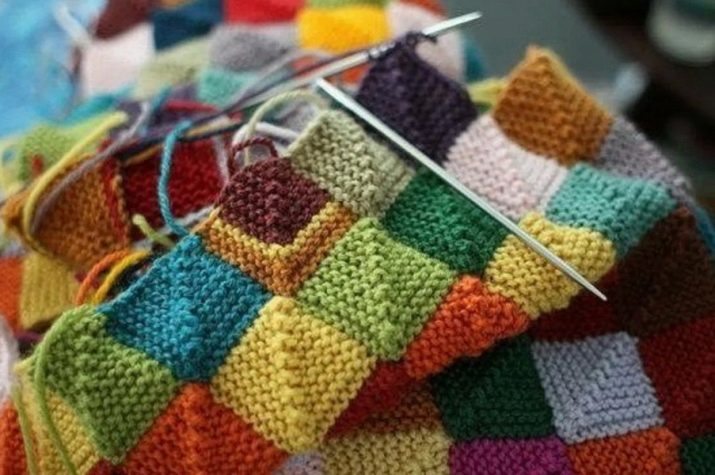
In addition to sewing from fabrics using the patchwork technique, they often resort to knitting or crocheting. The result is warm, colorful and positive things.
What types of techniques are suitable for beginners?
Over the millennia of its existence, patchwork has developed many techniques. They are varied, but most of them are not very difficult and are suitable for beginners. It is possible to combine pieces of fabric into canvases in different ways, and this is how techniques for stitching from stripes, squares, multilayer "sandwiches" of chenille and things with traditional Russian motifs appeared. The most popular types of patchwork include the execution methods below.

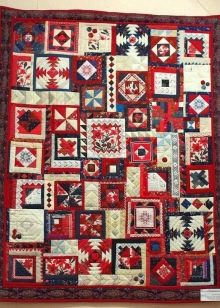
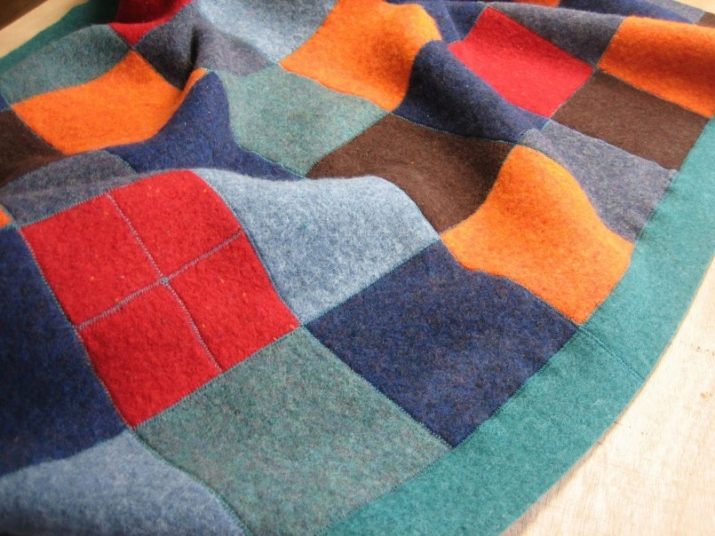
Traditional
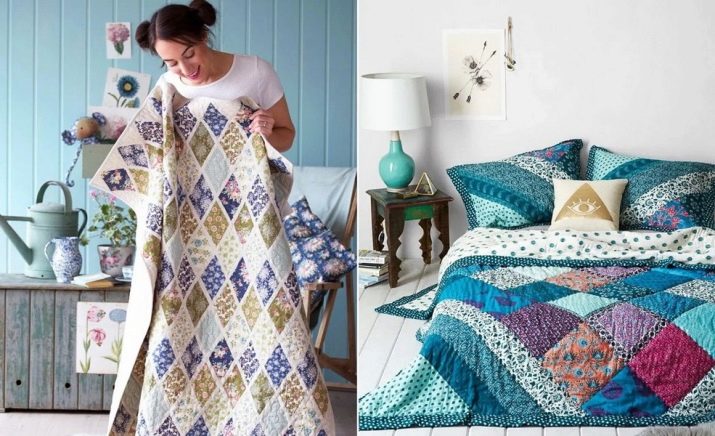
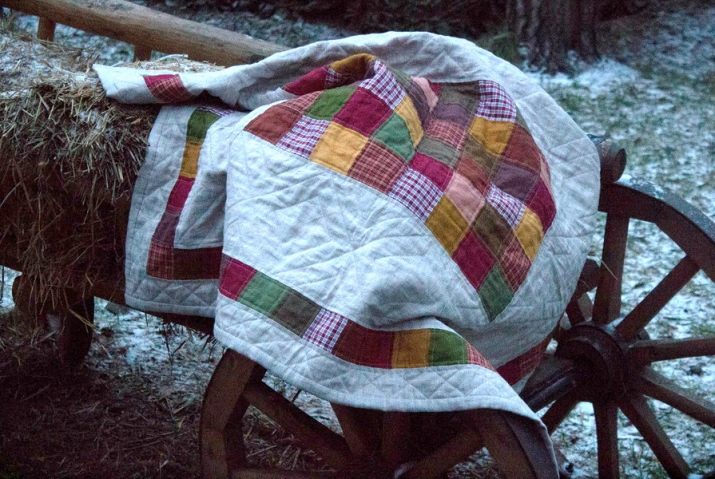
Classic or traditional patchwork uses patches of regular geometric shapes - squares, triangles, rectangles to create canvases. A blanket, for example, can be composed entirely of squares. But the traditional approach also allows you to mix types of curly patches and compose more lively and complex canvases.
The classic patchwork technique is used only for the surface of the object, and the lower part of it is made from a single cut.
Japanese
Japanese patchwork is mostly traditional, but it also has its own characteristics, by which it is easy to distinguish it from patchwork sewing by craftswomen in other countries. The Japanese skip stitches on the finished product, are careful about choosing the color and structure of the fabric, although they work mainly with silk. This style is rich in applications on a natural or everyday theme.
Knitted
In this technique, products are not made from fabric patches, but from knitted fragments, which are then connected to each other using a hook and thread into a large canvas or any other thing (bag, pillowcase, sweater). The enterlac technique allows you to knit a single piece, imitating fragments, but it turns out, as if sewn from rags.
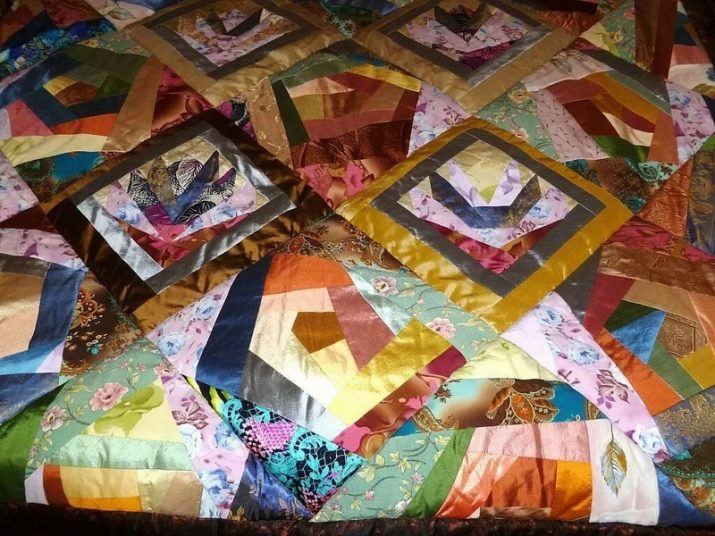
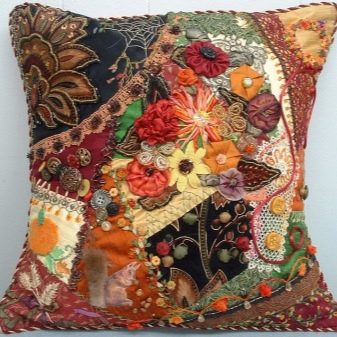
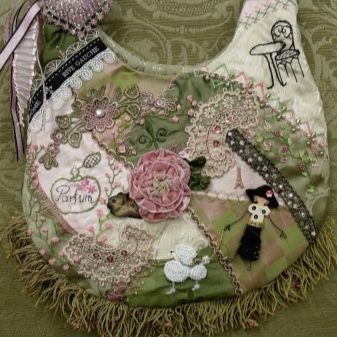
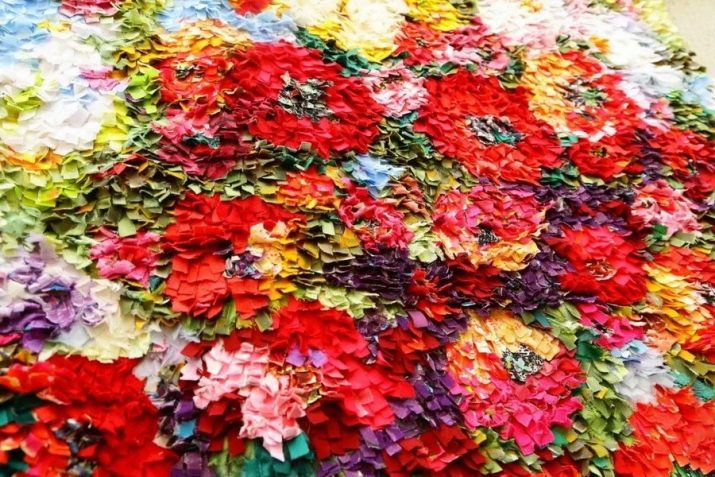
Crazy patchwork
"Crazy" is translated from English as "madness". Style presupposes a chaotic mixture of shapes, structures, colors. Due to the difficulty of sewing, the connection of the flaps is often masked with appliqués, braid, lace, and embroidery.
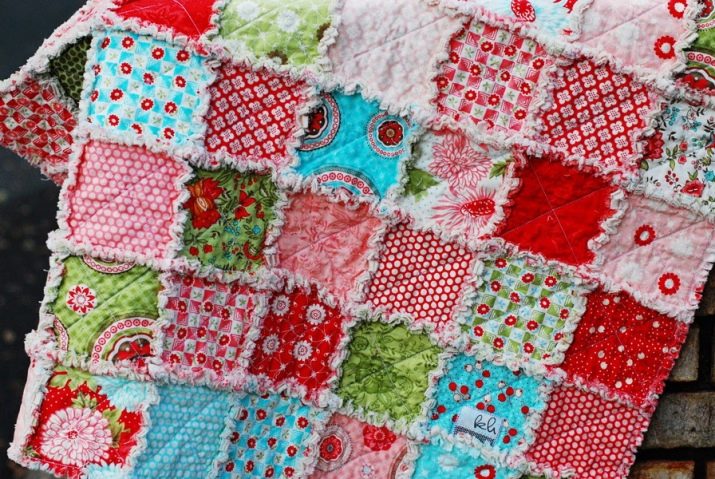
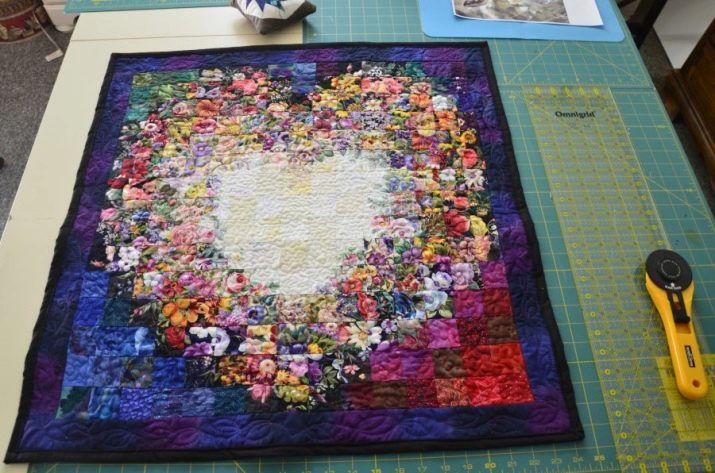
Quilt
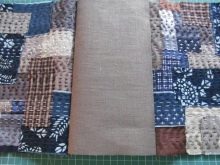
Quilt in translation means - "quilting". For quilting, three-layer product is important: front surface, soft lining and bottom fabric. This type of needlework is often (but not always) used in patchwork for the surface of their "sandwich".
"Watercolor"
For the watercolor technique, the color is important, not the shape of the fabric pieces. A masterful transition from dark to light, without sharp contrasting lines, gives the impression of a watercolor painting. Floral themes are often used as plots.
"Well"
A small square is placed in the center of the item, on which subsequent figures are "put on" in ascending order. As each square is sewn on, the image becomes larger and more voluminous. If you look at it from above, an illusory impression of a well is created. Skillful work with color helps to make the "well" more realistic.
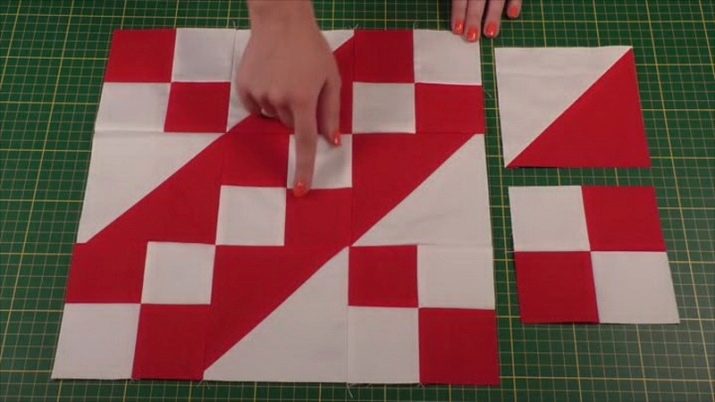
"Jacob's Ladder"
Products in the Jacob's Ladder technique consist of blocks containing only two geometric shapes - a triangle and a square, but a variety of options for their placement allows you to produce a variety of patterns.
"Bargello"
In this technique, the color effect is important. At first glance, it may seem complicated, but if you diligently work out the color and follow the instructions step by step, you will get incredibly beautiful drawings.

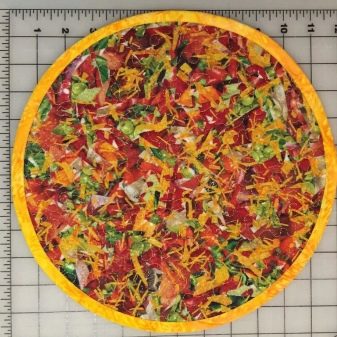
"Pizza"
The product in this technique really resembles a pizza. Novice craftswomen can follow the easy path: sprinkle hot glue on the substrate, lay out randomly pieces of fabric, starting with large fragments and ending with small elements. The gaps must be completely filled. Then cover the product with paper and iron it with an iron so that the glue connects all parts of the canvas.

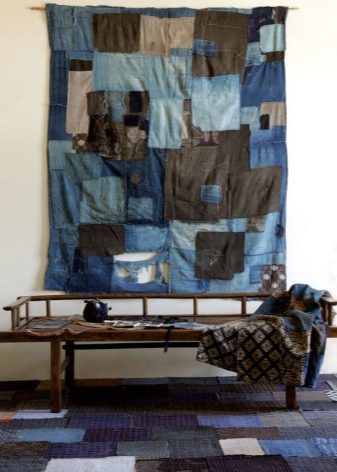
Boro
You can literally translate the word "boro" as "scraps" or "rags". The style came from the patches that the Japanese people sewed on their clothes due to poverty. The modern population of the islands no longer needs such a method of repairing clothes, and the boro technique has gradually moved from the domain of everyday necessities to folk handicrafts.
"Lyapochikha"
This technique is loved and used by our craftswomen. The products look spectacular, like 3D pictures. The canvas is created for a long time, painstakingly, as it contains many small pieces, sometimes rolled into tubes to create more volume. Fragments of fabric are sewn on with one end, and the other remains free.
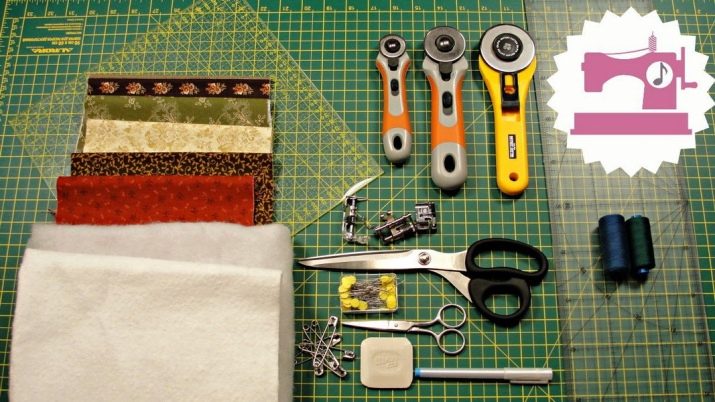
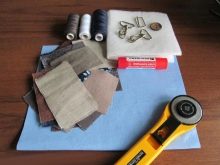
What tools are needed?
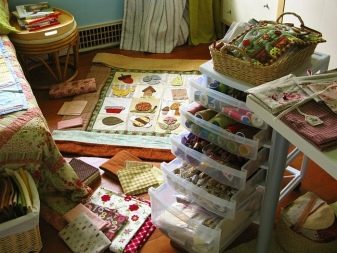
The creative process itself depends on the successful organization of the workplace. Every detail and every tool should literally be at hand, but not create chaos. Prepare tools and materials in advance.
- For work, you need sharp scissors and several types of cutting knives.
- The needles are inserted into the sewing machine, taking into account the type of fabric.
- When choosing threads, you need to be guided by the selected material.
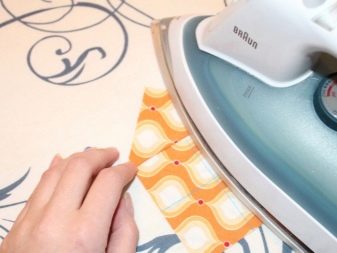
- An iron with a steaming function must work flawlessly, the patchwork process cannot be complete without it.
- You will need pins to secure the fabric.
- You need pre-prepared templates and chalk to work with them.
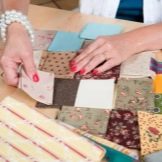
- Materials (or scraps) should be selected that are compatible in texture and color.
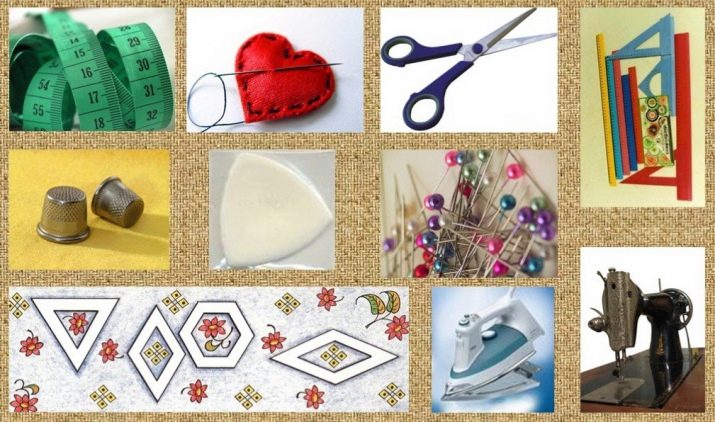
Depending on the product chosen, you may need a synthetic winterizer, whole cuts of fabric, for example, for a duvet cover or pillowcase. To decorate women's accessories - a bag or a cosmetic bag in the style of a patchwork, beads, rhinestones, lace are prepared in advance.
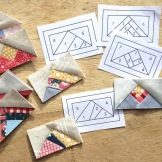
Step by step diagrams
In patchwork needlework, even experienced craftswomen will need patterns, templates, detailed instructions with a description of the things being created. You can borrow ideas and technologies from the Internet. Those who are starting to take the first steps in this area, it is better to choose the simplest things so as not to face the disappointment of unsuccessful work. For beginner needlewomen, we offer several master classes for creating simple products.
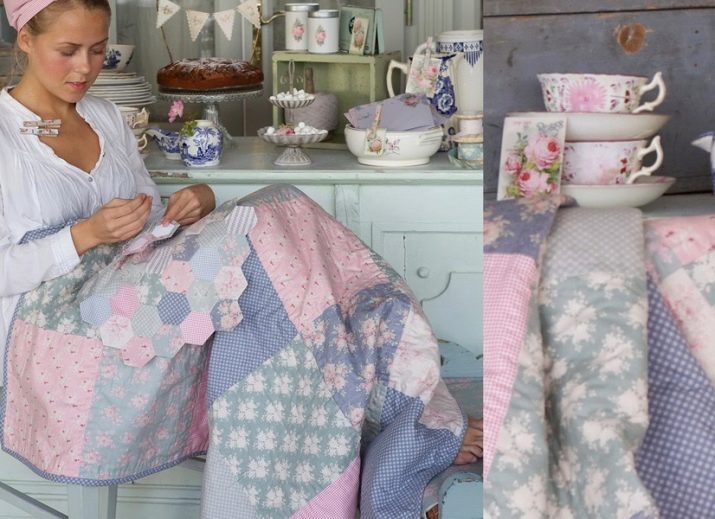
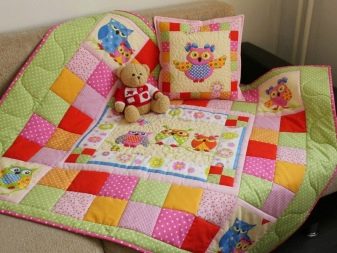
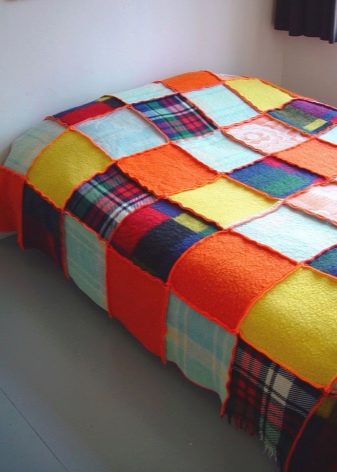
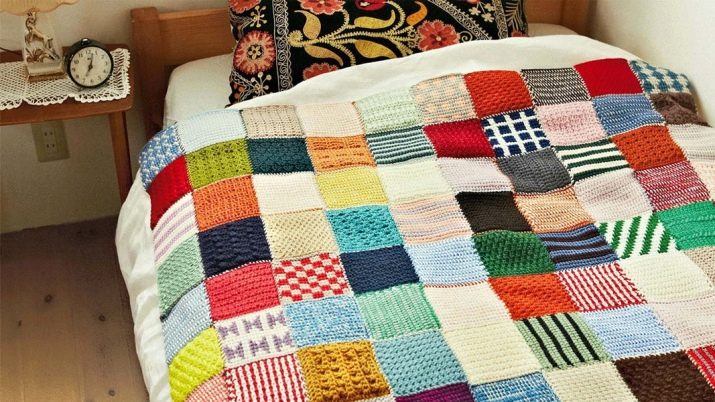
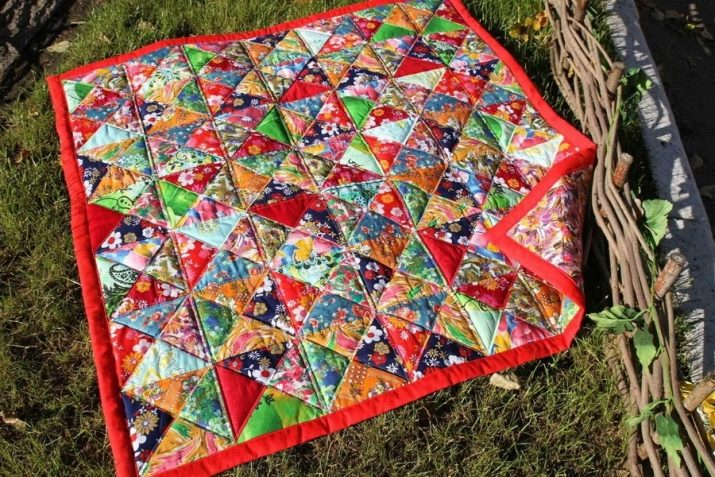
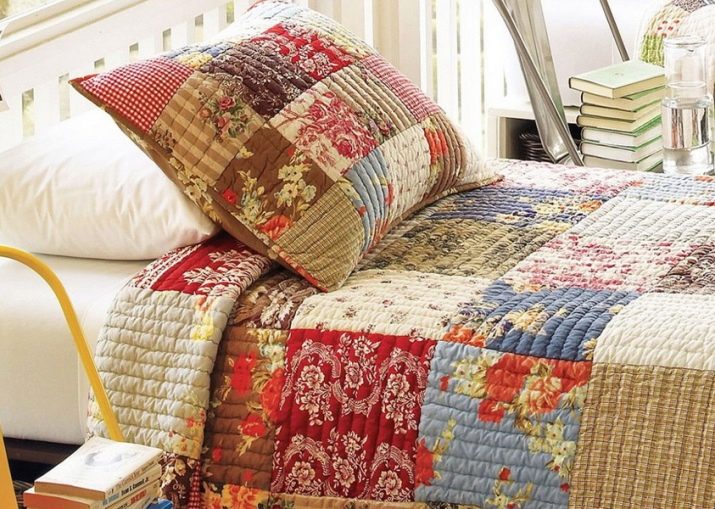
Blanket
It is better to choose patches for sewing blankets from natural fabrics, even if the bottom of the product is made from a single piece of cotton. It is uncomfortable to sleep under a synthetic blanket, as it does not allow air to pass through and is electrified. To make a patchwork quilt, follow these steps:
- using templates and chalk, fabric is marked and cut out, each detail is numbered;
- the flaps are well steamed and ironed with an iron;
- all fragments, taking into account the numbers, are sewn into a single canvas;
- the cut out bottom of the future blanket is laid out with the front side on a hard surface;
- a synthetic winterizer is placed on its seamy side;
- the last, upper, layer is occupied by a patchwork;
- all three layers are sewn with threads along the edge, the seams are masked with edging material;
- so that the "sandwich" does not disintegrate, the product is quilted over the entire surface.
A lovingly sewn blanket promotes a pleasant, sound sleep and adds coziness to the interior.
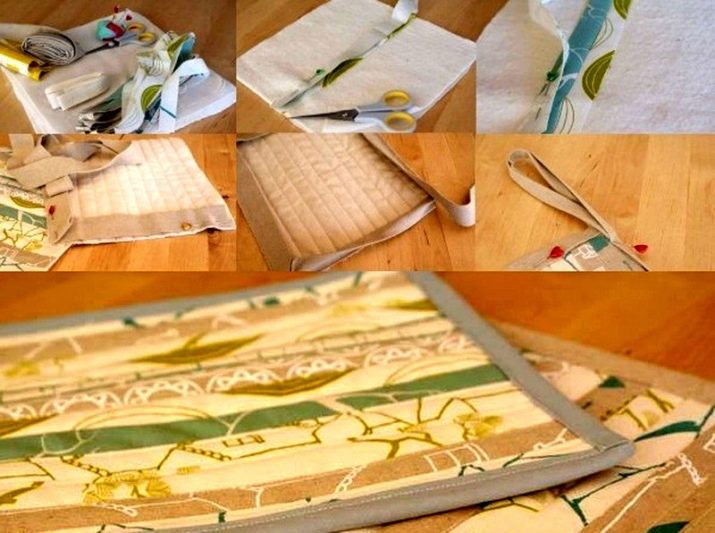
Rug
Rugs are made in different ways, we offer a simple option that even an inexperienced craftswoman can easily perform. For the product you will need:
- a piece of dense fabric, twice the size of the intended rug;
- a piece of transparent fabric that matches the parameters of the future product;
- patches for creativity patchwork;
- synthetic winterizer or any other filler.
Thick fabric is folded in half, covering a layer of padding polyester on both sides. The assembled workpiece must be laid out on a hard surface, it will be the basis for creating a rug. On top of a dense fabric, patches are laid out in the order the craftswoman intended. From above, the product is covered with a transparent fabric and is neatly stitched not only along the edge, but also over the entire surface.
The densely quilted fabric will prevent the shreds from moving under the transparent fabric.
Potholder
The potholder seems to be a small and inconspicuous attribute of the kitchen, but not a single housewife can do without it. But you can make it bright, memorable, accent, stylize it to match the interior. It's not a shame to give such a hand-made to someone for a holiday, it will decorate any kitchen.
For novice craftswomen, it is necessary to master patchwork sewing with an oven mitt. The work is not difficult, and the result does not have to wait long. A dense and fire-resistant material is selected for the product, which heats up for a long time. Any technique can be preferred. Most often, they resort to options such as "pizza" or "well".
To make a kitchen item using the "well" technique, you need to cut colored fabrics into strips of different sizes. Then they should be sewn onto the surface of the tack, forming squares, from center to edge (ascending). The edge is trimmed with tape, which ends with a loop at a certain point.
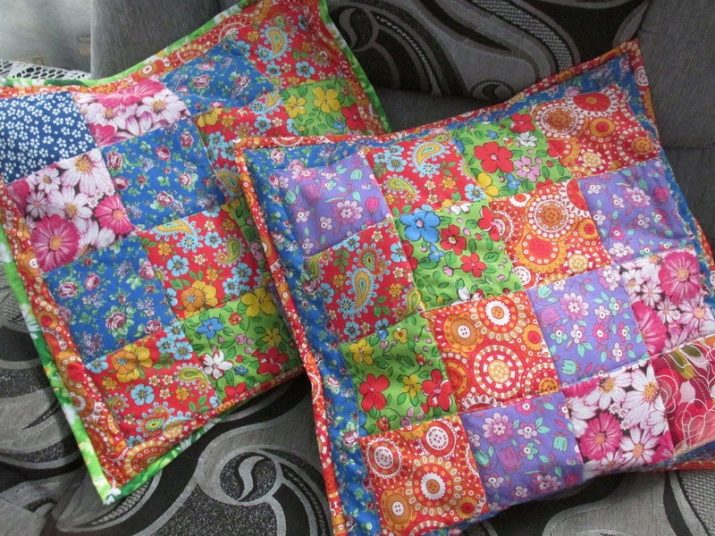
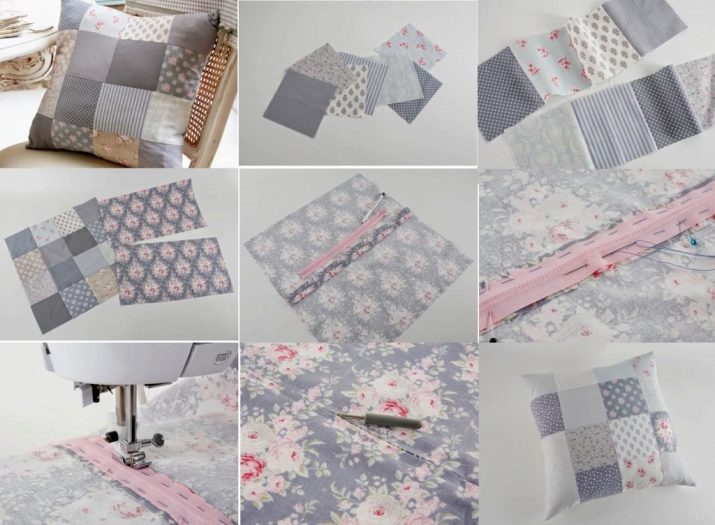
Pillowcase
A drawing of rags is thought out in advance, a diagram is drawn up on which all the elements of the future ornament or image are applied. Then, from a dense fabric, the pillowcase itself is sewn directly. Cut and numbered patches are sewn onto the surface of the pillowcase in the form of appliqués.
The second method consists in stitching the flaps according to a well-thought-out pattern into a small independent fabric, which is then connected to the lining fabric. The completed workpiece becomes the surface of the pillowcase. All that remains is to sew the lower and spare part from any natural material.
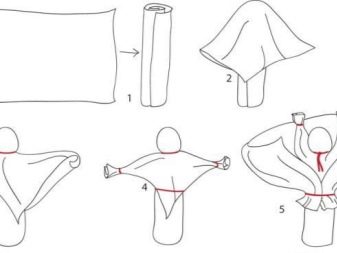
Dolls
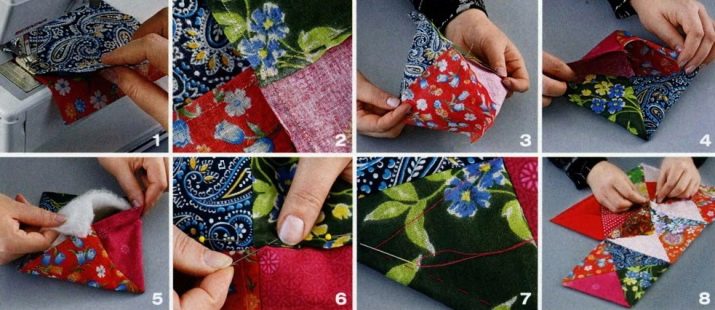
Making a doll, even a simple one, with your own hands, is no less interesting than making a patchwork blanket. All actions should be performed in stages.
- A white linen square of fabric is taken, rolled up into a tube, and fixed with threads. The workpiece is folded in half, and you get two legs. The place of the bend is tied with a thread so that the limbs do not "parted" to the sides; instead of shoes, pieces of burlap are tied to the legs, imitating bast shoes.
- A head is made from the second linen square, for this a piece of cotton wool is placed in the center, a spherical piece is formed and tied with threads.
- Remnants of fabric from the square, hanging under the head, are formed into spread-out handles, they are stitched to maintain their shape, and the cuffs are again tied with threads
- Sew the legs to a small piece of fabric that remains between the handles.
- We put on the doll and fix with threads a beautiful skirt sewn in advance from rags.
- We tie the head with a triangular flap, depicting a scarf.
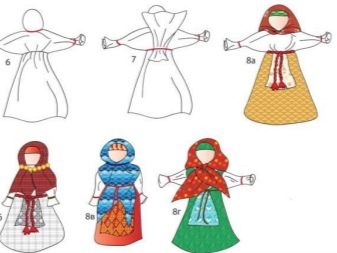
The doll is ready. Anyone who does not want to leave a faceless face can paint it.
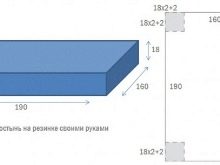
Mattress topper
If you need to hide the mattress under a beautiful patchwork-style cover, choose knitted fabrics that can stretch and take the desired shape. Then such actions are performed.
- The surface of the mattress is measured and marked on the diagram indicating the parameters.
- The thickness of the mattress is measured, in the diagram it is supplemented with allowances of the required dimensions on all sides. To the obtained figures, another 8 cm is added to create a drawstring for an elastic band.
- Then a patchwork pattern is drawn up. You can choose any technique.
- Flaps are cut out and stitched together, forming the canvas indicated in the diagram.
- The edges are tucked in and stitched, an elastic is inserted into the formed drawstring.

A bag
Making a bag begins with a drawing and a paper pattern. It is necessary to cut out a rectangle from paper, the dimensions of the front or back wall of the bag, as well as the part along which the sidewalls will be formed. Then you need to calculate and make a pattern for the bottom of the product.
The bag will look interesting using the boro technique, sewn from patches of different sizes... The canvas is sewn according to the size of the paper pattern. The front, back of the bag and two sides are formed. The workpieces are glued with an adhesive material, gaining rigidity.
The bottom is double made of durable fabric. All parts of the bag are sewn together. Lining details are cut and stitched. The handle can be a chain, leather or rag belt.

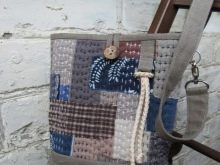
Sometimes a zipper or magnetic fastener is inserted into the product. The finished bag is decorated with fringes or other elements to your liking.
Recommendations
In order for a beautiful and positive product to turn out even for beginners, you should learn the basics and pay attention to some points in working with patchwork sewing.
- A properly organized workplace will help facilitate the process of needlework. It is better to get a lot of containers and arrange the rags in them according to their texture and color. You need to try so that everything you need is at hand and at the same time has its usual place.
- New fabrics (or scraps) are washed and smoothed before being used. This protects the product from deformation during operation.
- To reanimate fabrics from old clothes, they can be sprayed with water containing dissolved starch from a spray bottle, and then ironed with an iron.
- In the process of work, all seams should be smoothed in one direction, and the fabric should be smoothed along the lobe thread.
- When a diagram of the future product has been thought out and drawn up, we recommend that you sew one test block, analyze all the errors on it, and only then proceed to the main project.
For information on how to cut fabric for patchwork, see the next video.


